My Blog Posts:
Thur May 15
Today is the final day of my Capstone project! I’m going to be handing in all of my work on a flash
drive with my user and developer guides on it. The capstone presentations from two Saturdays ago
went well! In case you missed it, there’s now a recording of it posted on this website. You’ll find
it on the documentation and files tab on the nav bar. The user and developer guides will also be
posted there.
I hope that people will enjoy trying out my app (If they have the resources to)! I enjoyed working
on this project despite the many challenges and roadblocks I faced (not to mention keeping myself
motivated to work on the project). It was tough in the beginning, and my vision for this project
kept changing due to hardware/software limitations, and I had to just stick with making the program
as stable and optimized as it could be. It’s not perfect in that regard, but then again, AR is a
resource-intensive process that eats up a good chunk of processing power and graphics. I do think
this project could be worked on in the future–not to say it’s unfinished in any way–but there’s
still much to be desired in terms of practicality and user friendliness. I hope that this app and my
knowledge can be passed on to a future CS Capstone student so that they can broaden the scope of
this app and include other features, such as placing custom 3D models or being able to choose from
other shapes, using textures on planes instead of flat color, etc.
I want to give a final shoutout to the CS faculty: Dr. McVey-Pankratz, Dr. Meyer, Dr. Hagedorn, and
Dr. Diederich. Thank you for all of your support in aiding me with this project. I wouldn’t have
made it this far without your assistance. You all were very understanding of the struggles I went
through with this project, having to learn several new things all at once, including even Xcode
itself…
I hope everyone has a great summer, and to the seniors, a wonderful graduation! Me? I have another
semester of school left before then. It’ll be good going into the final semester with Capstone
already behind me. That being said, I’m going to try to make sure my last semester here is a good
one. Till then, see ya around, folks!
Tue Apr 29
Back with a quick update to my app. My screenshot button no longer crashes my app! Hooray! All I
needed to do was check with the user first if the app could write to the photo album, and since
it did not have write access to the photo album, it would crash my app without warning (thanks
Swift, you really couldn’t have just told me that I didn’t have the proper permissions in place?
I guess that’s on me for assuming you could save photos without needing some type of user
permission).
I have all the pieces of my app working currently. All that’s left is to create a
presentation, prepare my talk, and create my demo for Saturday. This will not be the final blog
post, but it’ll likely be the last post before Saturday. Wish me luck!
Sun Apr 27
Hello folks! This week has been pretty productive for me. I was able to get a working object/model editor made, which I have been testing thoroughly. You can watch me play around with it below:
Notice that each object is retaining its “properties” accordingly, and the user’s preferred
options are retained when editing objects. With the simple material type that Reality Kit
uses to render the planes, the user can set the roughness of the plane (how polished the
surface is; less polished surfaces will have duller reflections) and whether the plane has a
metallic look. I also added a slider that adjusts the depth of how far away the plane sits
from the surface.
The reader may have noticed that I also added a camera icon. Yes, I am working on
allowing the user to take screenshots of the AR scene. Right now though, I can’t show it off
because it has been crashing when I try to take a screenshot using the snapshot function
that AR View/Reality Kit library has built in.
Open demos are only a week away! I hope to have one final blog post before then,
once I can get the screenshot function to work and *not* crash my app.
Tue Apr 22
Happy Easter, everyone! I got back from an extra-long weekend break due to Easter Break, and I was disappointed to share that not much progress was made over the weekend due to me being sick for a couple days and having some rough periods at home. I have taken a stab at getting event callers to work properly and have gotten a test case working. The goal is to be able to tap on an existing object and have the UI display some editing tools. I was able to make some text display:
It’s not much, but it’s a start. Now that I have a working method, I’m going to spend the rest of today to work on making a proper UI. Wish me luck!
Sun Apr 13
Welcome back. This one’s going to be a quicker update than others since I haven’t made too much significant progress this week due to being busy with other events and other homework since the last time I posted. I did some testing with removing objects from the scene, and I am glad to report that it works well with few issues. However, there really isn’t much else to show off at the moment. I am going to need to continue figuring out how to encode the UI elements with my AR View. I have been mostly focusing on that more than the Swift UI elements, other than the color wheel I integrated. My plan is to work on getting one element working at a time, that way I can make sure my app isn’t half-baked when it comes time to demo my work. I have a plan for what I want the design to look like when it’s finished, but I have no sketch work laid out for it yet. This week should be pretty clear for me in terms of free time, plus with Easter Break on the horizon, I expect to make a lot more progress. The end goal is getting closer. Only three more weeks to go!
Mon Apr 7
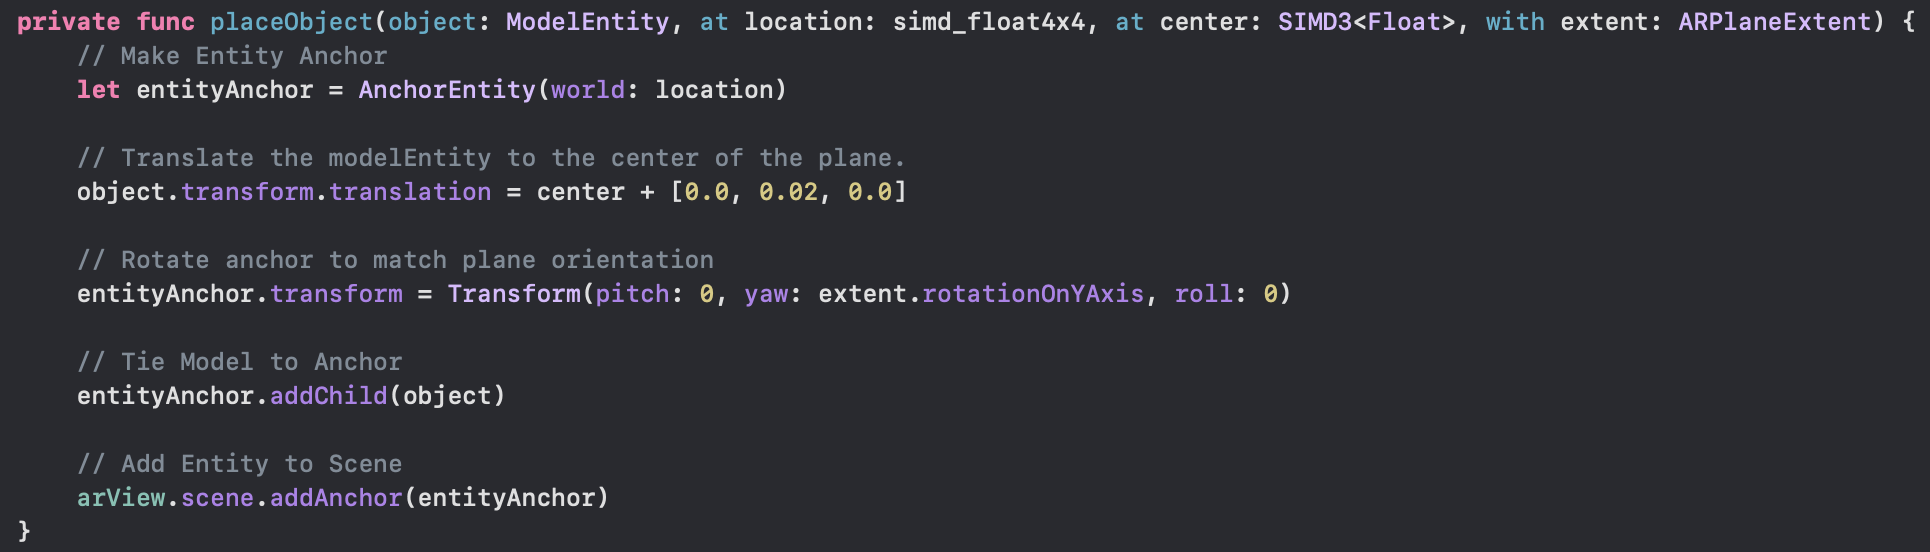
Hey y’all! I’m a little late this week with the blog post, but I decided to wait a bit till I made more progress on my project. Last time I had issues with the vertical planes and their rotation. Turns out that the solution was realitivly simple, at least in term of the amount of code I had written. It turned out that I had to rework my anchor implementation because the vertical planes weren’t being placed vertically and rather they were horizontal. I found it much easier to rotate the anchor than to create a vertical plane on a horizontal anchor, since when I tried translating the object, it was basing it off of the anchor coordinates, which is hard to predict from the raycast location alone. To simplify it, the object anchor uses the same position, rotation, and alignment as the plane anchor. This way, I can make use of the information that ARPlaneAnchor and ARPlaneExtent gather from plane detection to reorient the object to match the orientation of the surface.
I’ve done some research into what a 3D transformation is. Before this point, I was fairly new to the term. Essentially, a “transform” is the component of an entity that defines its scale, rotation, and translation. It’s more complex than it appears on the surface, since all the data is contained in a 4x4 matrix that looks something like this:
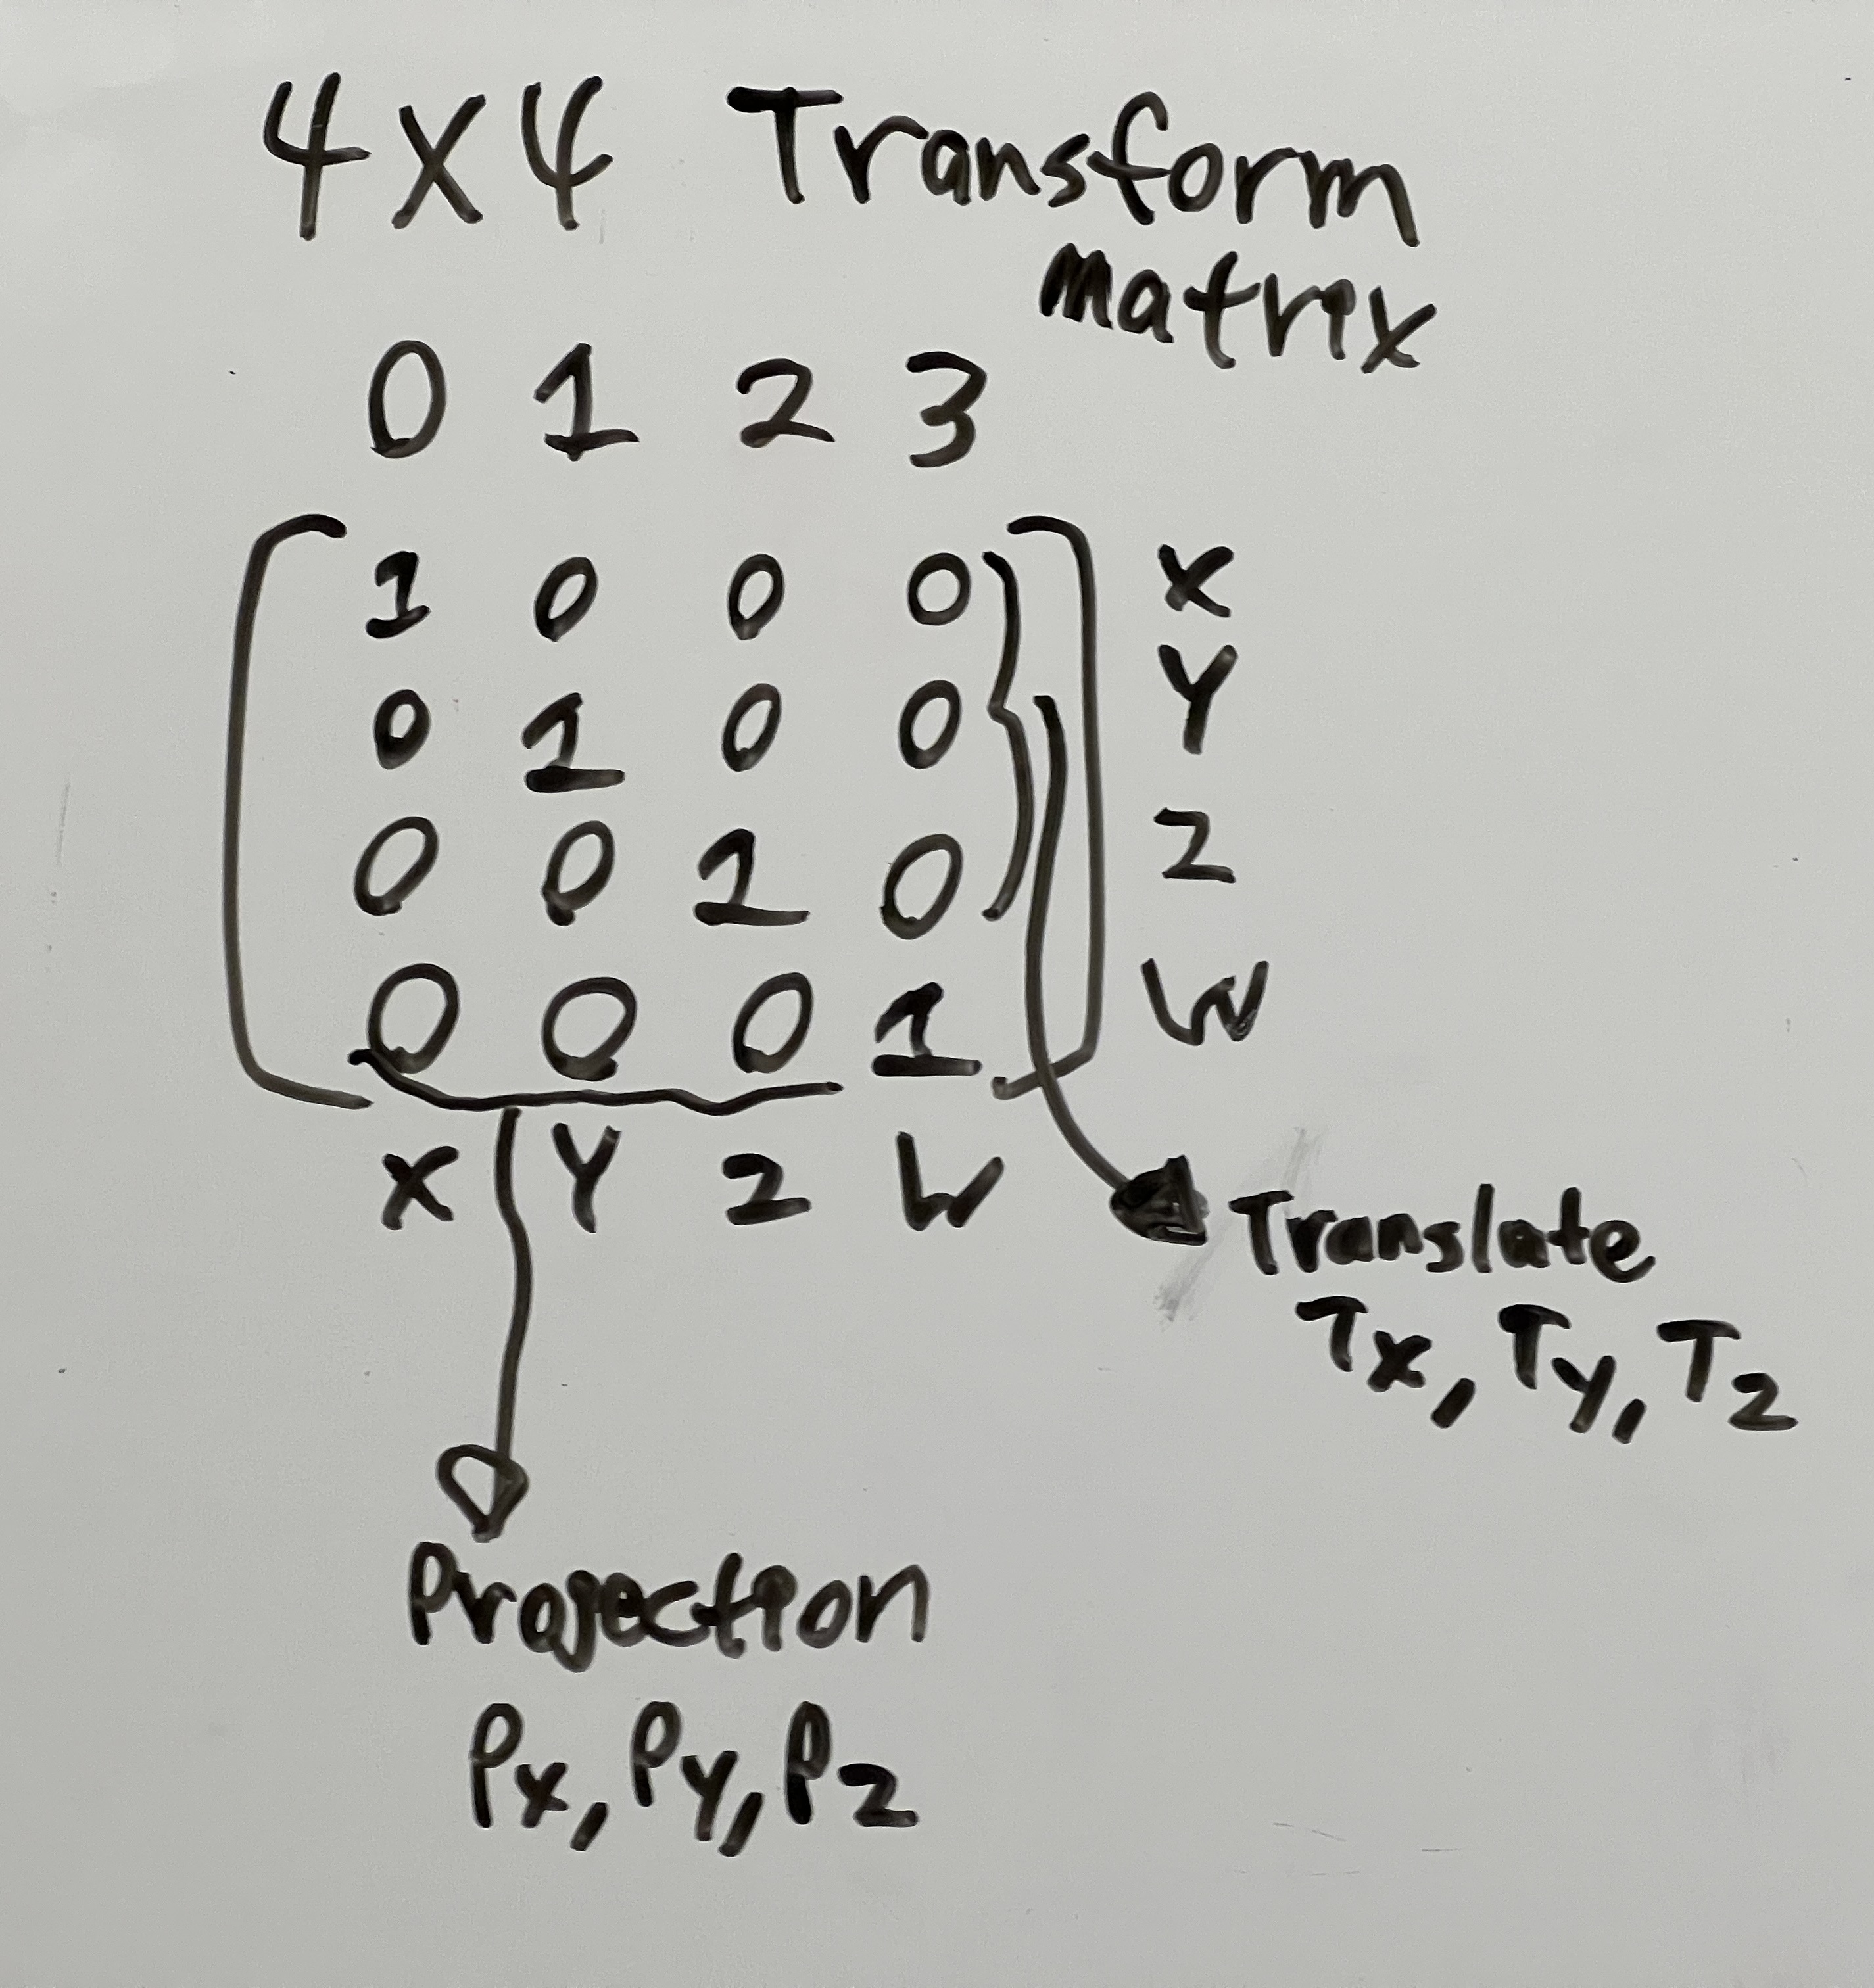
The translation of the model is its x, y, and z coordinates relative to its anchor
location. Thankfully, AR Kit makes this simple by having a translation variable that
gets
stored in the Transform component of the entity, for both the anchor and the object
model,
since they are both defined as entities.
Once I managed to get the planes working, I began working on setting up
object
occlusion. If the reader is unfamiliar with object occlusion, it’s when a foreground
object
in an image hides part of an object in the background. Part of the goal behind using
object
occlusion is to make sure foreground objects cover the virtual content so that it
looks more
immersive to the viewer. Using scene reconstruction/scene understanding
functionality built
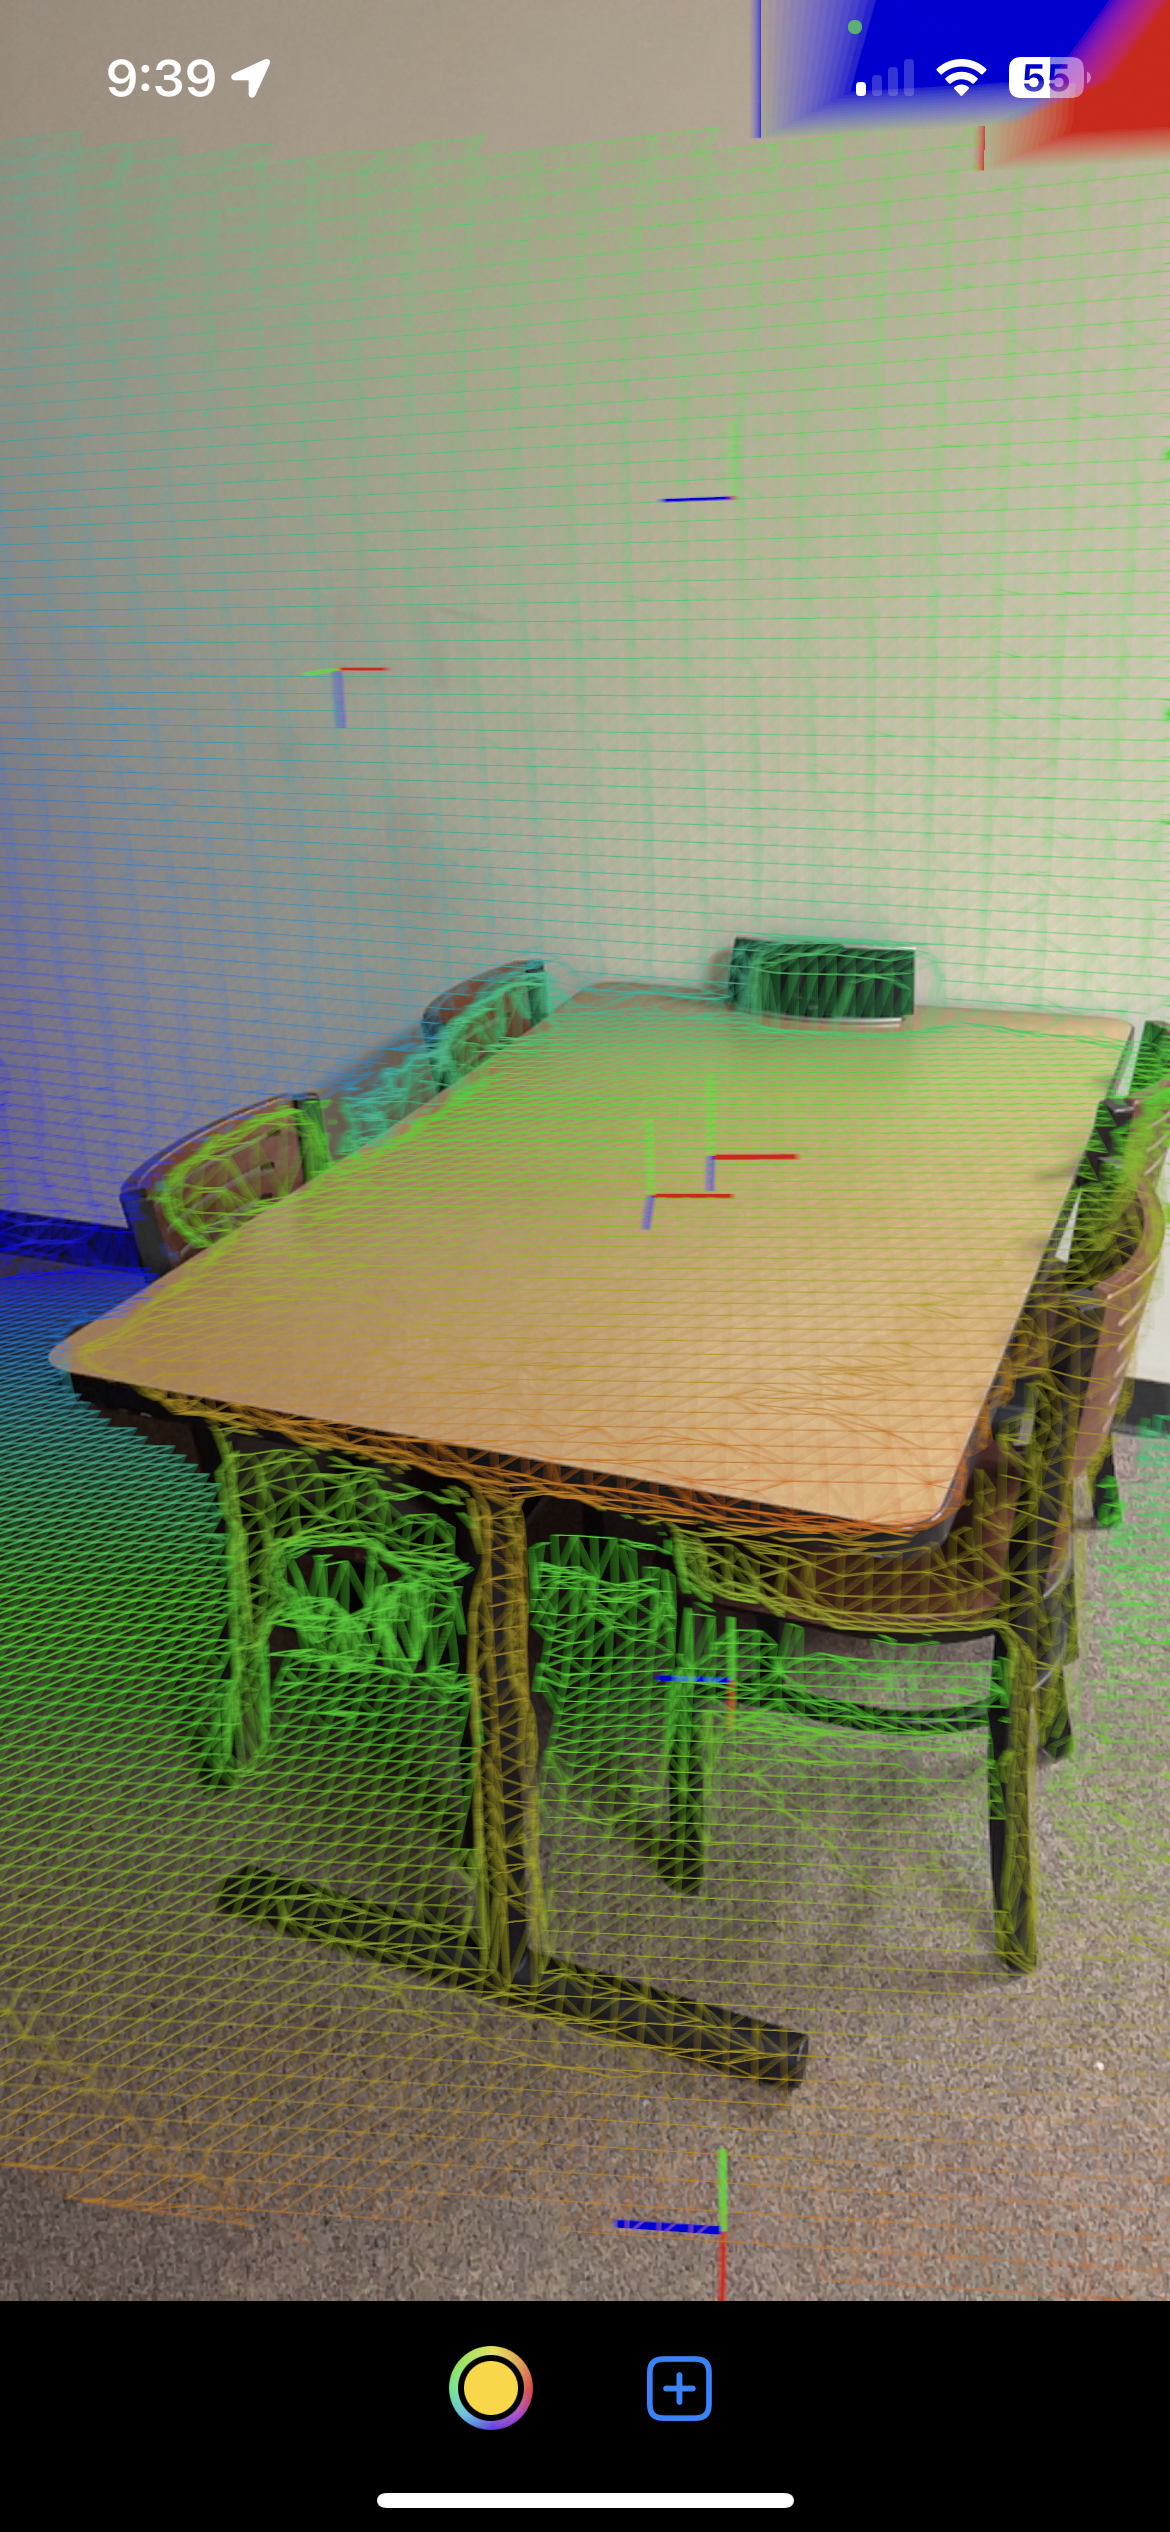
into AR Kit, I was able to find a setting to enable occlusion. Here’s a screenshot
of it in
action:
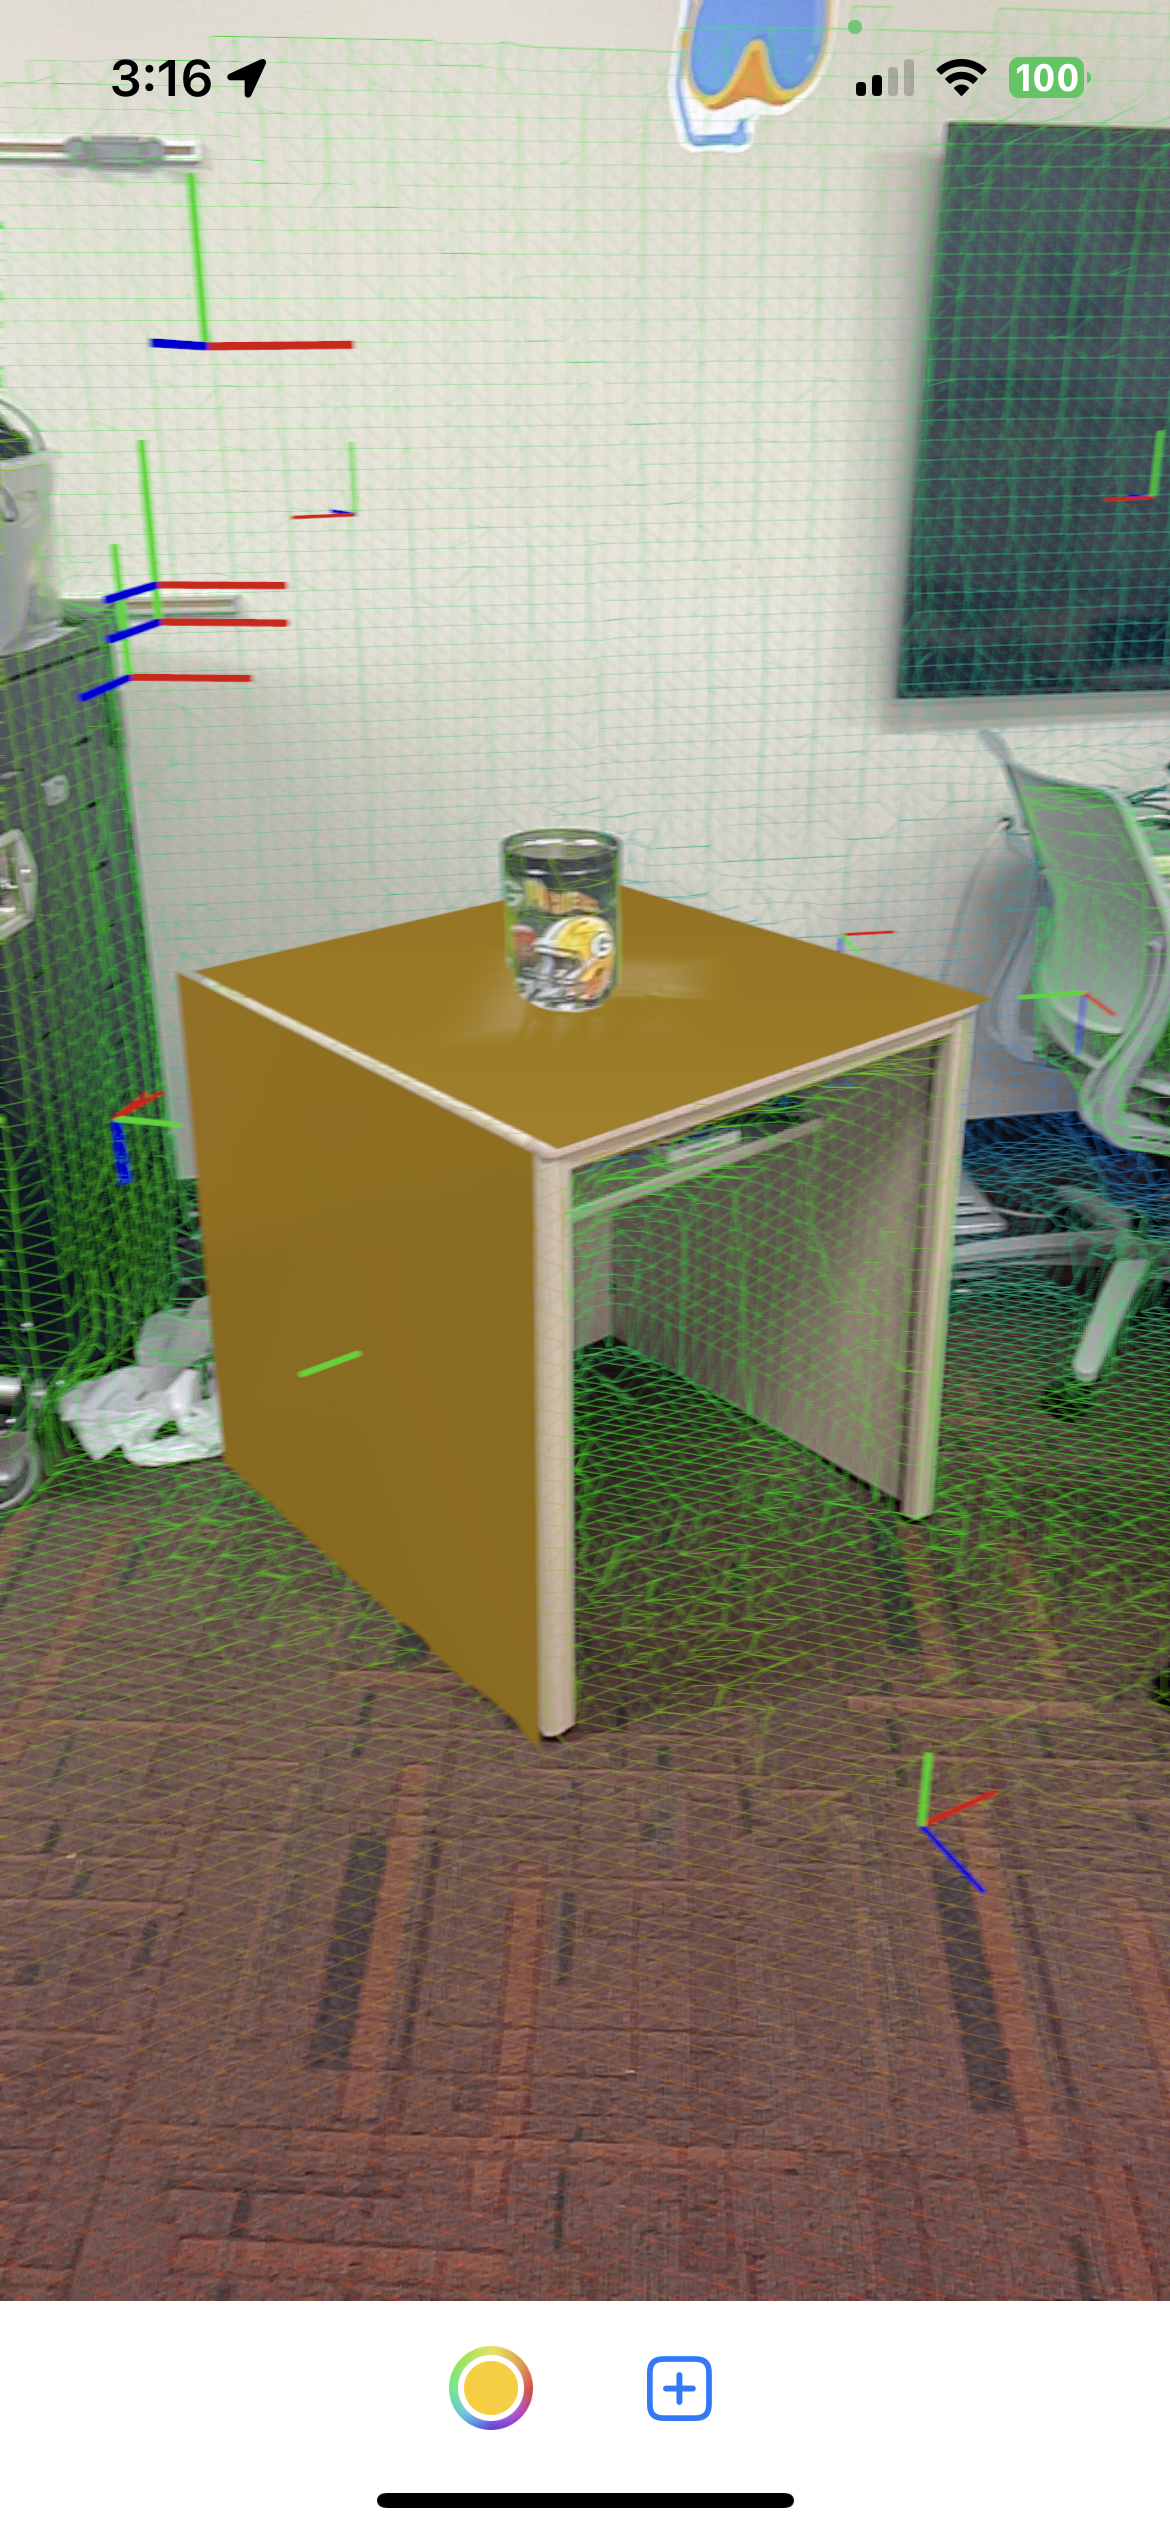
If you look very closely, it isn’t super accurate. It has to rely on the scene
reconstruction to hide the plane, and it takes time for it to update as a result.
When it
comes to uneven surfaces, I have to be a little careful. You may have noticed that I
added
extra distance to the y translation; that’s because the object was clipping through
the
wall. For surfaces like brick, clipping could happen more frequently due to the wall
being
an uneven surface. I plan on giving the user an option to increase or decrease how
far away
it should place the object from the wall to prevent clipping.
I still have plenty of work to do! Next, I want to work on my UI and add in
other
gesture recognizers in my AR View, one that is able to select an object so they can
edit the
object
in various ways. Anywho, I’ll post another update as I continue to get more work
done.
Later!
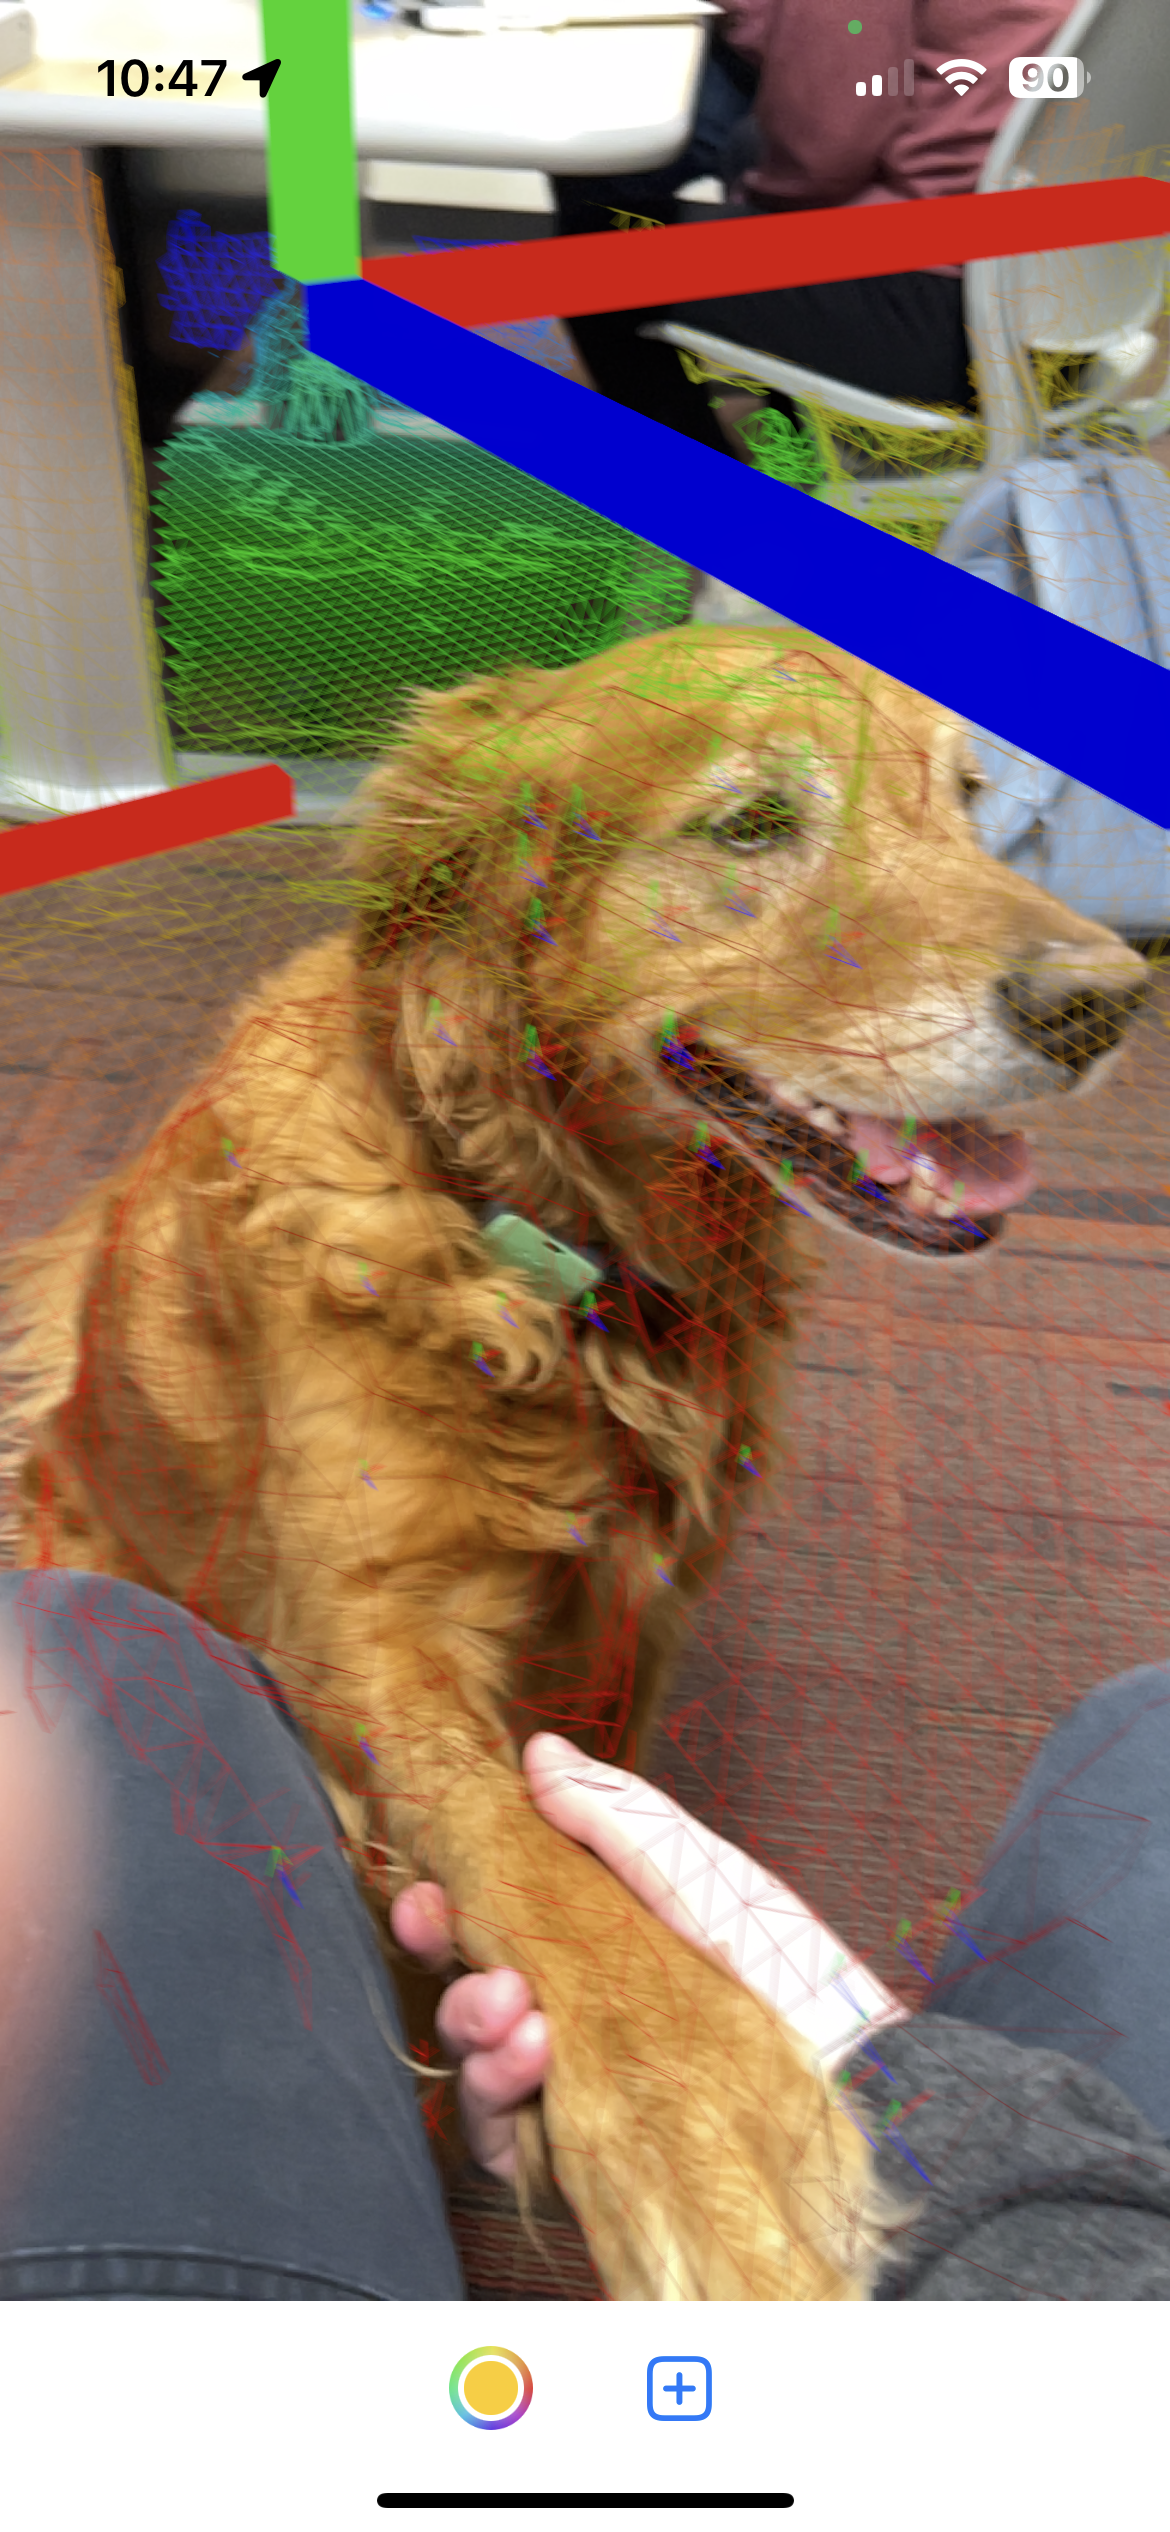
A picture of our favorite teaching assistant, Ellie, taken last Friday (Apr 4th) while I was testing my app.
Sun Mar 30
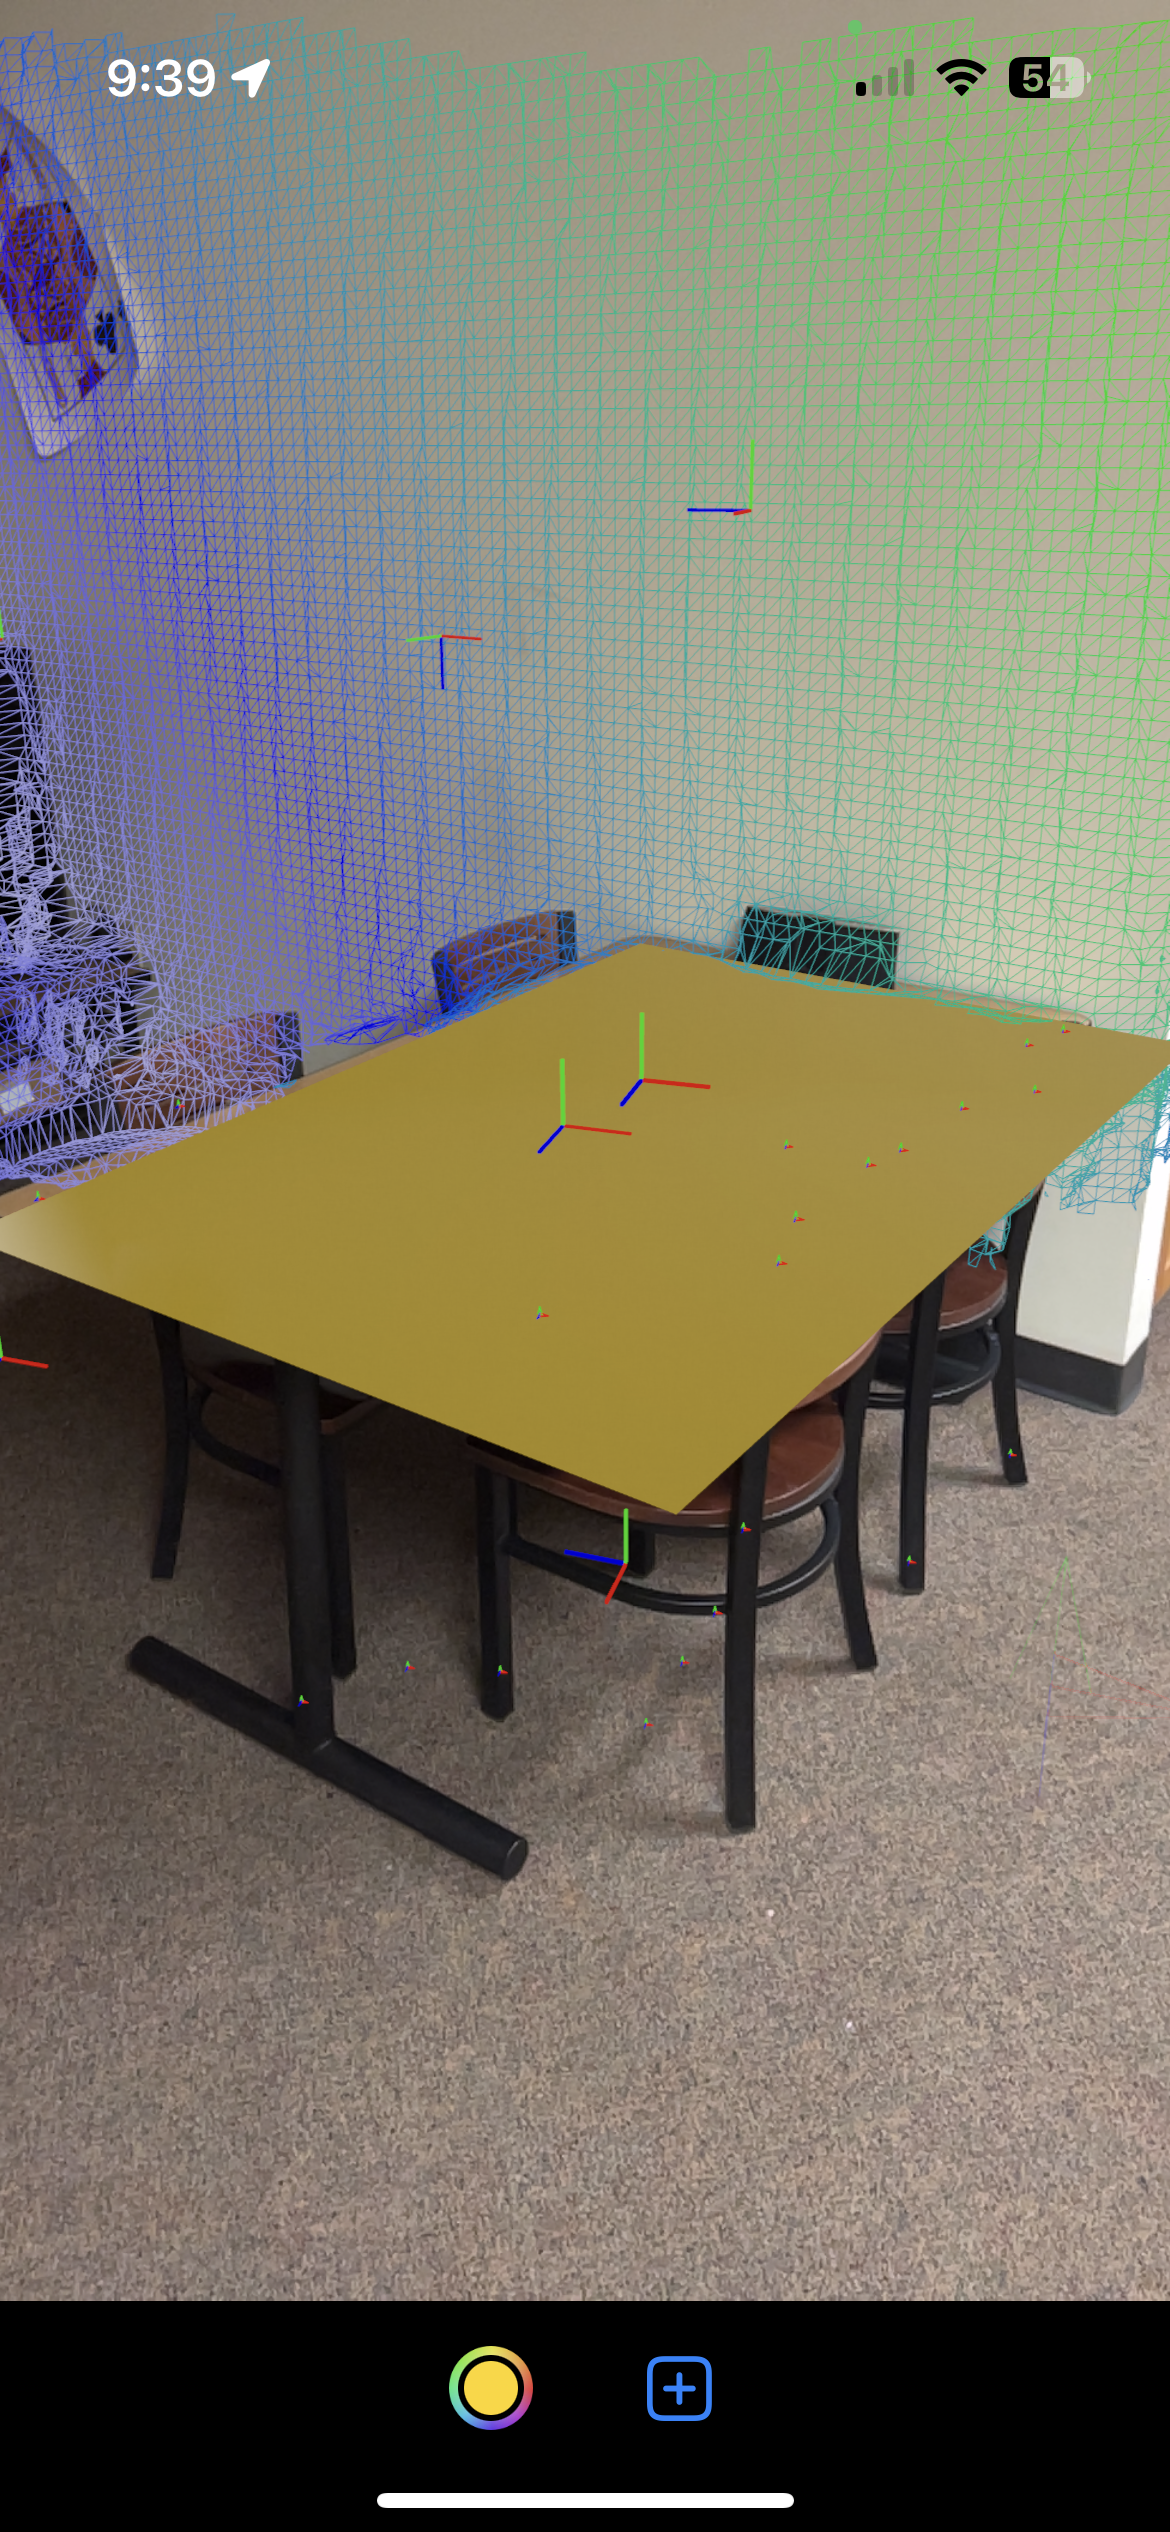
Welcome back to another weekly scheduled blog post. I made some progress this week on resizing planes to match the size of detected planes through the raycasting method I talked about. I was able to reference the anchor obtained from the results of the raycast and was able to downcast it from a simple anchor class object to a plane anchor object, giving the AR controller access to the extent of the plane in regards to its estimated size, its rotation based on the orientation of the anchor, and the center of the plane itself – since it would otherwise place it wherever the user taps on screen. The accuracy is not the best sometimes, especially as it can take time for the AR View to fully calculate the surface of the plane as well as needing a good view of the plane with the camera. For some odd reason, I’m struggling with getting the vertical planes to rotate vertically. Right now, I have it set up to place vertical 2D planes on vertical plane anchors and vice versa for horizontal planes. I can’t show it off very well since I can’t seem to rotate the plane at all. I’m not entirely sure why this is. Attached below are a few screenshots I took that show off placing a 2D plane on my apartment table.
I haven’t made much progress outside of this, but next I’m going to be working on
a way
for
the user to be able to rotate and move these objects around. I also would like
them to
be
able to adjust the size of the objects, ideally through gestures as well if I
have
enough
time to do so. I’ll want to spend some time testing when I have a completed
version of
my
program.
I’d estimate that I am about 40% done with adding the required features
I need.
The
ones I still need to add are the custom texturing, which will require a bit of
work in
regards to file management, since it will include not only my textures, but
custom
textures
as well. I don’t know if I’ll have time to implement adding 3D objects/textures,
not
that it
wouldn’t be possible, but I am worried that it might over extend my time
constraints for
this project. I also need to add in a few other features like editing and
deleting
objects,
as I stated previously. I then need to add in the ability to take photos and
screen
recordings of the AR view, which I don’t anticipate to be very difficult. AR Kit
should
have
those built in, at least I know very well it can take screenshots. I’m not sure
about
screen
recordings, but I’m not too worried about that either since I’m sure there
exists a way
to
record views in SwiftUI/UI Kit. All in all, I’d say that there’s lots to do and
considering
that I’ve only got about one month left, the clock is ticking. This is going to
be one
busy
month!
Sun Mar 23
I’m back from spring break and ready to share another update on my project!
Currently, I
have
my app set up to create and place objects in the virtual environment (AR View).
I made
this
possible through a neat little function that AR Kit has known as Raycasting. It
allows
the
conversion of a 2D point into a 3D point by calculating the distance from the
camera to
the
detected plane and wherever the user taps on the screen will determine the
direction of
the
ray from the center of the camera. This type of technique was used in many early
games
that
had a 3D-like perspective (i.e.
Wolfenstein
3D, Doom, etc.) and
here the same concept applies, except AR users don’t see the invisible 3D
environment
that
is represented by the AR View. When the raycast hits a detected plane, it
returns a list
of
results that contain data about the position, rotation, and scale of where the
raycast
intersected with the target (the plane), the anchor of the plane, and the
alignment of
the
plane (horizontal/vertical). This then allows me to grab the coordinates of
where the
raycast intersected with the plane and I can then use those coordinates to place
my
object.
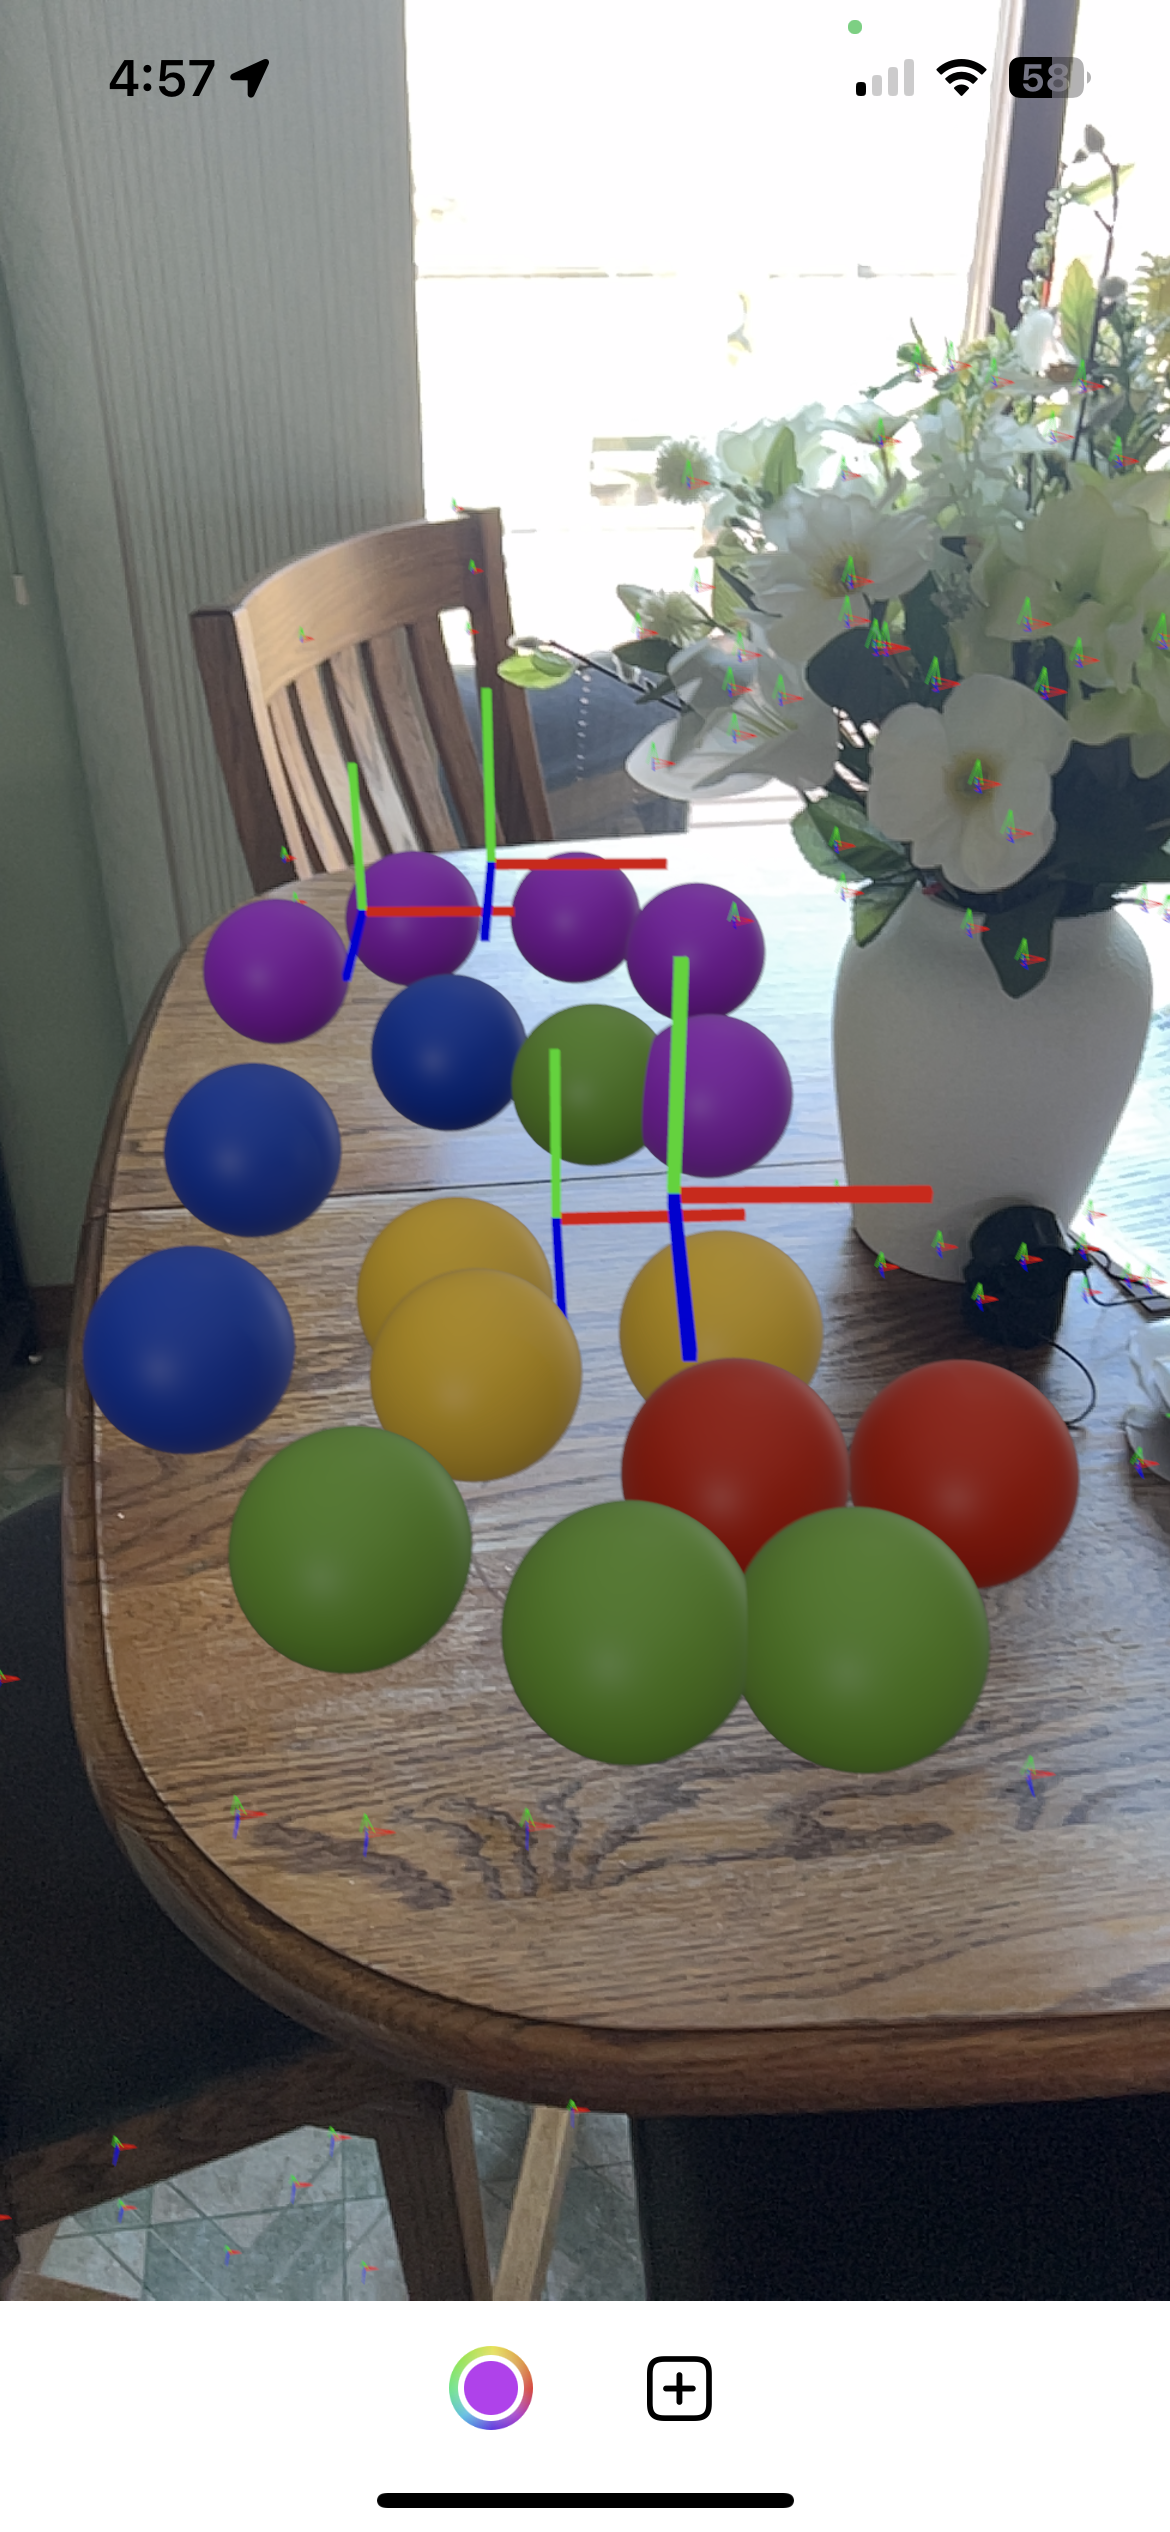
Below you can see I have demonstrated this by placing some spheres by
tapping on
my
screen:

Of course, I won’t be using spheres in my project, I’ll be using 2D planes
instead for
the
most part. The thing that is a little more tricky with those is getting the
rotation
correct
and aligned with the plane it’s placed on. As I dive further into this project,
I’m
starting
to have more and more doubts about my initial idea of having an object fill an
entire
plane.
I feel as though it will be too complex to program and it won’t provide nearly
as much
user
simplicity as I thought. Instead, I hope to make it designed in a similar way to
what is
shown in this example. The user will
have to
manually change the scale of the plane itself, but I think this will make it
much more
user-friendly, despite it taking a few more steps to create the plane. I want to
give
the
user as much freedom as I can while also providing ways to help ease the manual
process.
I’m
very certain that there are ways of obtaining a plane’s height and width,
however, I
have
not yet implemented this feature. I plan on testing it out to see what it would
be like,
but
I know I’ll have to build some kind of tool to help the user change the
dimensions of
the
object.
All in all, I have a lot of work to do in these next few weeks, but once
I can
figure out how to make this object stuff happen, things should be smoother
sailing (I
hope).
To end on a good note, another thing I was able to achieve was getting my color
wheel to
function (yay!). The color wheel has a binded variable that when changed calls a
function in
my ARViewContainer that updates the current material color used for the model
entity in
my
ARViewController. The result… balls of various colors!
Sun Mar 9
Hello, hello.
This week wasn’t as productive as I had hoped it would be. I met with
some of
the
Computer Science faculty members this week and we took a look at some of the
code that
needs
to be built into my program. Having no experience with event processing and the
like,
the
most perplexing part is getting things to automatically update in my app view.
The
current
thing I would like to get working is having some kind of 2D entity map onto the
plane
anchors. Ideally, I would like the size of the entities to match the extent of
the plane
anchor’s geometry so I can start visualizing what changes I would need to make
from
there. I
suspect that raw plane creation based on plane geometry will not be accurate
enough for
what
the user desires, so I may need to worry about that later on. Right now, I’m
still in
the
process of figuring out what needs to go where but hopefully I will have another
update
as
soon as I do. Typically, I’ve been making these weekly but as soon as I have
something I
can
show off, I’ll be updating this more often.
Sun Mar 2
Another week, another blog update.
I unfortunately didn’t make a lot of progress this week. In the time
that I did
spend working, I did some more research into the ARKit libraries and managed to
find
that
ARKit comes pre-packed with different reference objects for plane anchors, which
the AR
session updates and keeps track of while the AR view is running. The main four
that will
be
useful for this project are walls, floors, windows, and doors. Getting ARKit to
detect
other
objects requires setting up a separate config to scan the object to create and
export it
as
a reference object file. I talked with my project advisors and we decided
against this
as it
would take too long to set up.
The main thing that has been making this project a bit slow is the UI
integration.
As I talked about in the last post, the ARView class that acts as the AR
interface for
the
app itself is built with UIView, the older UI framework that Apple devices used
before
SwiftUI came along a few years back. As such, many of the tutorials and
documentation
that I
find online use the older UI view format and not the newer version that
integrates
UIView
into a SwiftUI interface. As such I’ve been needing to learn how to use a little
of both
which has costed me a lot more time than I would have liked.
I never want to get personal in these, but I’m finding out that making
progress
in
this project has felt slow. It also feels like some days I don’t end up making a
whole
lot
of progress, which has been very taxing on my motivation to work on this
project.
Already
being behind doesn’t help much either, but I think that if I do keep working on
it, I’ll
make a breakthrough eventually and progress will get a lot quicker.
On another note, this week I also came up with several ideas of how I
can make
my
app easier to navigate and function, thanks in part to the HCI paper that was
assigned
to us
last week. It really had me start thinking about ways that I could improve my
interface
and
cut down on needless UI elements and help the users navigate my app, once I have
a
working
build that is…
Sun Feb 23
Progress has been slow again this week as it’s proving to be a little challenging
to make
an
interface. I had to do a little more digging into getting the AR View to work
with the
SwiftUI framework. Turns out that ARKit is a bit of an older library and
therefore does
not
conform 1-to-1 with SwiftUI and uses the older UI View/UIKit interface, which is
a bit
more
complex and wordy. I’d would much rather focus on using the newer SwiftUI since
it
allows
for easy previews of the basic interface, not including the ARView itself, since
I
mentioned
in the last post, it requires the use of real hardware, especially for its
prebuilt
plane
detection algorithms and such that I’ll need.
But now at the very least I have a working interface that’s running off
of an AR
Session, which will allow me to start implementing plane detection. My next
steps are to
focus on detecting walls and being able to change the color of the walls. This
will be a
multi-step process, where I’ll need to first be able to mark off a particular
wall
through a
specific touch gesture of some kind, then be able to select the color I want to
overlay
onto
the wall, then place an object or two-dimensional plane on the wall in the color
I
choose.
Currently I have a color selector already built, which I will use for
the time
being
to test out colors, before making a custom color picker that gives the user a
set of
pre-picked colors, while also giving them the option to make their own color.
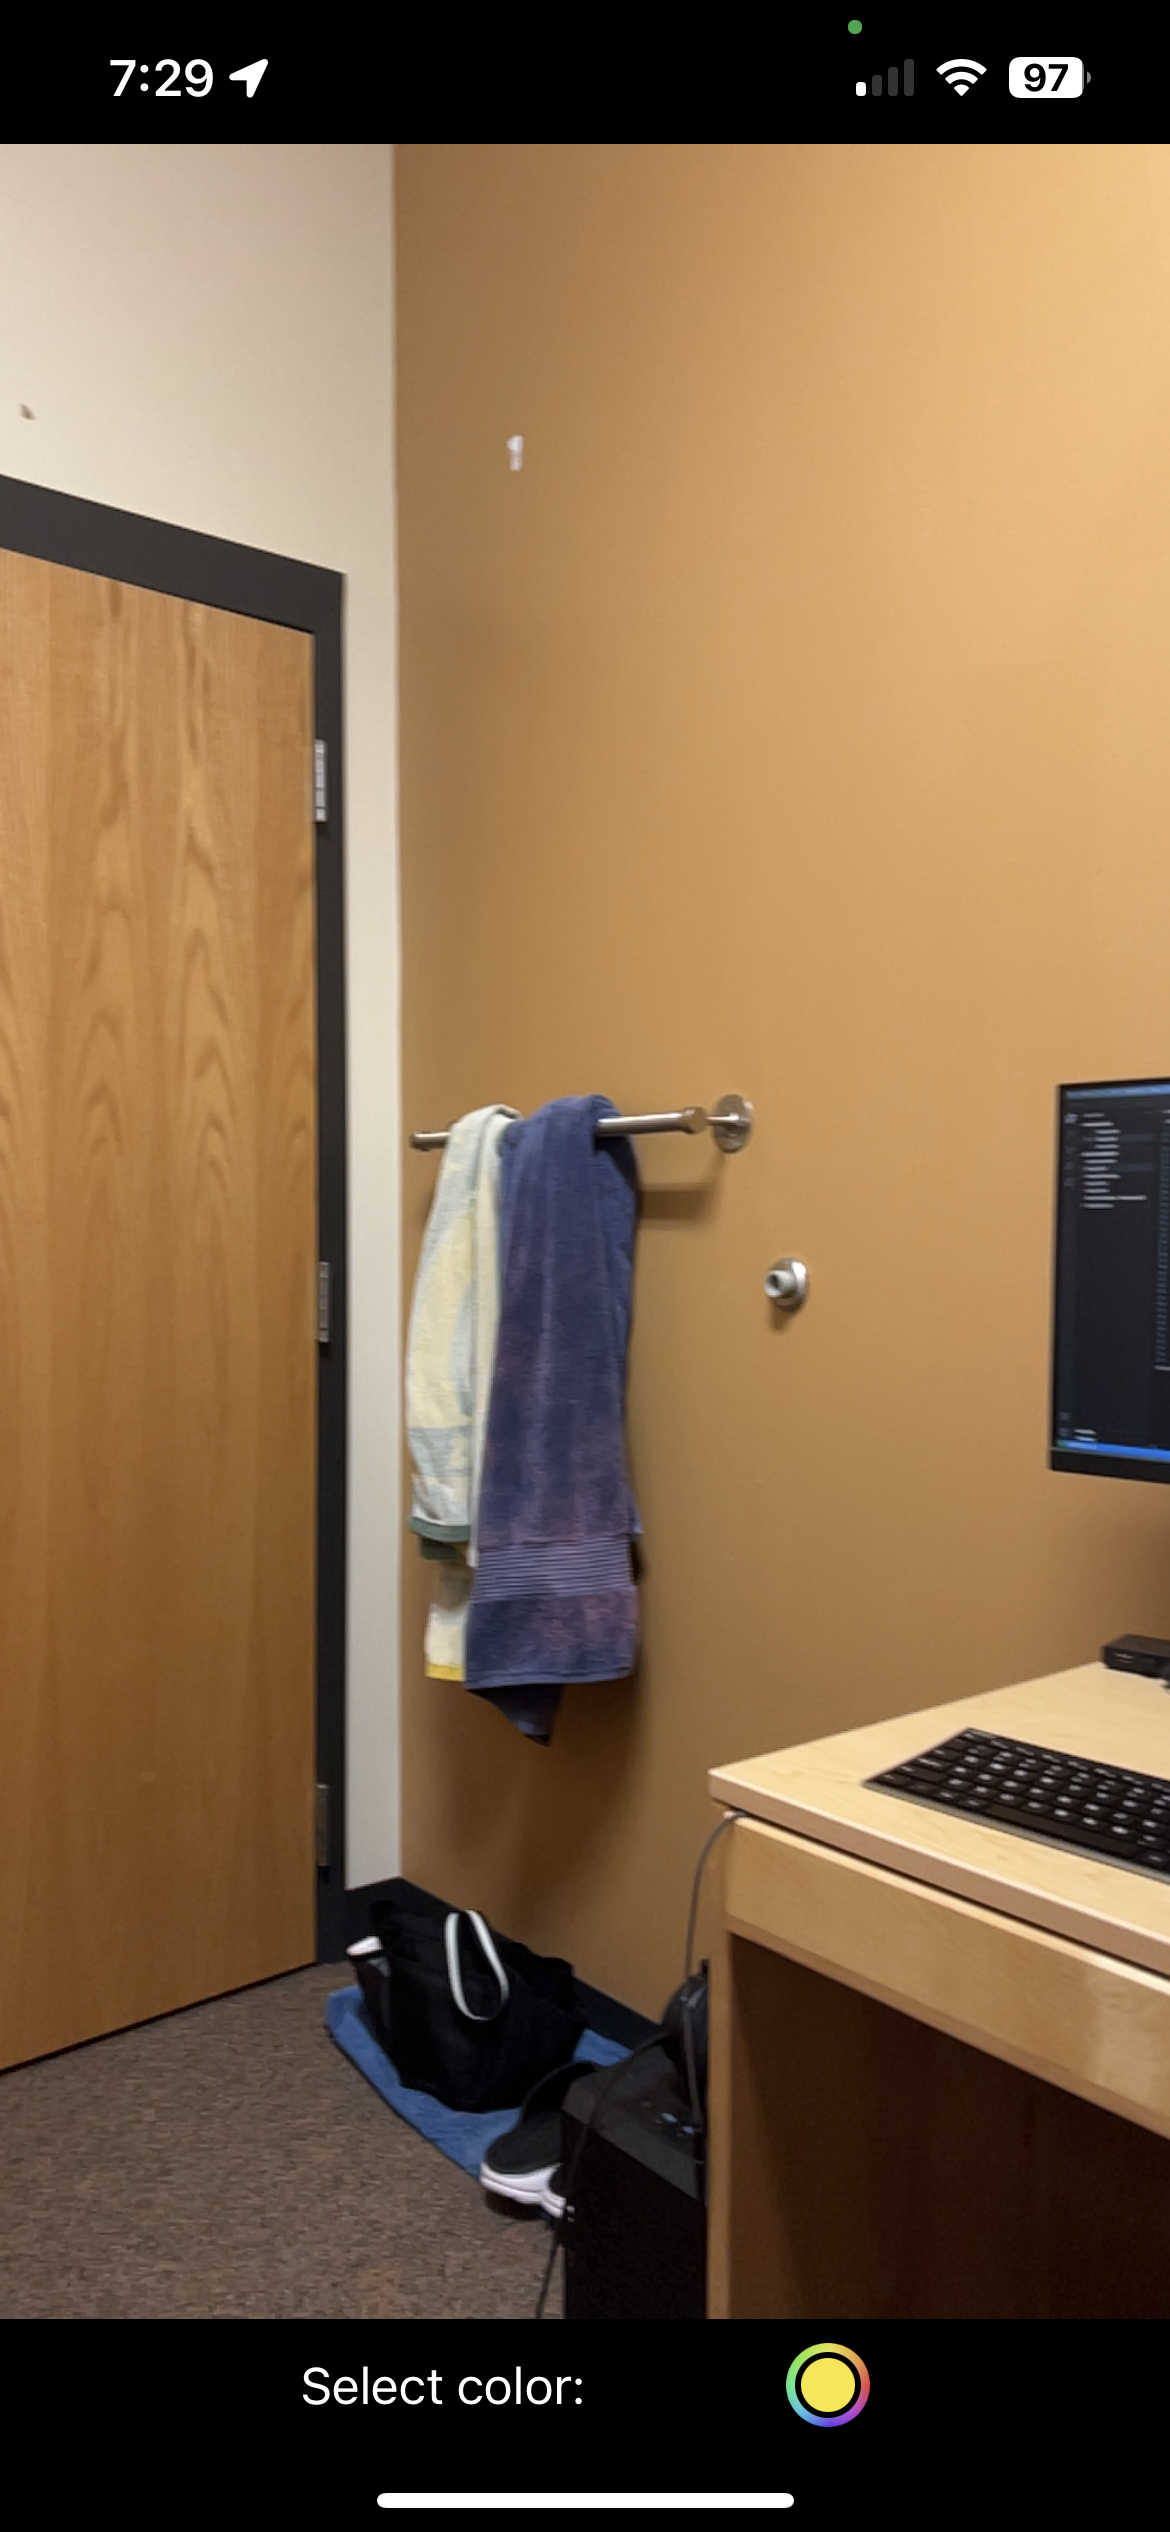
A screenshot of my in-progress layout. More features will be added later on.
Sat Feb 15
This week has been going rough for this project. I learned a couple things in the
past
couple
days
that might make this project a lot more difficult or next to impossible for me
to fully
finish. I learned that
wearing the Vision Pro headset while wearing my glasses is not going to be
feasible at
all.
I can wear it without my glasses, but
everything is just as blurry when I am not wearing the headset normally without
my
glasses.
As I was working on trying to get a basic
object detection program to run, I found out that the XCode simulator cannot run
ARKit--at
all. With the combination of not being able to
see well out of the headset and not being able to fully test everything in the
simulator,
there is a good chance I may need to switch OS and Hardware.
It's unfortunate that I had to find out on the third week in, where I could have
found
all
this out much sooner, but oh well.
In better news, I've been doing more Swift UI tutorials and I'm somewhat getting
the
hang of
the system.
I also have a pretty good idea for what features I'm going to try and include in
my
application,
thanks in part to the grease board sessions we had this week. I've made a rough
list of
what
features I'll likely add,
the first few I want to have in my first major build. My current objective is to
be able
to
get ARKit set up properly and to get plane detection working.
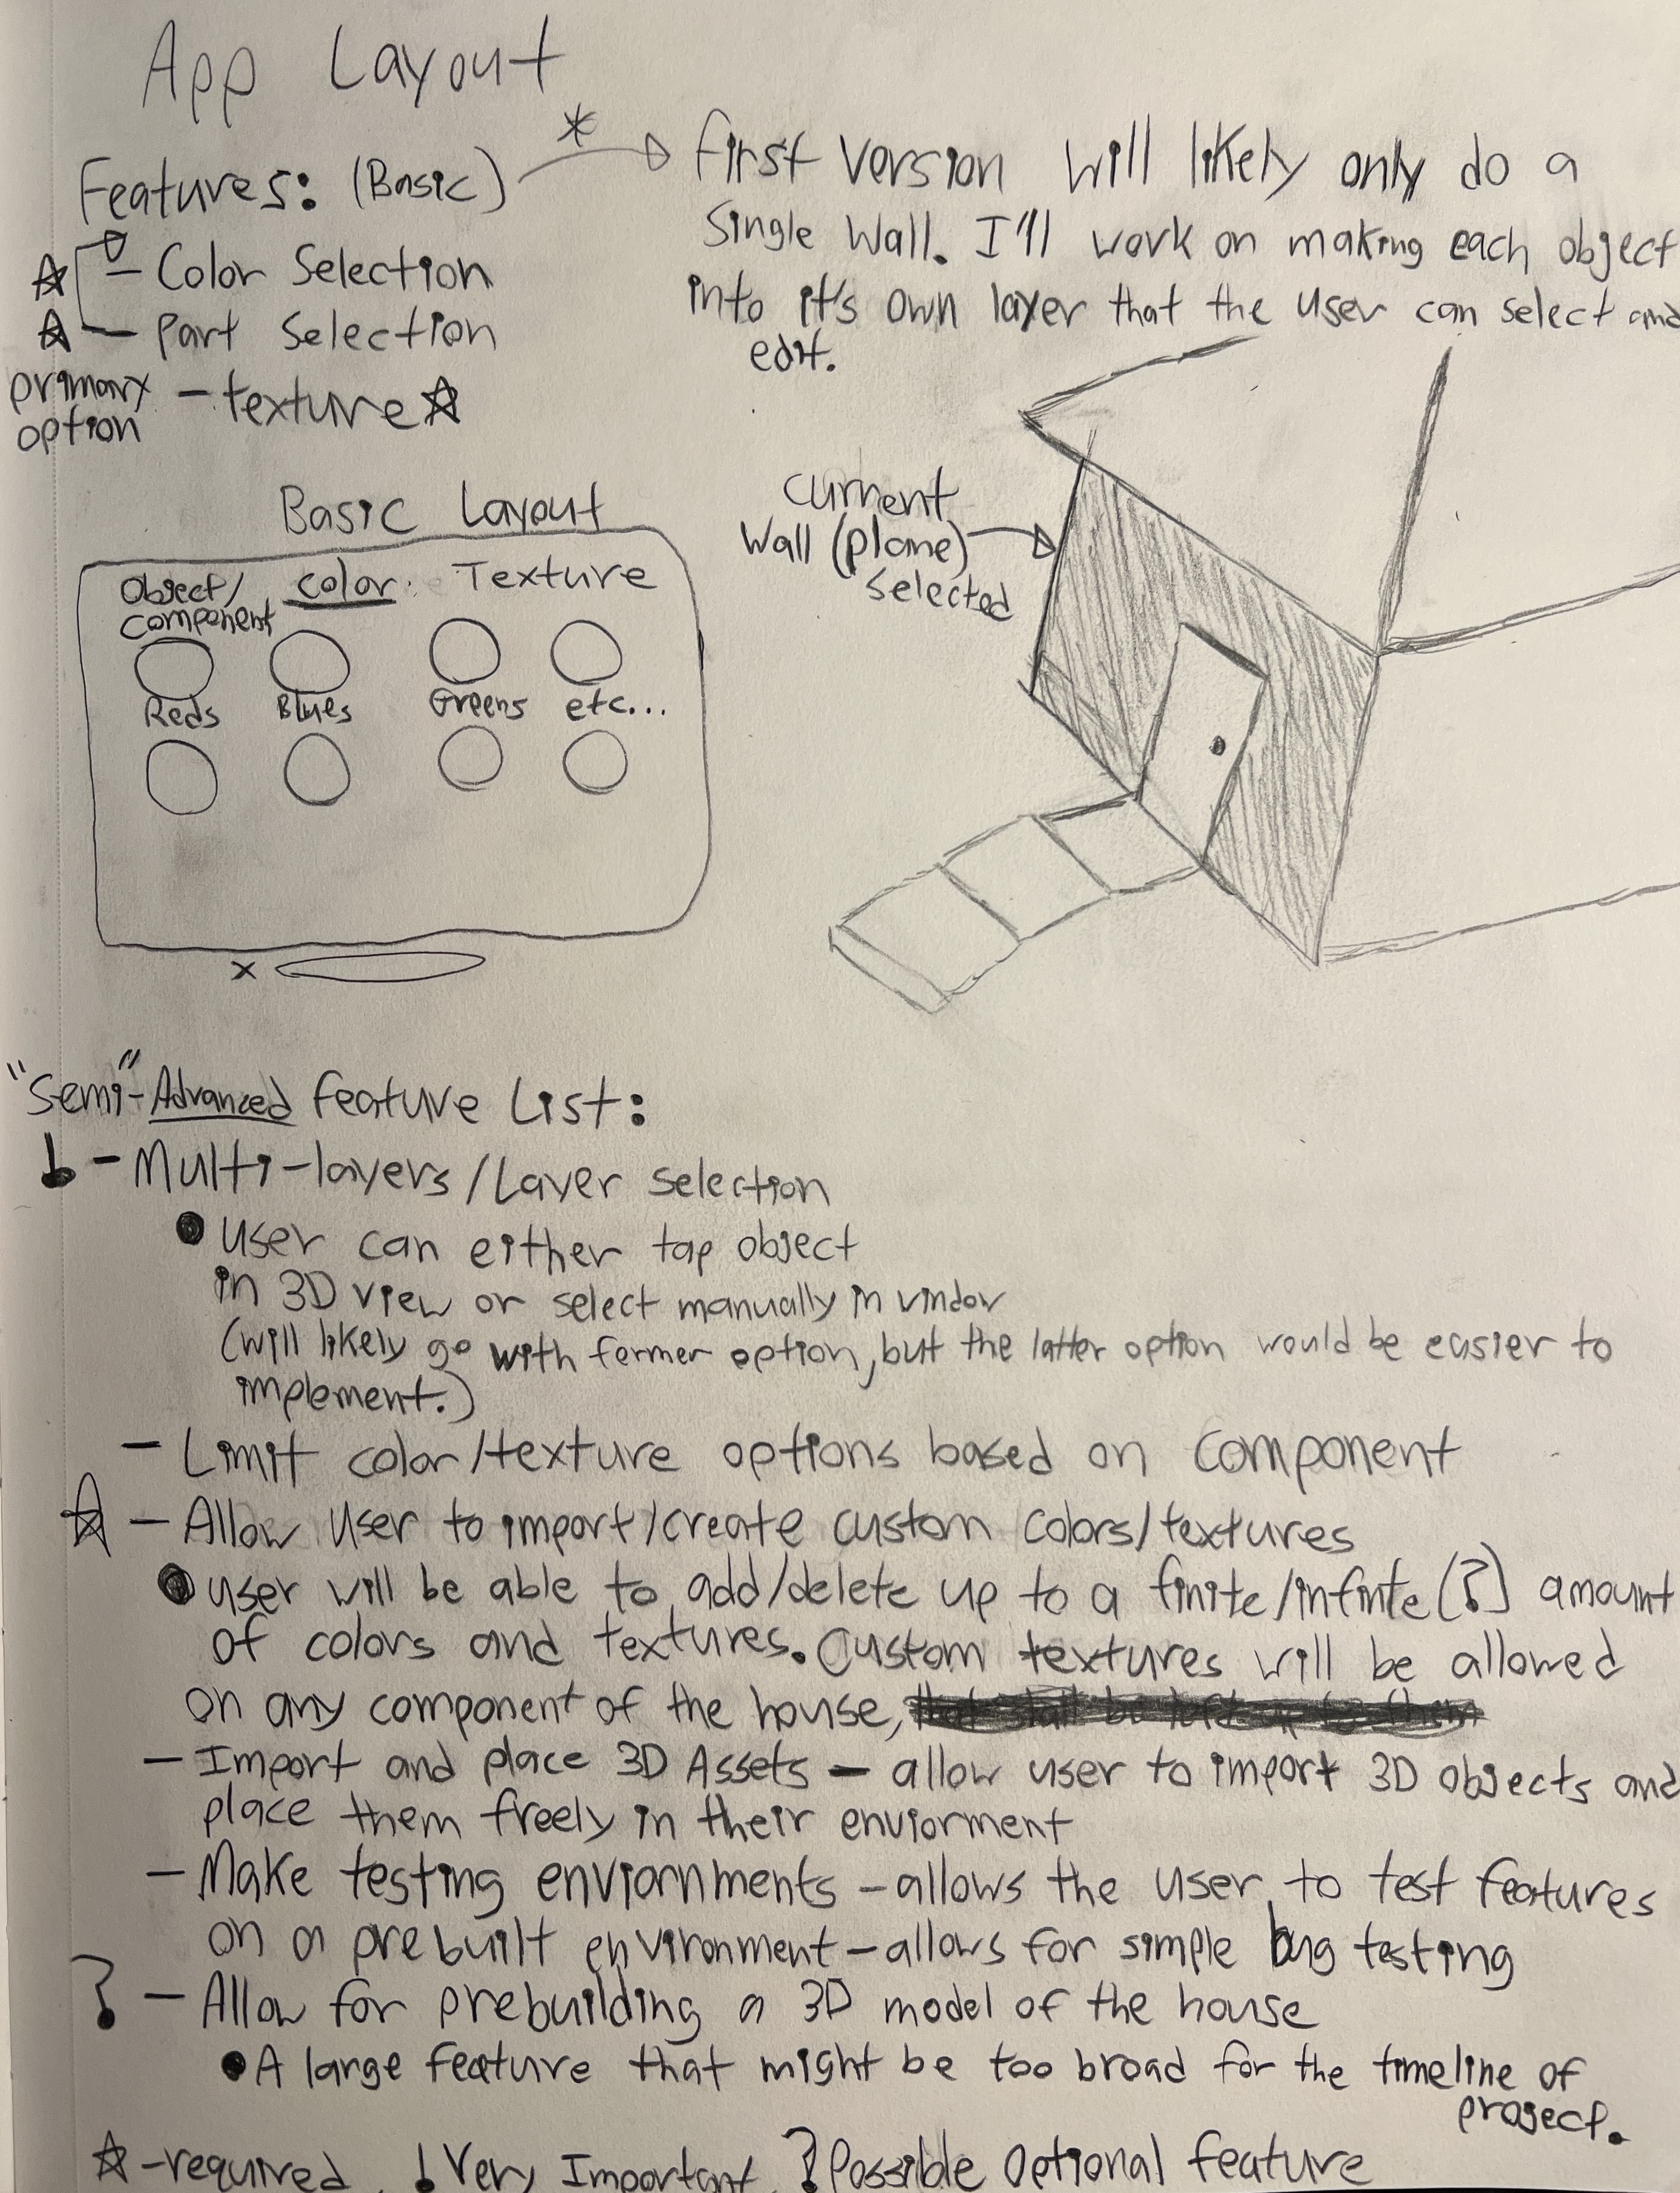
Sketch of a design layout and planned features
Thu Feb 6
Progress has been slow, but then again they say the hardest part of starting a new project is getting started. I'm going to need to pick up my pace if I want this to be a successful project. So I'll likely devote most of this weekend into working with Apple's tutorials on SwiftUI and iOS apps, since even though I'm working with VisionOS, I'll need to know how to make a UI for my AR application. I'll likely start to sketch potential layouts for my app as well.
Wed Jan 29
Today I met with Dr. Meyer and Dr. McVey to go over the scope of my project. I was a little nervous going in, but I did get to test out the Vision Pro headset and I have to say it’s pretty amazing what that thing can do. My current plan for this week is to have my website running so I can post this and all of the rest of my blog posts there as well. After that, I’ll start doing some research into how to develop using Swift and Xcode since I haven’t done much coding in either language/environment.