How To

Assembly and User Manuals
Wire guide - This is a guide on how to make good connecting wires for the TJ-Pro.
TJ-Pro Assembly - This is the TJ-Pro kit assembly manual.
TJ-Pro User - The TJ-Pro user manual.
Handy Board Assembly - The Handy Board assembly manual.
Handy Board User - The Handy Board user manual.
Handy Board Schematics - The Handy Board schematics.
IC - The Interactive C user manual.
What's on the Handy Board
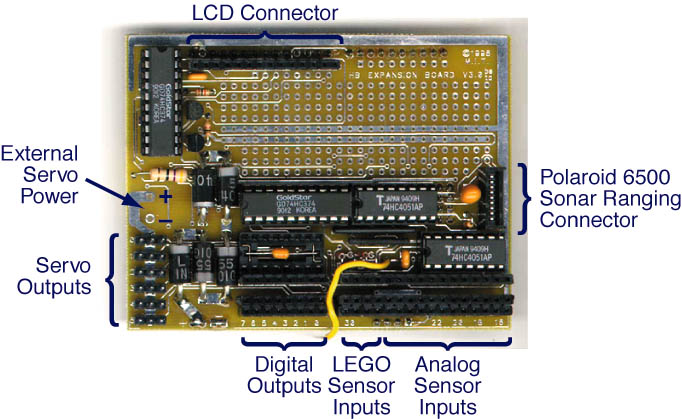
What's on the Expansion Board
Handy Board Hook Up
Downloading pcode to the Handy Board:
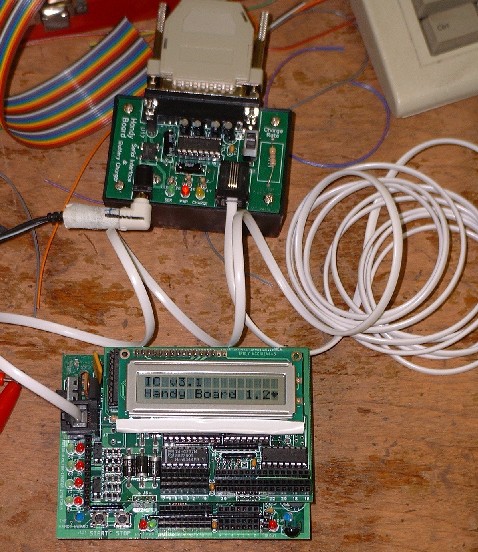
Plug the communication converter (top) into the COM port in the back of the computer. Then plug the phone cord into the sockets on the communication converter and the handy board itself. Do not turn on the handy board yet. Open the IC program. It will prompt you saying the board is not responding.
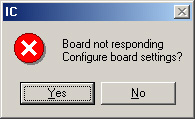
Click "YES".
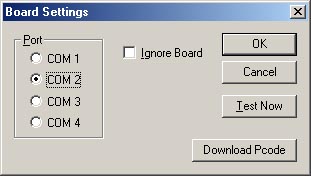
Click "Download Pcode" and search for the file "Handy_Board_1.2.icd".
You will now be prompted to place the Handy Board into download mode. Hold down the stop button and turn on the Handy Board (pushing the black power switch towards you). When the green LED power indicator light goes off (should take less than a second), release the stop button and click "OK" to download the pcode.
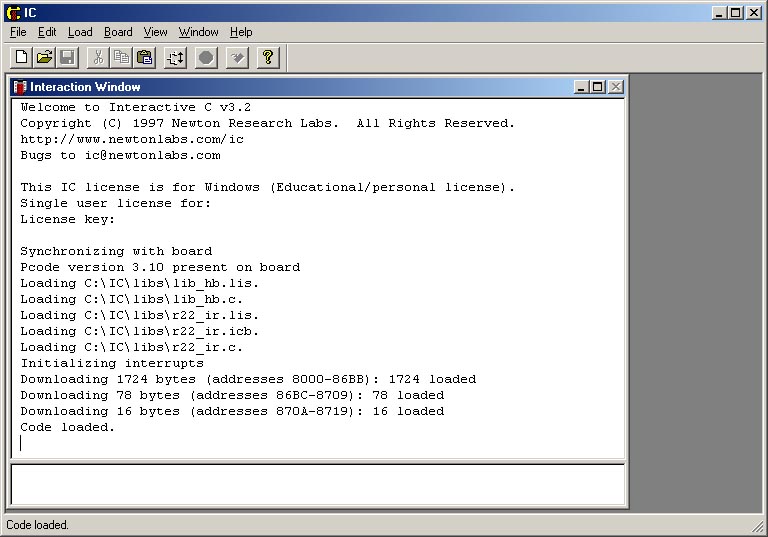
Once the pcode has been downloaded to the board (should take at least 10 sec. to download), IC will ask you to reset the board. So, switch the board off (pushing the black power switch away from you) and switch it back on. Click "OK". And it should now be downloading the handy board libraries to the board. You should get a screen that looks like this.
The pcode will stay on the board as long as it has power supplied to it.
If the pcode has already been loaded onto the board, and you are starting up IC. First turn on the Handy Board and plug the telephone cord into it. Then run IC and it should recognize right away the board is there and will download the necessary library files needed.
Using Interactive C (IC)
To load your own code to the board you can do it two ways. One way is to open up your code for editing in IC and go to the "Load" menu and click on "download window". Or you can go to the "Load" menu and click on "download file..." Remember to have the Handy Board on during this time. Once the code has been loaded onto the board, turn off the board and turn it back on. The code that has been downloaded to it should now be executing granted the code had a "main" function in it.
Using the IC Interface
You can type any C expression at the prompt. This will download this one line of code to the Handy Board and execute it.
You can also type one of the following commands:
load filename - Load filename.c into the board.
unload filename - Unload filename.c from the board
edit filename - Edit filename
ps - Print the status of currently executing processes
kill_all - Kill all processes
quit - Quit
help - Display this message
list files - List all files
list functions - List all functions
list globals - List all global variables
list defines - List all #define macros
Servo Motor Hack
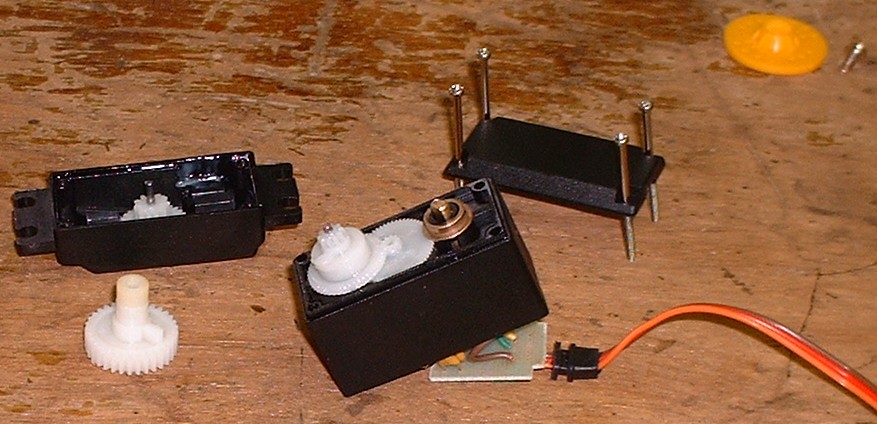
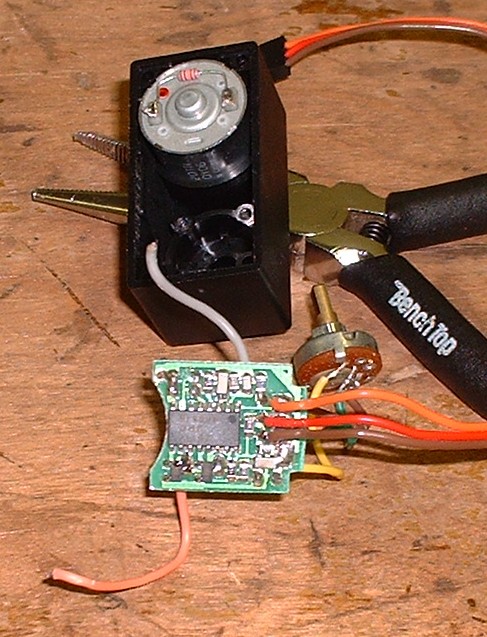
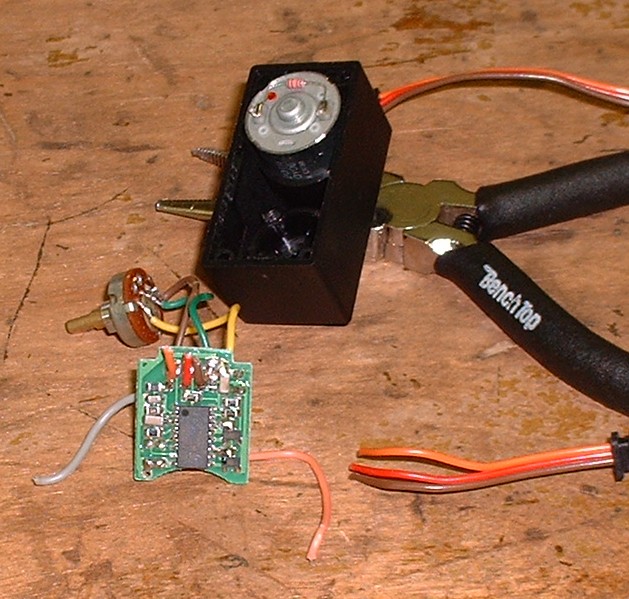
First unscrew the yellow servo horn and the four screws on the bottom panel. Then remove the components as seen in the top and bottom pictures.
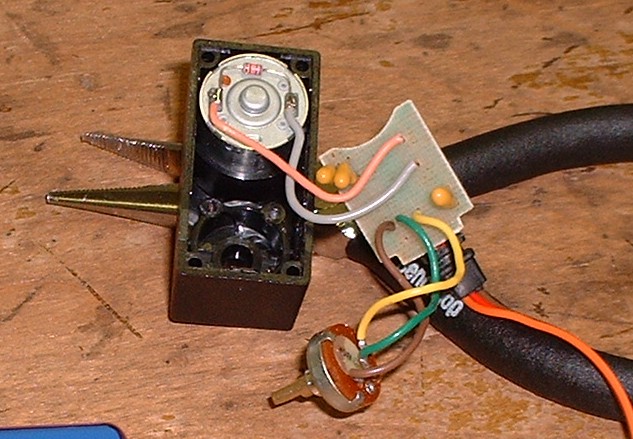
Now cut the two wires connected to the motor.
Cut the three remaining wires connected to the board. You can discard the board and everything connected to it.
Cut and remove the orange wire. After this, strip and tin the brown and red wires and solder them to the motor. The red wire must be soldered to the motor on the side with the red dot. The brown wire then gets soldered to the other side. Leave the small transistor soldered to the motor.
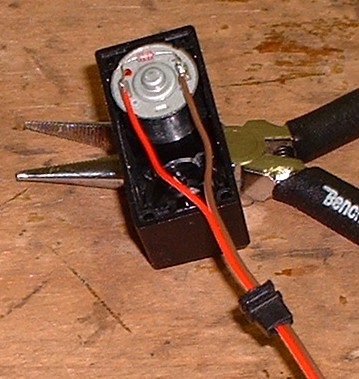
Now remove the mechanical stop on the output gear.

Finally, place everything back the way you found it and screw back on the back plate. Try a test run of the now hacked servo motor by hooking it up to a board. Give it a command to go and see if it is turning 360 degrees. Also listen for any ticking sounds. If there is a constant ticking sound, this means the mechanical stop may not be fully detached from the gear. In this case, remove cover and make sure there is no contact with the output gear.