Multi-Touch Desk #1 - Projected Rear DI
Implementation status: Completed successfully!
Mockup:
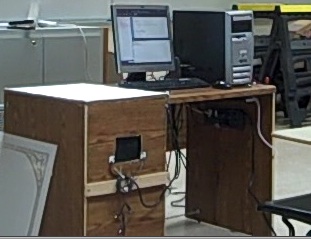
Completed device, and demo (see below for a video hardware tour with more detail):
Click to play embedded video: Two demos running very well on Desk 1, even before the correct, faster video card was installed. Download video or open in other media player
Download the Quick Guides and User Manual book for Desk #1 for illustrated basic end-user instructions.
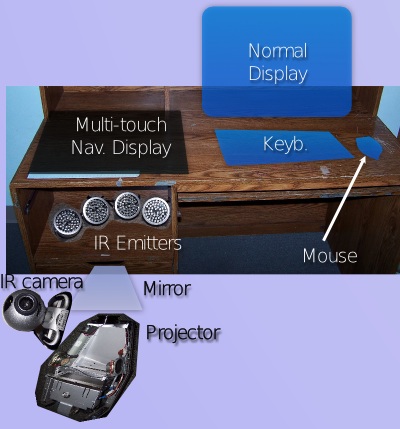
This desk was the first to be built, using the rear DI technique with a projector for image generation. It works well, and contains some advancements I had not seen in my exploration of similar devices:
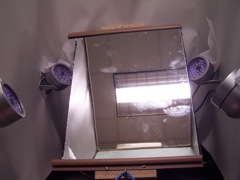
- The projector is on a drawer and the projection/webcam mirror is hinged and tethered to that drawer, so that it reduces in size for transport and retracting the drawer for use automatically sets a correct mirror angle. This technique allows use of a small projection/sense chamber as well as the replacement of the projector with ease (it is held down to hooks on the drawer with bungee cords), yet is secure for transport (deadbolt installed on drawer). This also means that, contrary to usual practice with rear DI, the box is not completely enclosed: there is a portion open during operation due to the slide-open shelf that also permits ventilation for the projector.
- The acrylic sheet for the surface was installed into very inexpensive, plastic, false-wood-grain (also available in white) window/door edge materials. These materials were available in a number of styles including a style suitable for flat attachment and another for 90 degree angles, and came in 8' lengths for around $2 each. They fit the 6mm acrylic used perfectly, and would also hold a stiffer projection/diffusion surface (like vellum or tracing paper) in place if desired. This was the original plan, though the improved performance of the shower curtain material and the desire for flexibility and easy replacement led to affixing the projection surface above the acrylic using double-sided tape on the plastic rails. The usual material serving this role is relatively expensive and hard-to-use aluminum or steel u-channel: this plastic material could be cut easily with a Dremel rotary tool or a hacksaw, and trimmed to fit using scissors.
- The light sensors on the IR illuminators was disabled by the installation of a small piece of closed-cell window insulation foam, adhesive on one side, over the photoresistor after unscrewing the clear cover. Re-attaching the clear cover keeps the foam from moving away.
- Discarded projector screen material was used to line the image chamber to reflect IR emitted. It was held in place with screws and some double-sided tape. Cables for the illuminators were fed through slits cut in this lining and routed to the power source completely hidden from view within the completed chamber.
- A very cheap (Dollar Tree) off-white shower curtain was found to provide the best combination of projected image quality and touch contrast, better than a more standard thickness of shower curtain (lower contrast) and two different fabric interface materials (excessive projected light transmission, and lower contrast in the thicker material)
A video tour of the device is available below, embedded in the page as Flash or downloadable. The tour shows the detachable power connector for 12VDC from the computer next to the IR circuit power indicator light, and the IR being switched on from the power box below the desk and the resulting indicator light change. The next scene moves from above the touch surface (from behind the desk) down to the projector drawer with the projector and camera fastened using the bungee. The camera moves into the chamber, showing the lining, the mirror hinging, tethering, and mounting, and the IR illuminators aimed for use. After tilting upward to show the rear of the acrylic and surface, the camera leaves the image chamber and returns briefly to an external view of the multi-touch screen.
Click to play embedded video: Hardware tour of Desk #1 Download video or open in other media player
Important hardware used in the construction:
- Projector set up to rear-project on acrylic surface - 640x480 InFocus LitePro 570 used to perform testing (focus distance adjustment made to lens mechanism), higher-quality projector checked out from Media Services for final setup, demos, etc.
- Mirror for projector and camera access to surface - basic rear-surface mirror installed on board, hinged and tethered to drawer.
- Acrylic sheet - 17"x23", 6mm, clear, contributed by Midland Plastics Inc.
- Projection surface and diffuser - Dollar Tree off-white shower curtain used in final prodcut (interfacing material from Joann Fabrics tested earlier was less suitable during later testing)
- Infrared illumination for rear of acrylic sheet - 4x 48 LED Illuminators, ordered from DealExtreme, light sensor blocked
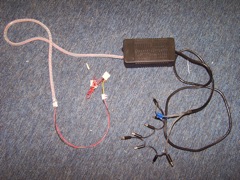
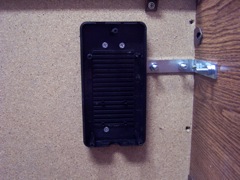
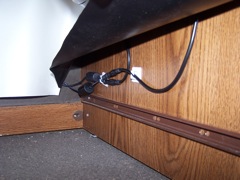
- Power for IR illuminators - adapter built to use computer power supply and provide a shutoff switch and indicator light.
- Webcam with IR filter removed, and a removable visible light filter installed - Filter removed from QuickCam Pro 4000, floppy disk piece tested as visible light filter, but resulted in very poor contrast (touches not recognized). Two pieces of darkened, developed negative film used in final product, which works well.
The photo album below shows the development process. Click on any photo for a larger version.
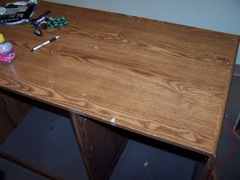
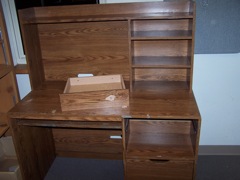 Original desk |
 Disassembling scrap power supply to use case, switch, wiring |
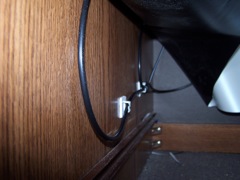
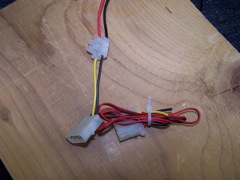 Getting 12VDC for IR illuminators from a computer |
 Inside the computer-IR connector box |
 Computer-IR connector and adapter box - additional connectors later added |
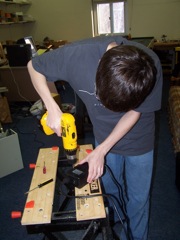
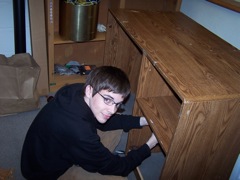 Removing shelves to convert desk |
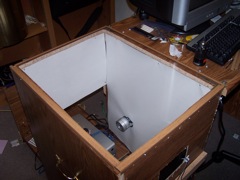
 Desk nearly completely stripped |
 Discarded projector screen material used to diffuse the IR within box |
 Material mounted inside projection chamber |
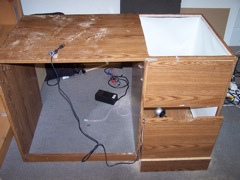 Shelf modified for stability when extended to support projector |
 Power box fastened beneath desk - also note reinforcements added after exhibition transportation damage |
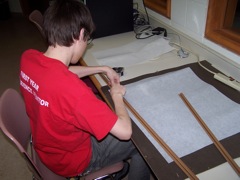 Cutting diffusion/projection material (thick interfacing) - later found to not work as well as other materials |
 Projection with surface and mirror being tested |
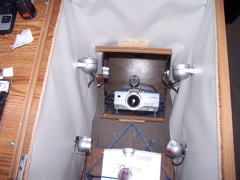
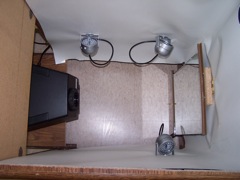 Mirror hinged and mounted, 3 illuminators mounted, and test projector inside projection chamber |
 IR illuminator cables routed neatly behind chamber lining |
 The other side - cables neat above the projector shelf rail |
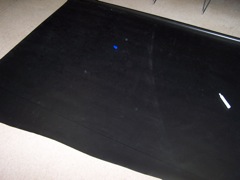
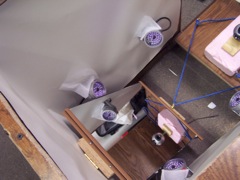 View from above during testing without projector - IR showing up purple, white squares later removed |
 View from where the projector would have been in the previous picture |
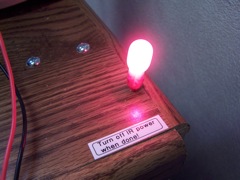 Indicator light added to IR power circuit |
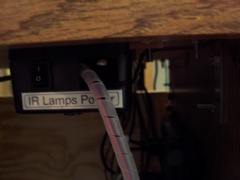 IR power switch labeled |
 Acrylic mounted in window/door edging material |
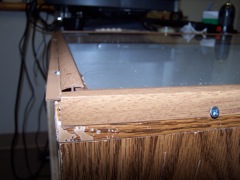 Close-up of mounting rail - new material available cheaply in woodgrain or white, and in a flat or 90 degree style, both shown here |
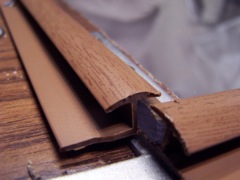 Close-up of corner: could have been mitered but it isn't seen much when finished - this material usage (rather than aluminum u-channel) was original |
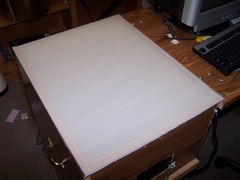
 Last view from above before installing projection/diffusion surface over clear acrylic |
 Inexpensive off-white shower curtain used - mounted using double-sided tape and cut to fit |
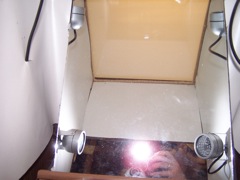 Image from projector location after mounting screen - note what a smooth surface it presents to the camera |