Summary
One-liner: Using a multi-touch interface as an accessory for a "conventional" workstation, create the necessary hardware and software to allow the user to manage minimized windows in free-form piles.
More info on the interaction concepts are on the Software page. Project background, general proposal, and constraints are located on the entry page.
Journal
Sunday, May 10, 2009 - Bug Fix Release
A number of little items, including some additions as requested by the professors during my defense. More pages than this were updated, but these are the major ones.
- Software - HTML bug fixed, link to download page for quick guide/manual added where filter tuning is mentioned.
- Software -> rp-mt-scripts - Component diagram added, additional screenshots of all the GUI tabs added, version 1.0.1 released with bug fixes (would not set camera properly when starting tbeta using GUI, fix GUI Python launcher).
- Software -> tactus-navigator - Class diagram added, by request - it's very large in the form that includes details on how each class fits in with the rest, so a low-text version is provided as well as a full, zoom-able PDF of the detailed version. Version 1.0.1 released with bug fixes and cleanups.
- Downloads - Several new downloads added.
Sunday, May 3, 2009 - Final regular update
Thursday was my presentation, and Monday is my defense, which means that this web site gets relatively frozen. It's been a great project - a bit busy, a little extensive of scope, and a little too dependent on shipping times and generosity, but overall very good. I think I've learned a lot and had the opportunity to put a lot of what I've learned earlier into practice. In my mind, this project has served not only as the capstone of my undergraduate computer science experience, but also the bridge to my Ph.D. studies in human-computer interaction that I will start this fall.
I've made a lot of web site changes - didn't realize just how much external documentation I still had left or could add. When a page was changed dramatically from a previous version, that version has been retained and linked at the bottom of the new version. New or updated pages:
- Home Page - New content (old content moved to Proposal) providing an introduction
- Proposal - new page, contains original content of homepage.
- Software - original content removed/moved to correct page, replaced with software system diagram and description of components and design.
- Software -> rp-mt-scripts - Updated with a video/screencast on how to install and setup, using the Git version control method (also mostly applicable to the tarball method). Also, I finished creating a graphical interface for these scripts, so there is a screenshot posted.
- Software -> tactus-navigator - New page, includes much of the content from the old Software page, as well as information on the gestures and interaction design (based on poster, walkthrough, and final presentation information), as well as installation instructions and some software design information.
- Hardware - More basic information added, page re-focused on those elements not necessarily connected to a particular touch desk. Some content moved to the new Desk 1 and Desk 2 pages.
- Hardware -> Desk 1 - New page, some information from old Hardware page, new photo gallery, new videos, description of final hardware and specific innovations beyond the typical model of its type produced elsewhere.
- Hardware -> Desk 2 - New page, some information from old Hardware page, mockup photo, basic description of final design.
- Downloads and Media - new page, contains links to all screenshots, media, and downloads on other pages as well as new downloads (snapshots of software, presentation slides).
- Philosophy - Updated, expanded, clarified.
Evaluation-related notes: Career plans are on my Resume page. Extensions are listed throughout, but in brief: implement remaining elements in interaction design for tactus-navigator and conduct usability testing (logging touches, etc), build additional software for the multi-touch platforms already constructed, improve the rp-mt-scripts to bundle new Community Core Vision (formerly tbeta), contribute edge-limited kinetics to PyMT, and more. The code is annotated with TODO or FIXME and an explanation where there is "low-hanging fruit" of one sort or another. Portability: The software (both rp-mt-scripts and tactus-navigator) should run on any Linux, and tactus-navigator is modular enough that some (platform) modules could be substituted to run on Windows or even Mac OS X. rp-mt-scripts is more directly linked to a Unix-type platform (like Linux or Mac OS X, because it arose literally as an automation of my command line actions on a Unix-type system. The use of GitHub should allow future extensions to be straightforward in maintenance, since it keeps a log of the changes and notes I make, as well as permits easy branching of the code by a new user. When browsing code, I recommend looking at it on GitHub because you can view it directly online and it will highlight syntax, number lines, etc.
Thanks for reading! You can keep up to date with me on RyAnd Computing (my own consulting/technical services company) and LinkedIn, and I'll probably still spend some time over at the NUI Group Community because I think they'll be interested in my work on this project, especially the rp-mt-scripts. Catch you later!
Sunday, April 26, 2009 - crunch time
Well, I am pleased to release a chunk of my software - the imaginatively called rp-mt-scripts. It's a whole system, built on a ton of Linux (bash) shell scripts, that basically lets you set up all you need to run multi-touch things on an Ubuntu Linux system with a single command. This is the packaging-up of the "getting started" knowledge - take a peek at the web page for the system to see all that it can do. What's more, the scripts are clean and neat enough that it doesn't obscure what's actually being done, so they can teach just as well as they can do.
I'm really liking GitHub as a revision control hosting service - I have the hang of git now, and I like the fact that my page both has instructions on how to always have the latest version (checkout/clone my version control) as well as a link to an automatically-created tarball of the latest sources. I see it has an issue tracker, too, and a wiki - it's almost a mini-SourceForge. My guess is that this software will become well-used in the NUIGroup community because it basically makes multi-touch on Linux a turnkey operation, so I'm happy that I picked a good host that will be able to support that evolution.
I upgraded the computer that I'm using from Ubuntu 8.10 to Ubuntu 9.04 because, among other reasons, I found that a lot of what I was working with had a lot newer, more functional versions in the newer version. In some cases, the software I'm using is so cutting edge it hadn't even been packaged back in probably September to make it into 8.10, but it's in 9.04 so that's a major labor-saver. The upgrade went really, really smoothly, no problems at all, even though the multi-touch stuff can sometimes be goofy. (This is partly why I got that software package above put together - makes these cross-version tests easier. Also makes it easier to have the same software setup on my laptop virtual machine, as my desktop, as the table computer.)
The wonderful diffuser interface stuff I got from the fabric store... does not seem so wonderful now that my tests with an assembled desk show that it's too opaque to IR, and so the blobs do not have a big enough contrast. The thinner stuff I had earlier doesn't work either, but fortunately I had purchased a shower curtain to cover the desk in transport. I had heard that shower curtain materials also works well, and when I tried it, it worked a lot better for showing blobs. I'm slightly modifying the mounting system: the plexiglass will be mounted in the rails but without the diffuser: the diffuser will be attached with double-stick tape to the rails, so that materials experimentation won't require pulling out brads or unscrewing the rails. I got a nice, fresh, white shower curtain (not cut-up and off-white like the desk's raincoat) to apply in this role, and so I'm pretty pleased. Others have demonstrated that this sort of materials also works fine for projection, so while I didn't test that part yet, I'm not concerned.
Now that I have essentially one hardware unit (the laser suppliers have still not gotten the lasers to us!) good enough to use, and a reliable software platform that's tuned well, I just need to get the last software work done, and put together the remaining slides on my presentation. It'll be a lot of work still, but doable.
Onward to more and other work!
Sunday, April 19, 2009
Wow, how time flies! With my senior project, other commitments, and private life, I've really had to work to balance things out, sometimes with much success, sometimes with less. This week, due to my other commitments and some health issues, I made less headway than ideal on my project, but I'm still confident I'll wrap it up in time.
I was able to finally figure out the algorithm I'll be using for the icon clustering - though there are existing clustering algorithms, they link up the entire set of items hierarchically, when I only want to put things in a cluster if there really is some sense in having them together. So, I will be using that algorithm, but not joining nodes into a cluster if doing so would create an outlier (by some standard found trial-or-error: either using the inter-quartile-range or the standard deviation) among all nodes combined up until this point. I had kind of had the "feel" of how I wanted it to work earlier, but wasn't able to get it straightened out to the point where implementation becomes simply translating mind to code.
This upcoming week will be finishing the implementation of the software - I have all the "hard" work done on the software, so now I just need to make sure I block out enough contiguous time to just sit down and finish it up. The fact that the computer connected to the multi-touch desk is not good for testing because of the slow speed seemed like a potential problem, but I now have a multi-touch framework written all in Python that actually includes a simulator that you can use a mouse as a single multi-touch input. It won't let me test the complicated stuff, but it's good enough to let me get the coding done on my (much faster) laptop. Also, since it's written in Python like my window-management code, I'll need to do less "plumbing" and avoid nitty-gritty interfacing between C/C++ and Python and can just focus on getting the actual meaning put into code. The framework is under active development and is fairly new, but it's built on good base libraries (notice a pattern?) so even what's out right now is very useful.
I talked with Dr. Olson, and while the goggles and test cards have come in, the lasers themselves have not. Fortunately I have the first desk rebuilt, so that I can use that. When the software is "done enough" then I will work on the physical building of the laser desk - because that part involves fairly little development of new ideas and is mostly just assembly, it will fit in hopefully this upcoming weekend or during next week if I have a later demo/presentation date. Even if I don't get to use the laser desk for open demos and presentations, I still have an obligation to complete it that I am happy to fulfill, whatever it takes.
Looking at the schedule is both exciting and a little bit of an adrenaline rush... If it didn't feel like a sprint before, it sure does now!
Monday, April 13, 2009
"We can rebuild it. We have the technology."
Yes, I got the desk rebuilt, and built better than it was before. I even got a groundbreaking assembly step done, using the window/door edging material to friction fit the diffusion layer over the plexiglass and mount both layers to the desk. My wiring problems, as well as the potential for wiring problems, were all taking care of through the judicious use of some zip ties, and now a lot is permanently mounted to that desk for simple setup.
That said, I would have done well to take the parental advice that says "think how long it's going to take you, double it, and add a little" to arrive at a better estimate of construction time. When Campus Safety finally kicked me and my dad out, we had done all this: four types of repair and stiffening, infrared illuminator mounting and permanent wiring installation, fixed some usability (tripping over too-long brace) and appearance (previous desk owner tore back panel) issues, got the diffuser material trimmed to fold over and fit, plexiglass mounts cut for all four sides, plexiglass mounts installed on two sides to permit fine tuning access to device in science, permanent mounting of the mirror in rails on the swing board, and fired up the system to make a test. It took about 4 1/2 to five hours to get all that done, working steady, so perhaps the pace of the work made time go by quicker.
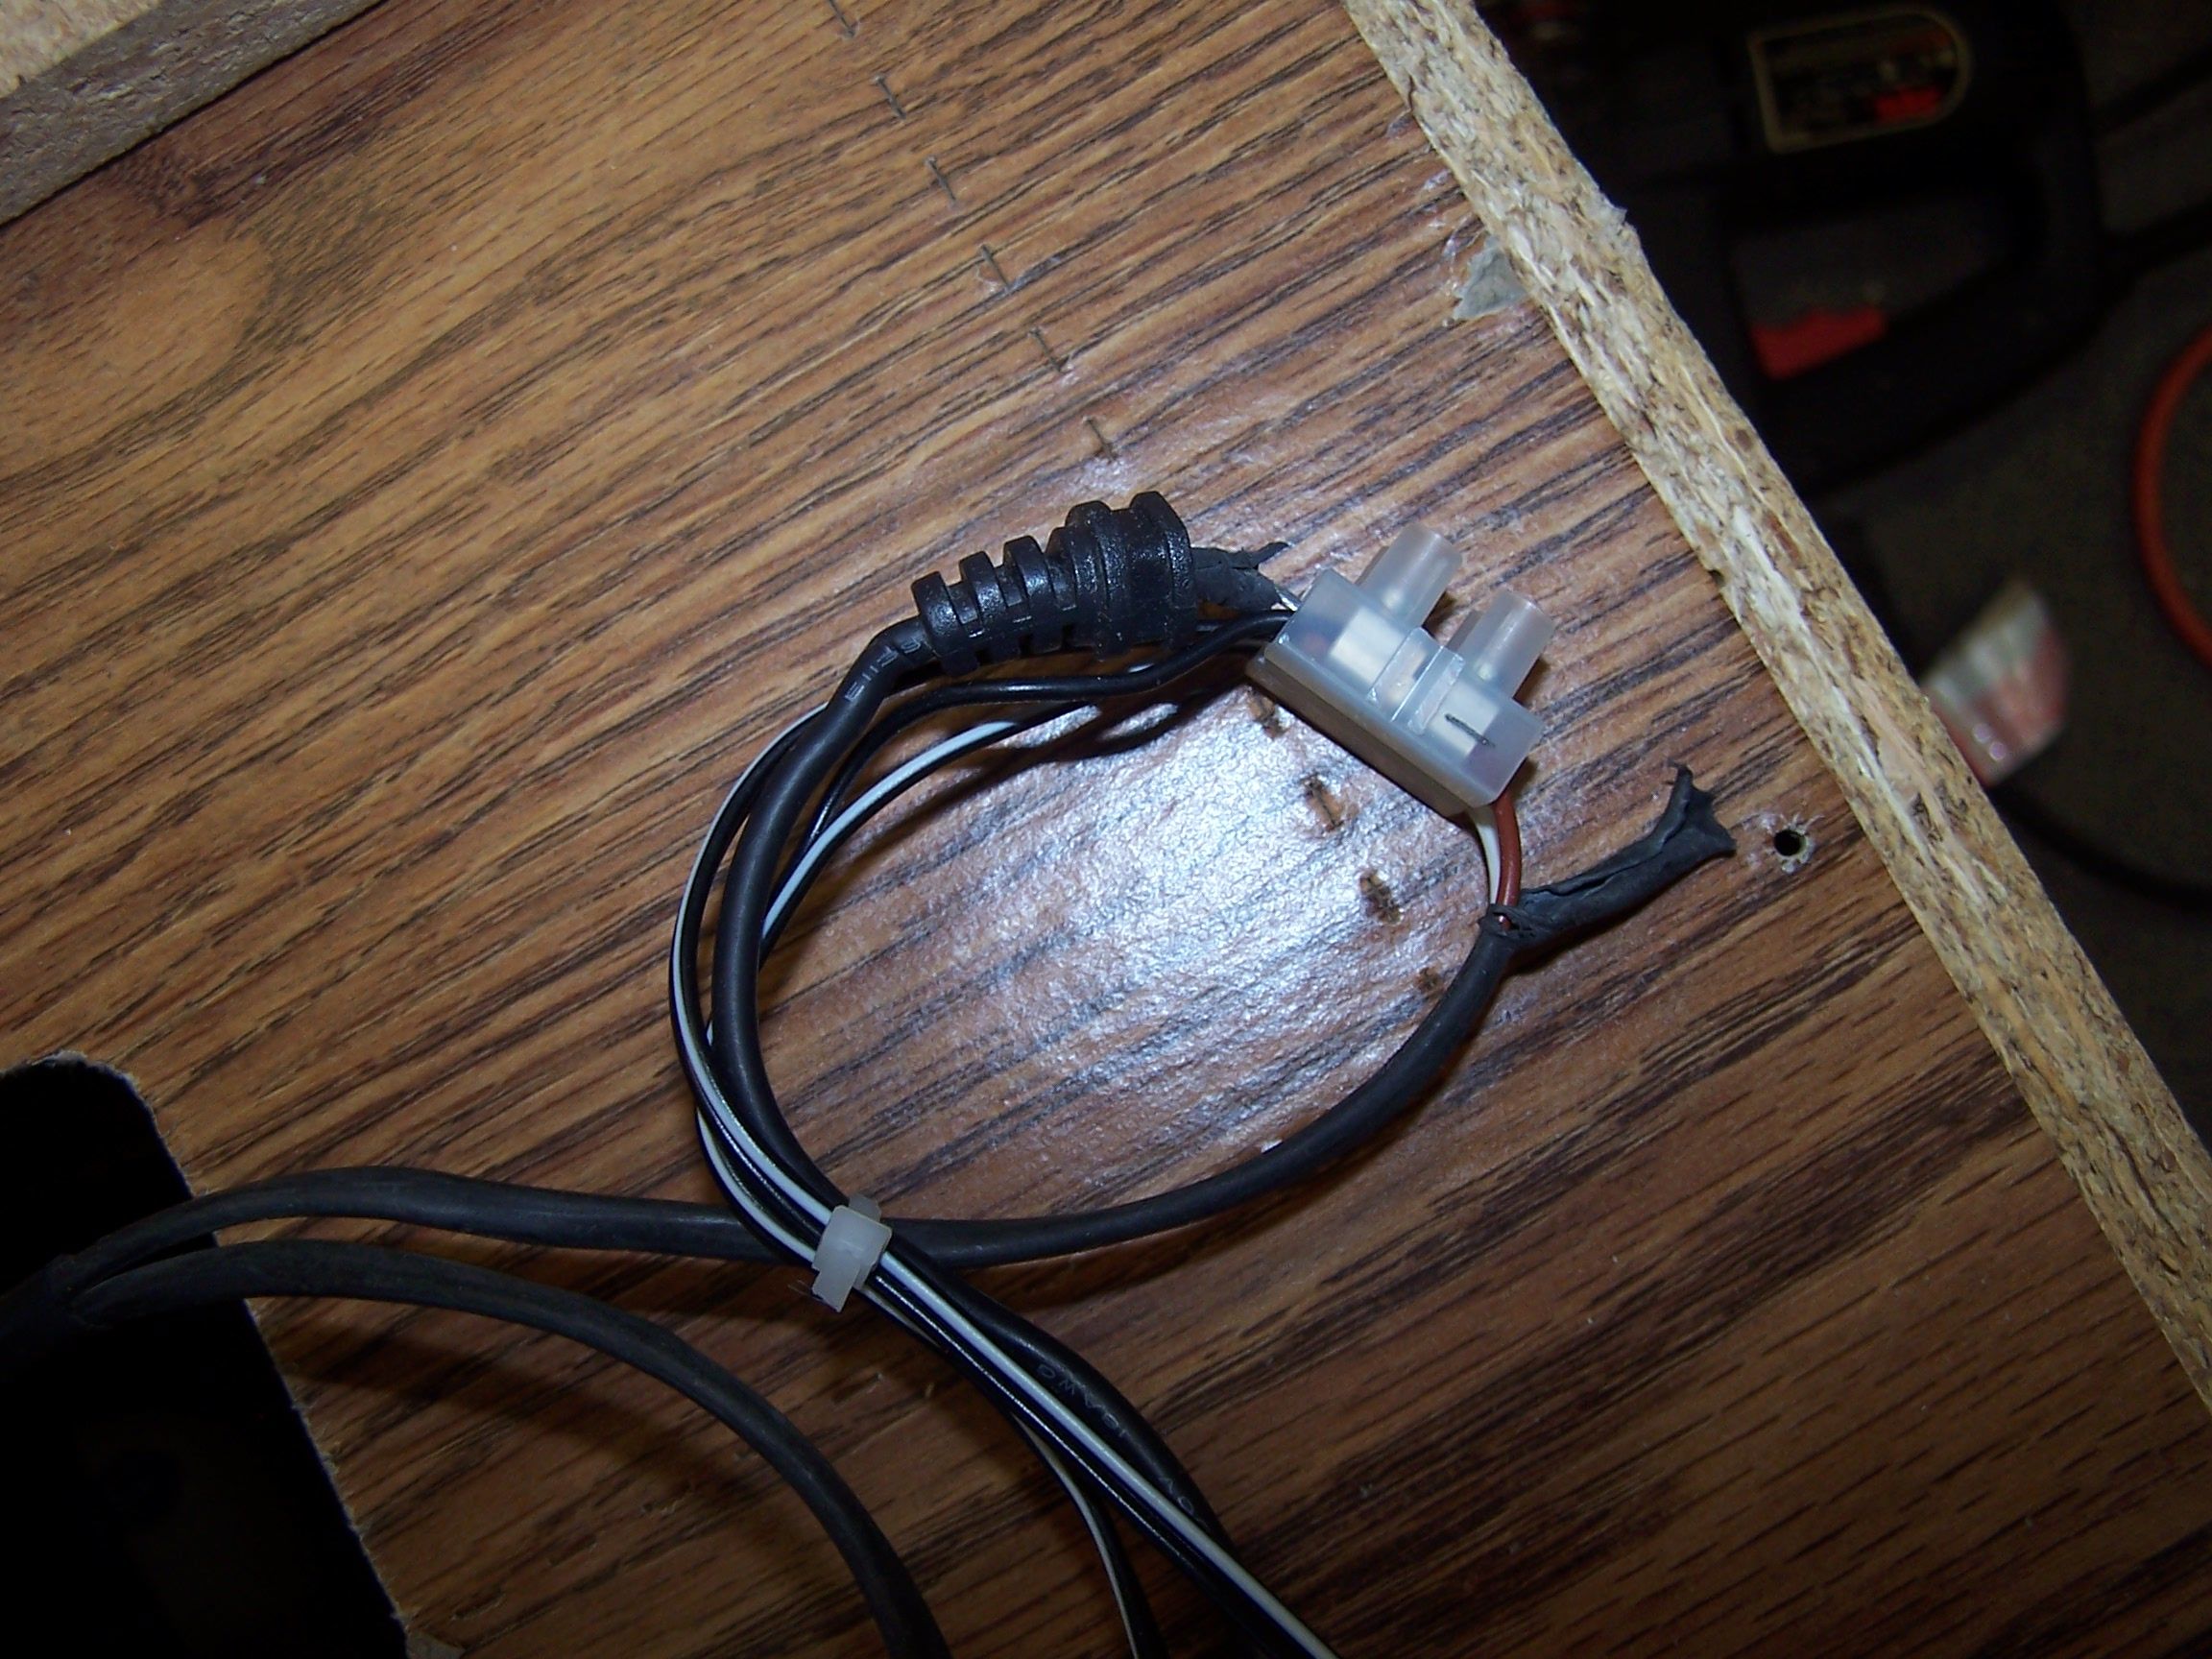 Mechanical connection prevents a repeat of the mystery of the dead IR Illuminators |
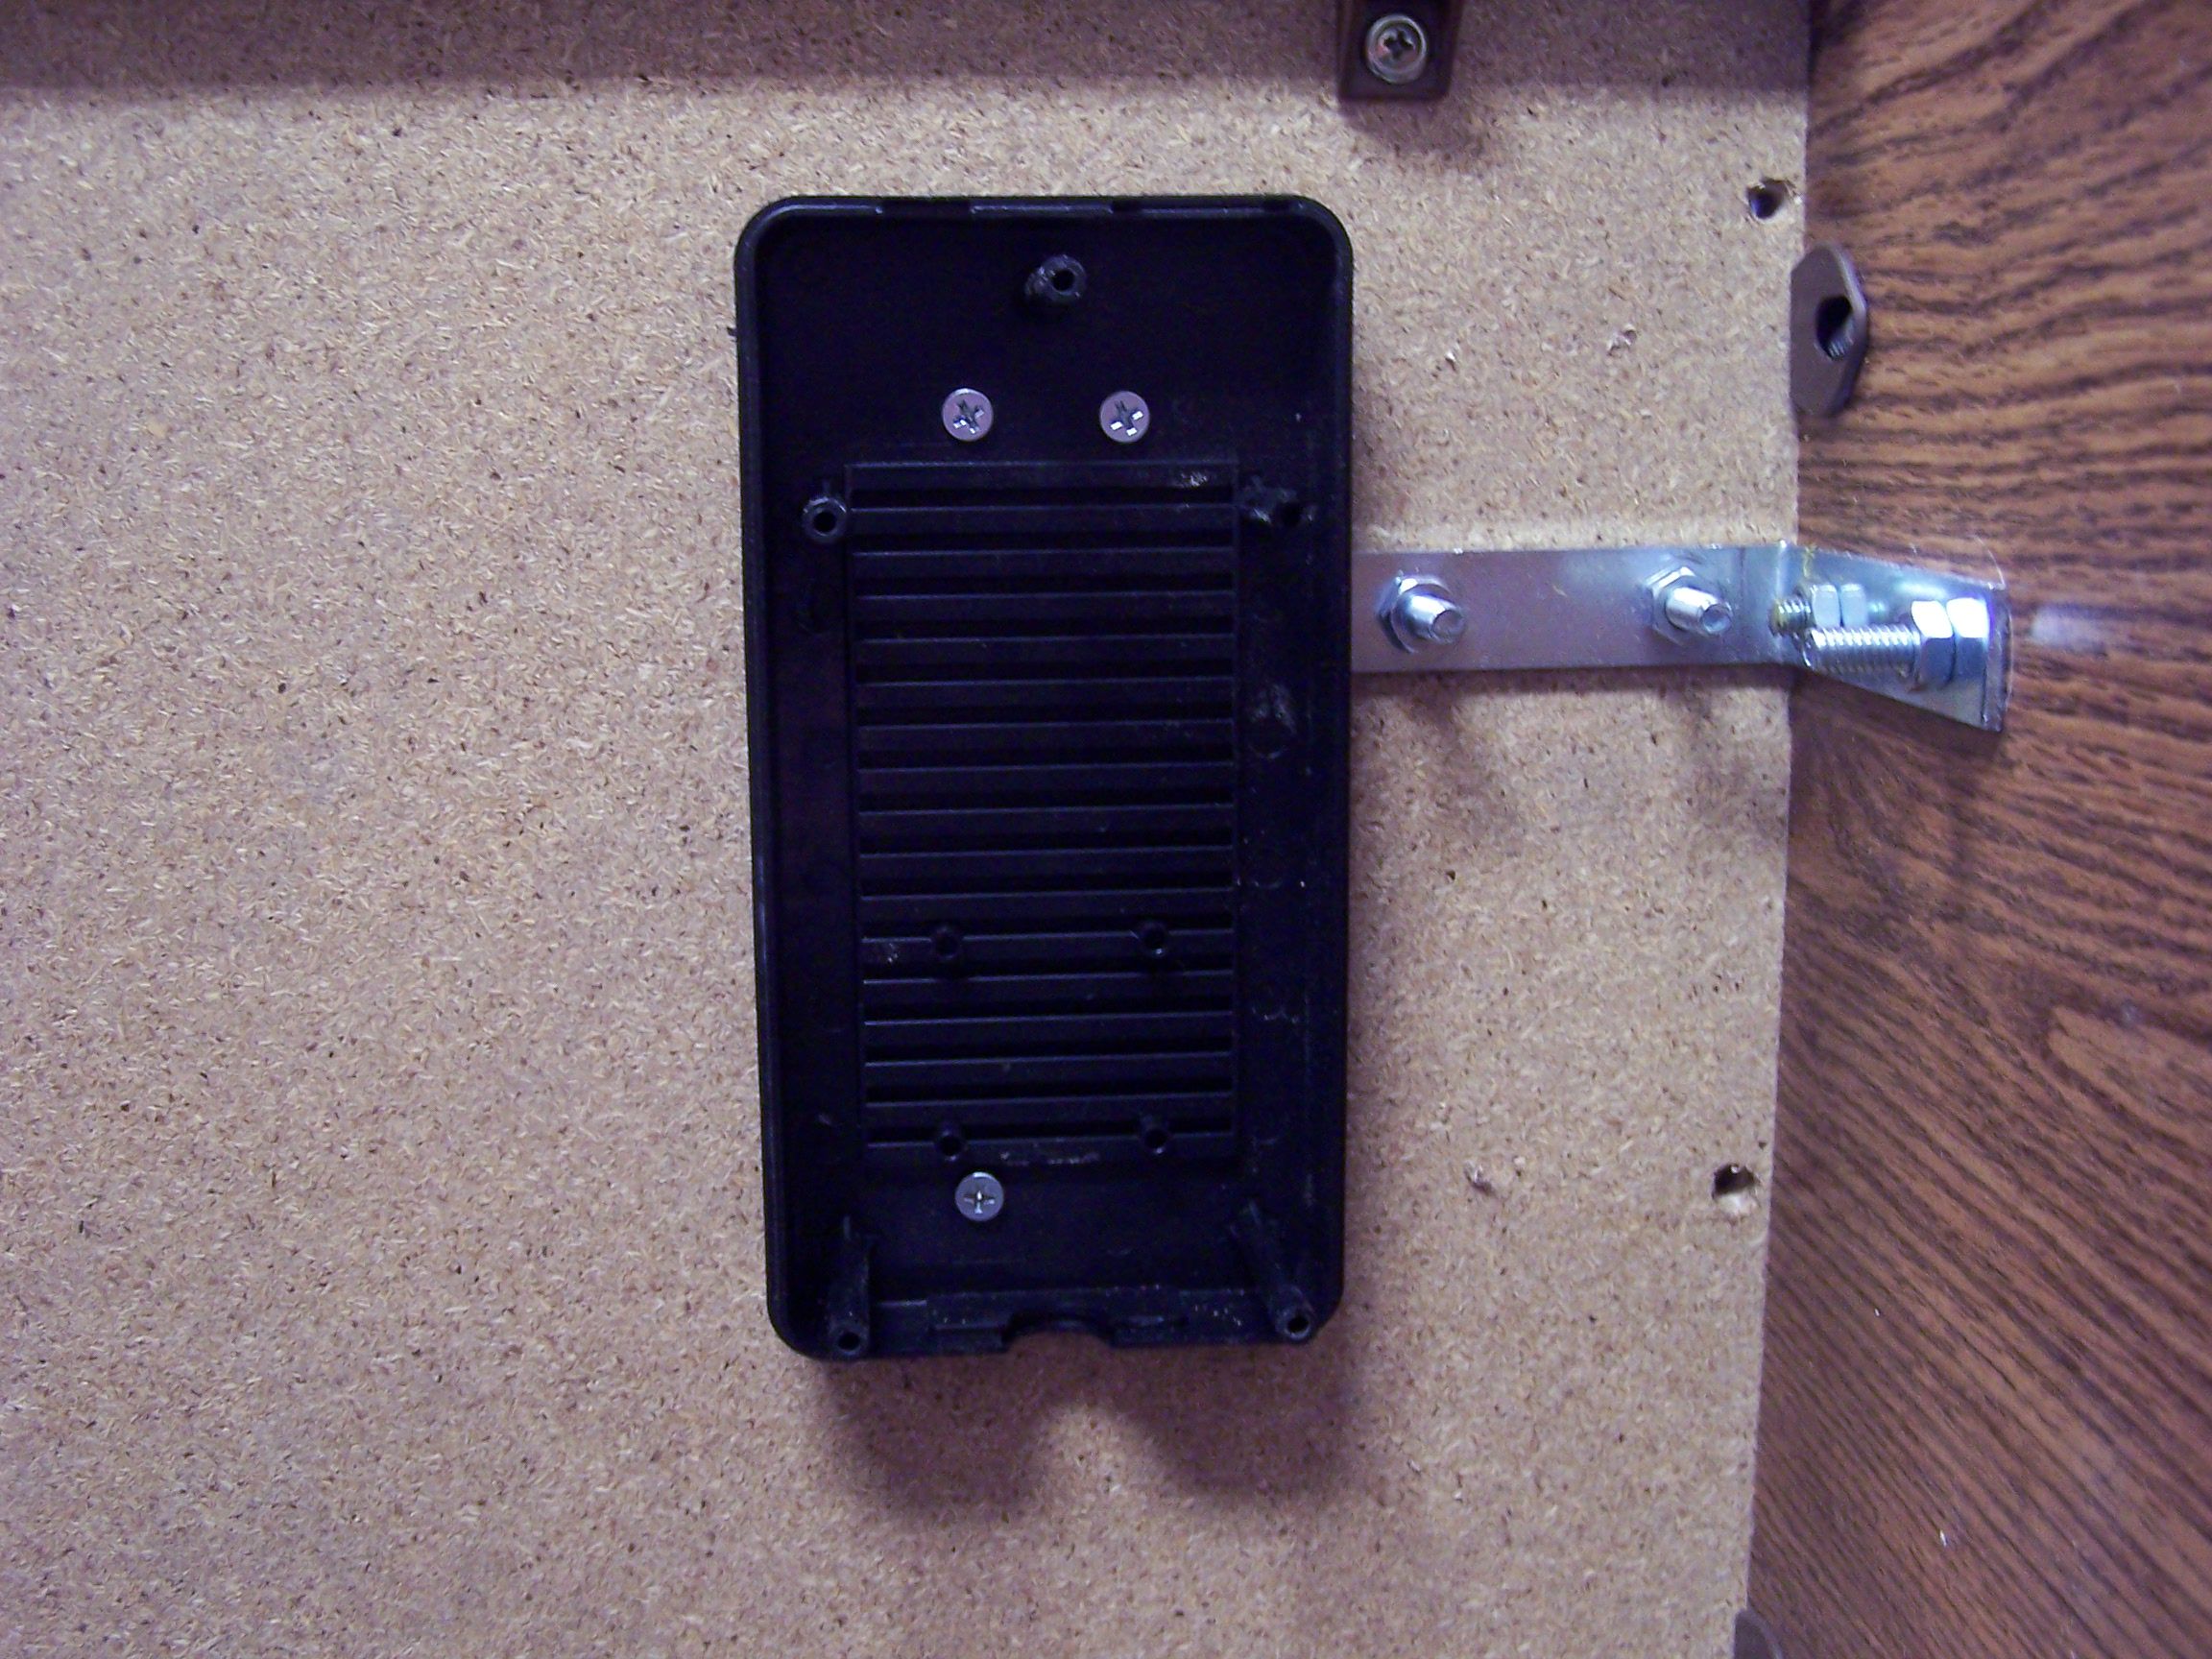 I opened the power adapter/distributor (the bit I built to plug into the PC to give me switched 12VDC outputs for the illuminators) and screwed the top case into the underside of the desk in a convenient location. |
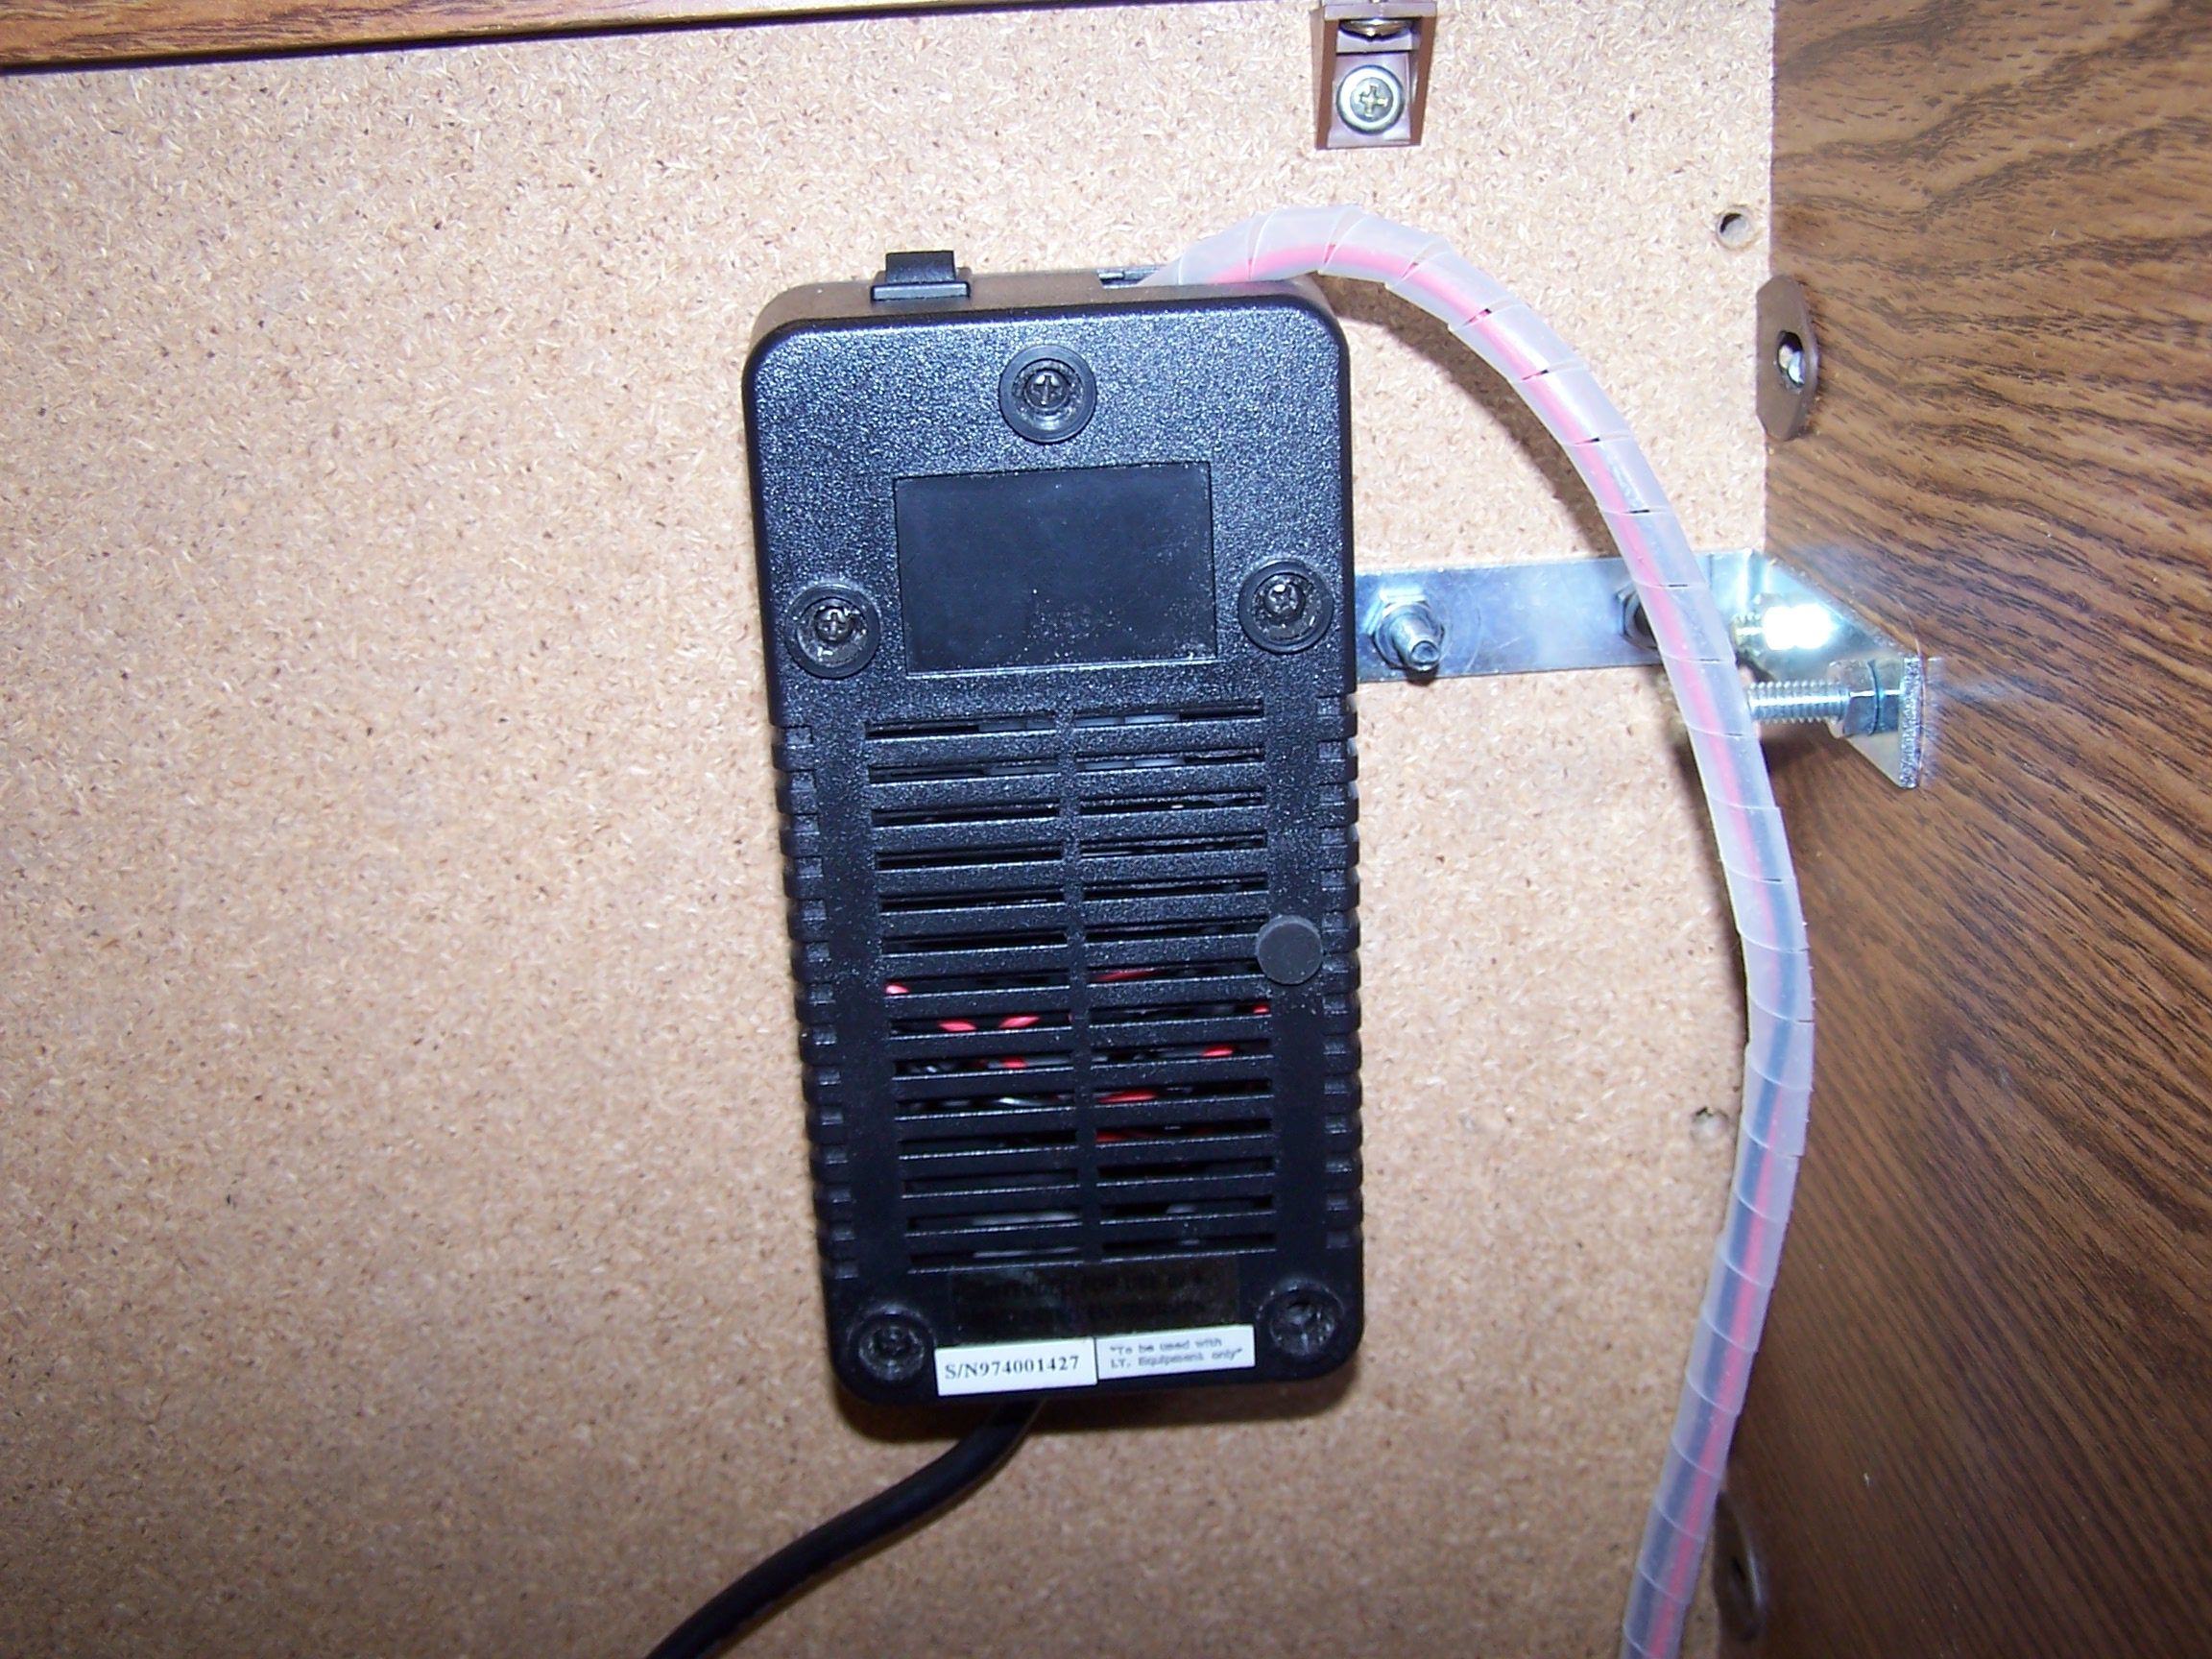 Then, I closed it back up, for that neat, clean look. Also note the large 3" reinforcing brackets - four of them were installed, as well as threaded rod to connect the outer leg, some T-shaped steel to stiffen/repair the desk surface, and a plywood "modesty screen" to prevent wobbling/"parallelogramizing" |
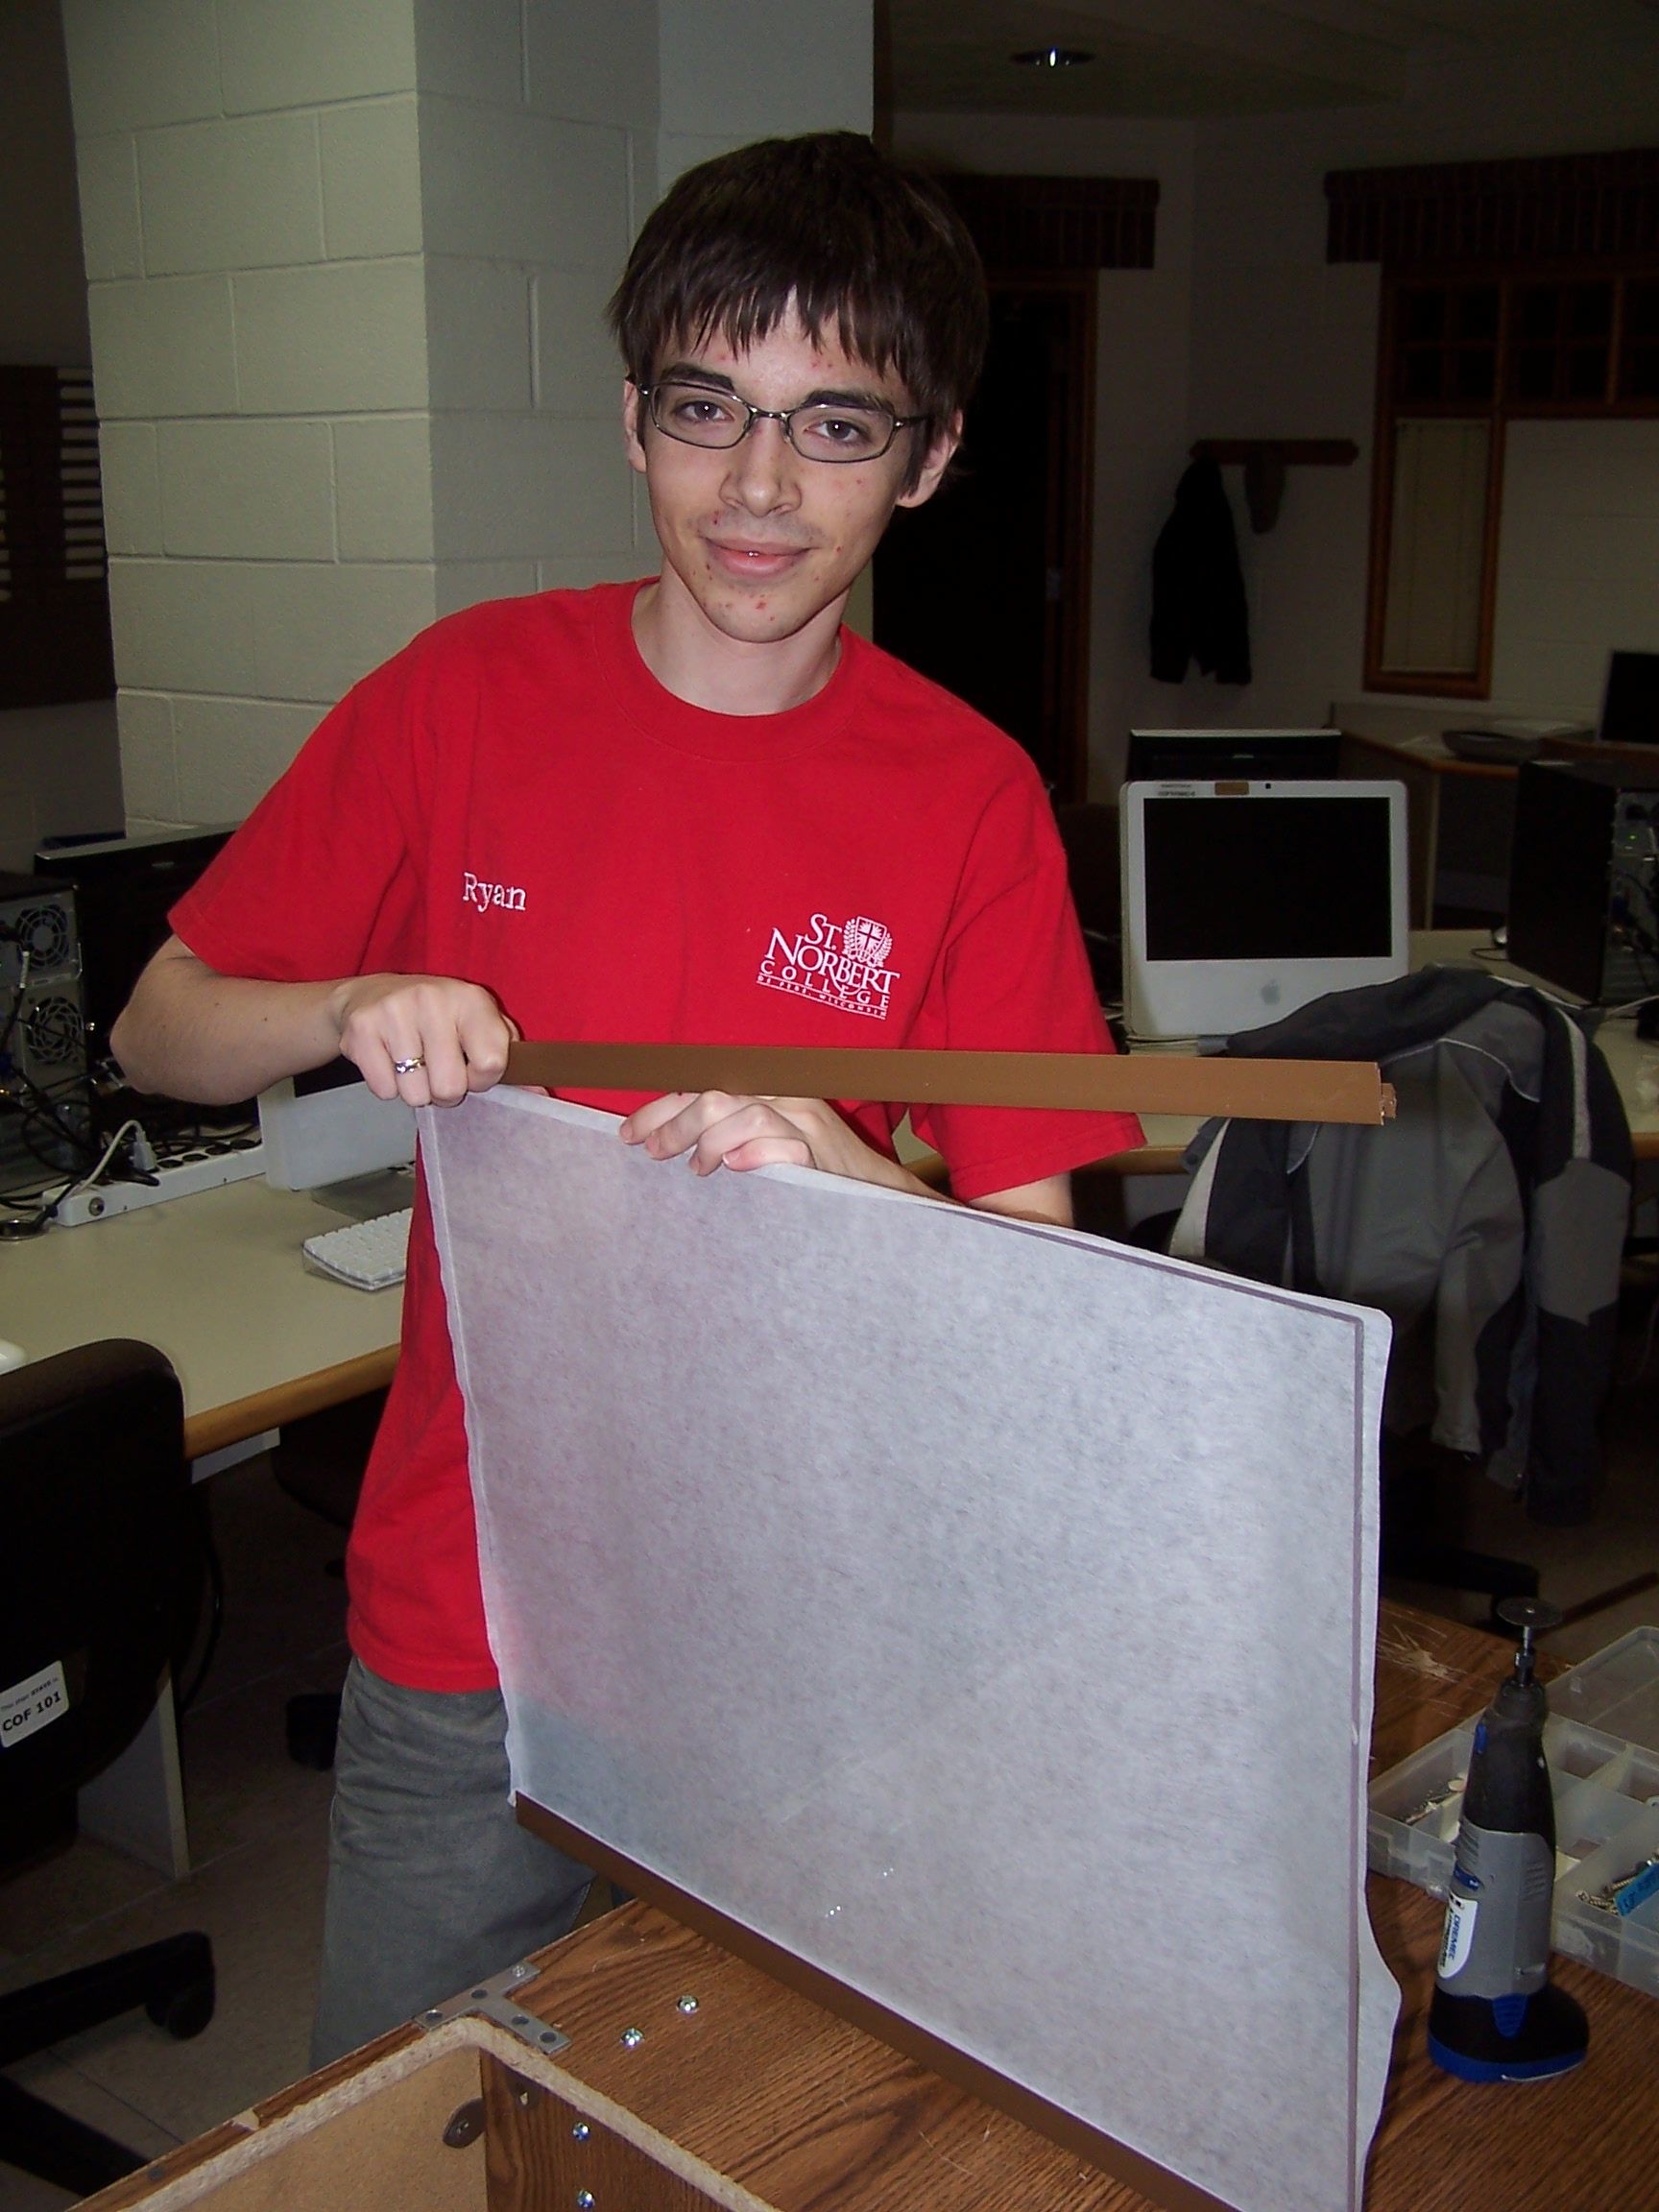 This is the step that, as far as I can tell, nobody had done before. I'm using highly economical (read: $2 for 8' piece) window/door edging as a rail for the plex and diffuser, which friction-fits everything, eliminates tape, allows for later adjustment, and avoids metalworking. Disregard my appearance - I had been crawling around in the desk for several hours by this point. |
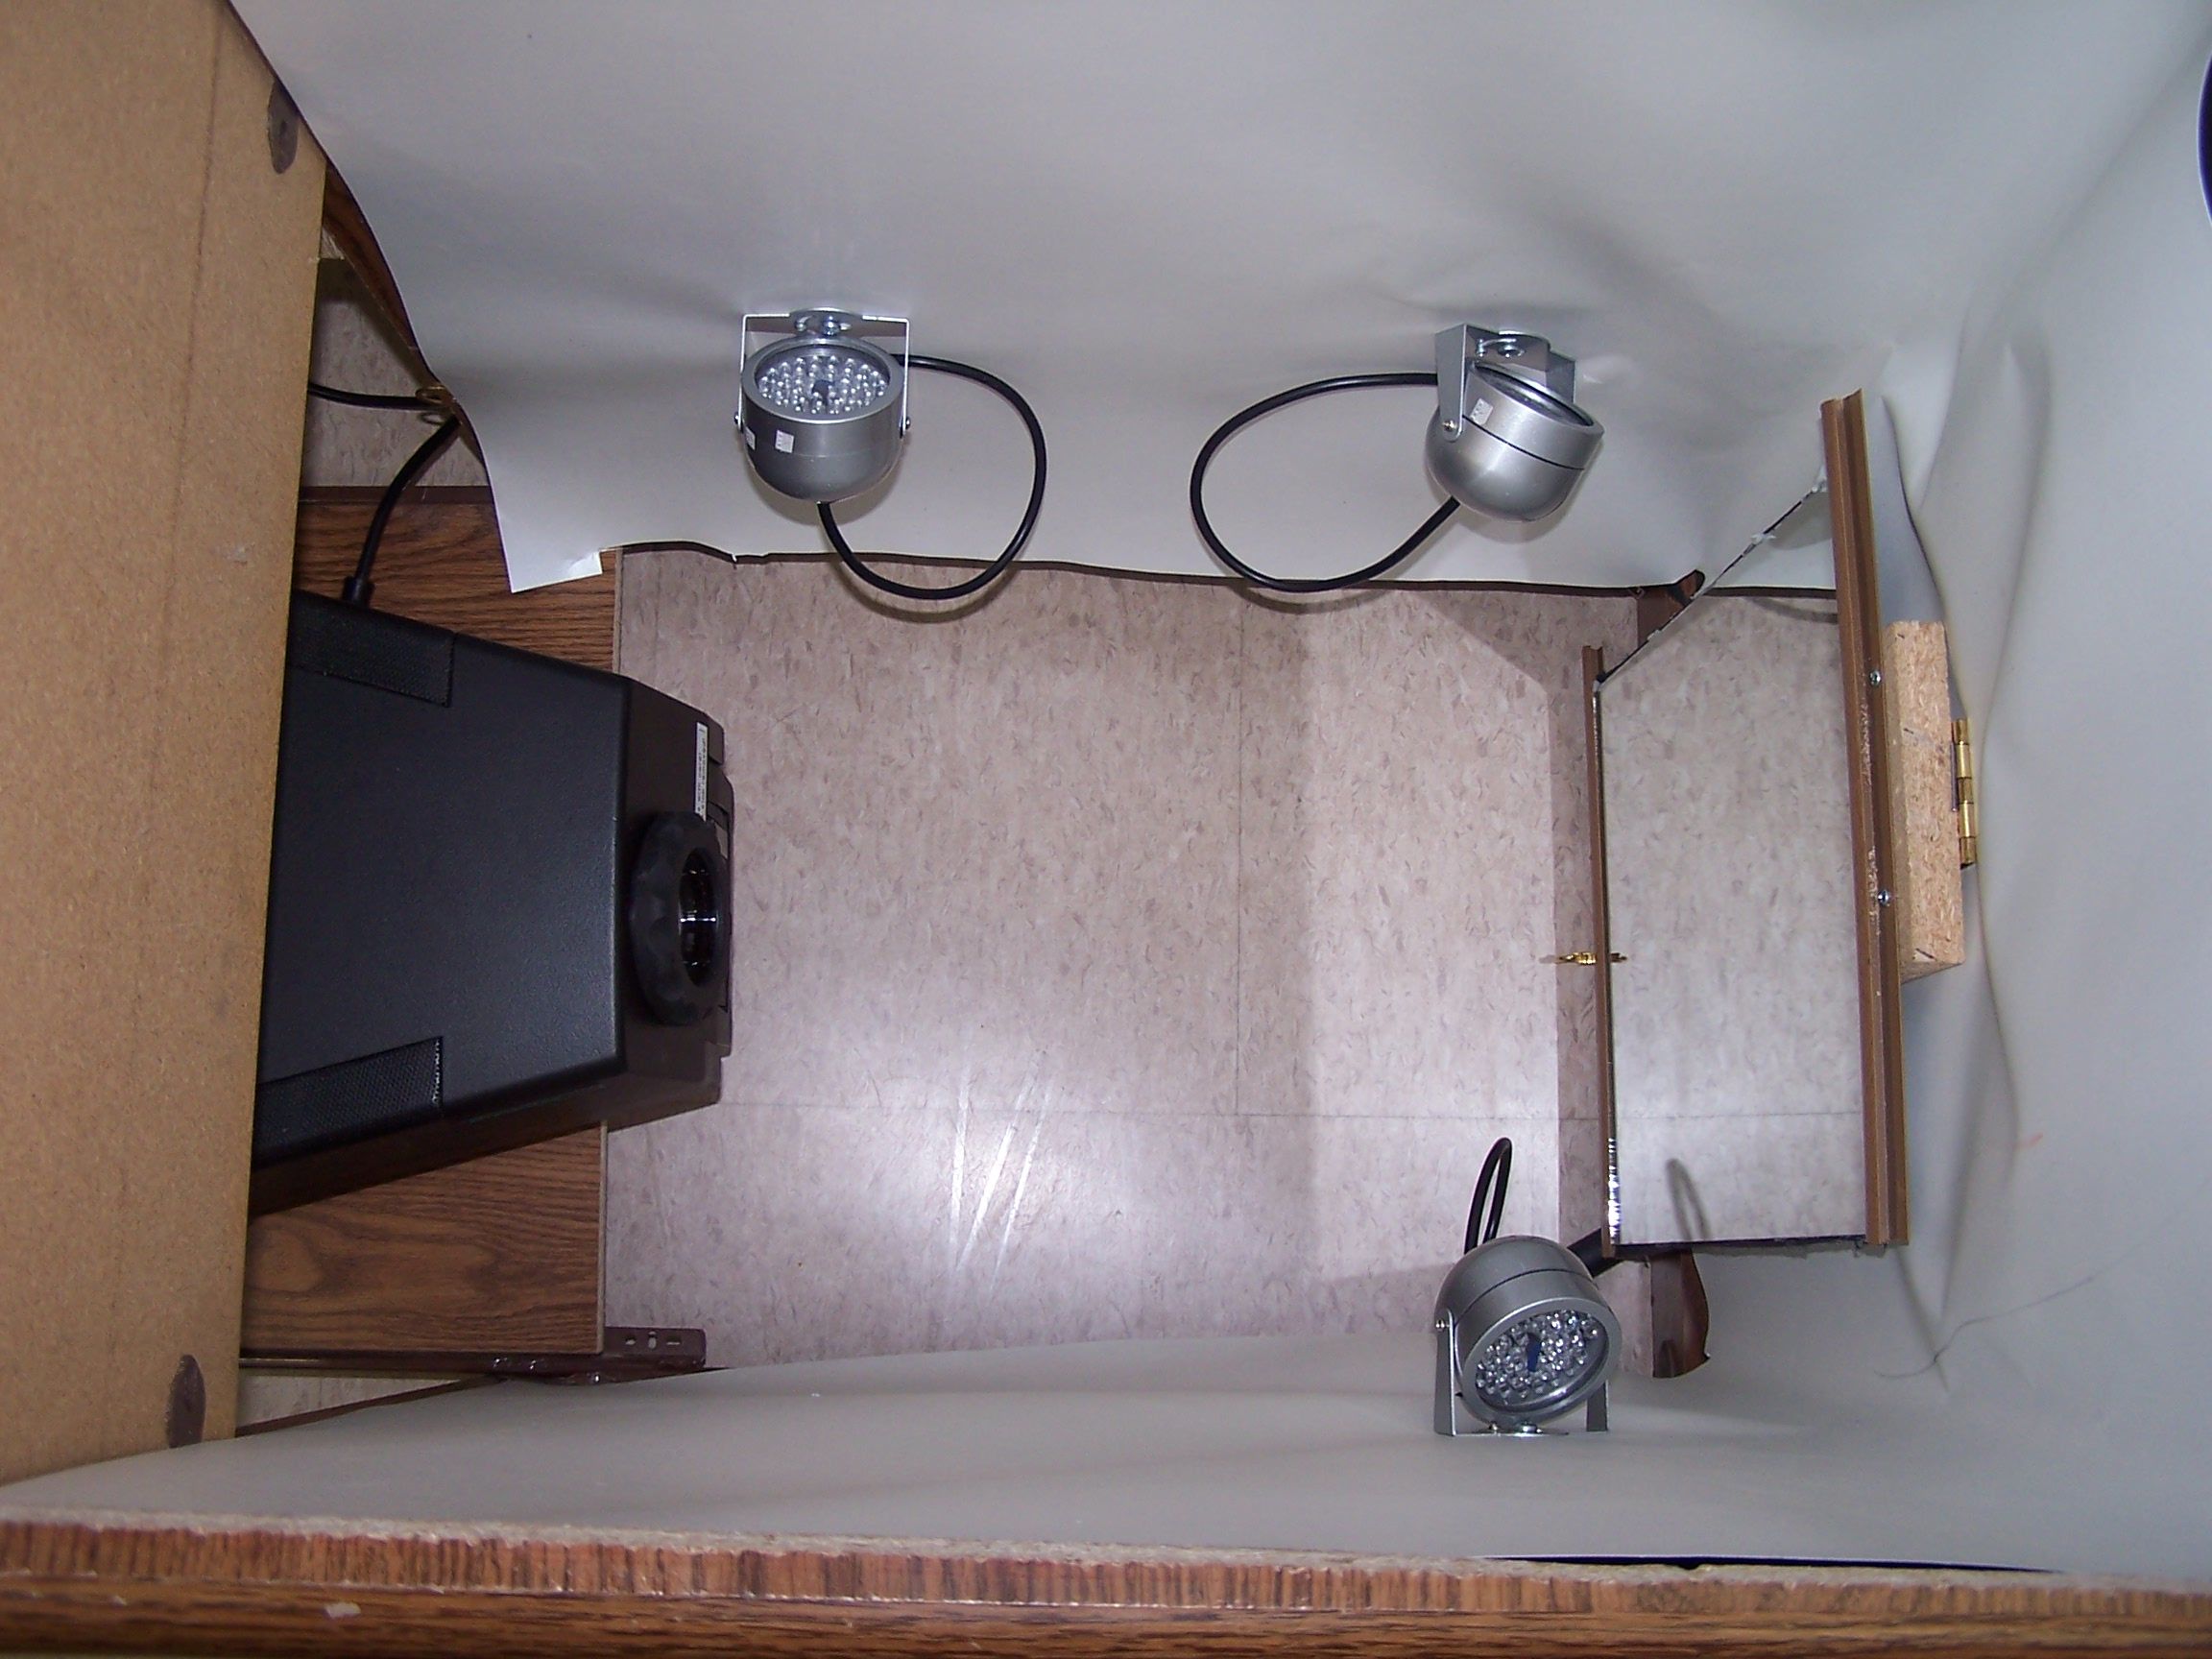 Inside the projection chamber: mirror and IR illuminators were newly installed and permanent. The spot for the fourth IR device (left out because it was separated for testing purposes) is obvious, and drilled and ready to screw in/connect. The hook on the bottom of the mirror just needs some rope and a matching hook on the drawer, so that it pulls out to the right angle when the projector slides out for use. |
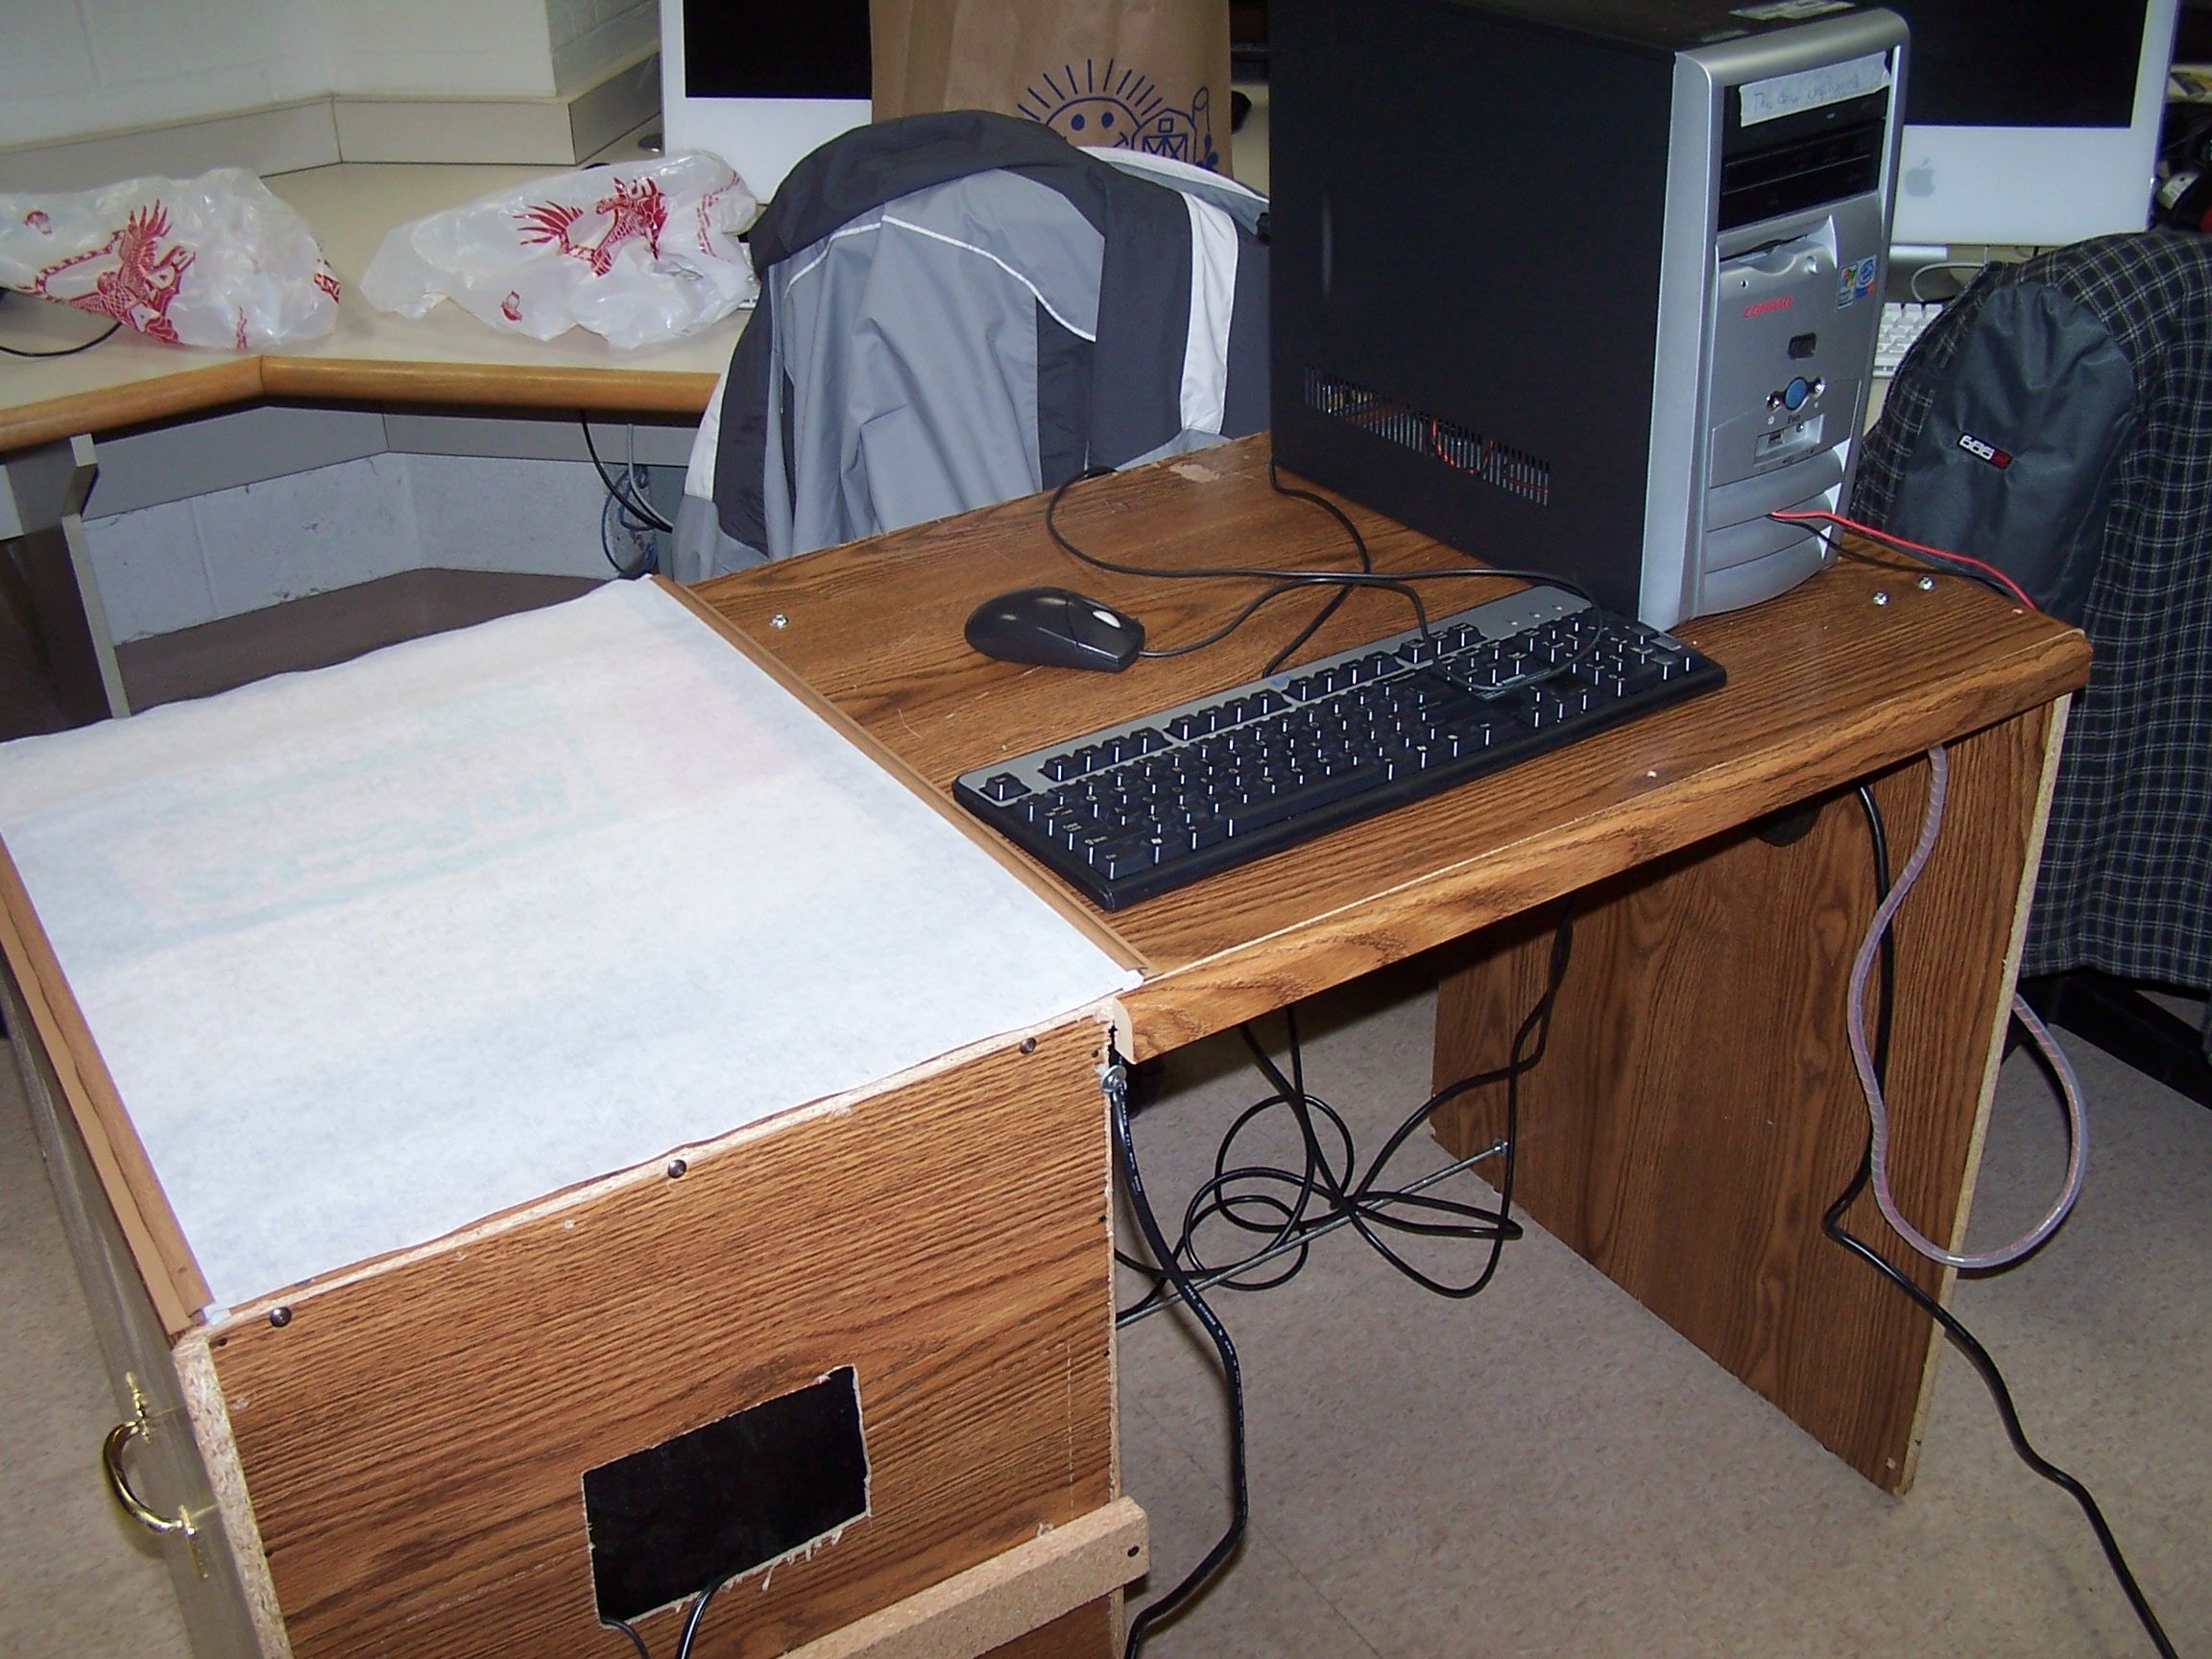 The whole thing set up! You can see a faint image from the old projector I have running on the screen. There is no "main" screen for the computer because I'm having video card problems (that is, I don't have a good enough one that supports 2 monitors) but that's just a matter of talking to the right people, and needs no real technical work. A surge strip is mounted beneath the desk (semi-permanently - hung up) by the power supply just out of sight to keep everything together and powered. This photo also lets you see the cosmetic cleanups (left hand side) as well as the addition of the threaded rod in place of the barely-wood beam that ripped out when I last tried to move it. Steel is much stronger than what 20/20 hindsight suggests to be paperboard. |
So, positive results: with the IR illuminators seemingly working and a floppy disk visible light filter badly installed, and using the older projector, I was able to see expected output from the infrared camera when I touched the surface, even with projector on, the hurdle I missed at my previous demo due to a wiring problem. This is great: I just need to screw in the hooks and permanently set up the appropriate mirror angle, mount the pre-drilled final IR illuminator, tack down the rails holding the plexiglass in place, and attach the camera with a better-cut IR filter. This time, I'll refrain from making a time estimate. :-)
My short break was thus spent productively: the above tangible productivity was gained, as well as the less tangible productivity of tending to my own upkeep and making sure I'm ready for the challenges of this last sprint without letting anything slip through the cracks. Onward!
Thursday, April 9, 2009
This past week was pretty intense with respect to my project. Between my walk-through and demo Friday, and the "Celebrating Faculty Student Collaboration" presentation on Tuesday, I made a lot of progress on the construction of the rear diffuse illumination desk. This progress led me to change my plans slightly for the presentation, and rather than set up a labor-intensive mockup using the more portable desk (intended for the lasers) and the rear DI hardware, I decided to transport the new modified rear DI desk, almost completely assembled, for the presentation. I put in quite a bit more time on the desk getting it ready for the demo, and the pace at which the work progressed pleased me. The poster presentation went very well (the poster turned out nicely, so here's a link to it [4.4mb image file]: Celebrating Collaboration Poster), and I managed to get the desk over and a demo of sorts set up. The desk suffered some damage in transport to/from the venue, and I had some technical difficulties linked to some wires that came loose which I only found afterward, but I was able to improvise a bit and get something going. (A good reminder of the electrical design lesson to never let your electrical connection serve as your primary physical connection... Screw terminals are not that sturdy.)
So, progress report: I now only have about an hour of construction on that desk left, and probably about an hour or so of repairs, plus the purchase of some reinforcing brackets. I found some really great material in the windows and doors department that will let me wrap the diffusion surface over the clear plexiglass and slide it into rails that can be screwed in to the desk. Best part: these rails, which actually match the color/fake woodgrain of the desk, come in an 8' length for about $3, and fit my needs perfectly.
Over break, I will get that construction done, and also get the software as complete as possible while still taking some time to recover and prepare for the end-of-semester sprint that I feel quickly approaching. The laser equipment sould hopefully be in next week, and since that requires actually less complicated assembly, for the most part, it should be good timing-wise.
Sunday, March 30, 2009
Lots of progress this week: this is a placeholder entry only until I can sleep, take a math test, then put up a more complete entry :D. In short: Established design and safety plans for second device (using the "laser light plane" system) jointly with Dr. Olson, ordered the necessary parts for the laser-based device, picked up acrylic sheets contributed by Midland Plastics Inc., gave walkthrough presentation and attempted demo, prepared a large, lovely poster for Celebrating Student and Faculty/Staff Collaboration presentation Tuesday the 31st, and just tonight, breathed in about a pound of sawdust in the process of deconstructing then re-constructing the large brown desk (it's now almost ready to use, so hopefully I will find time to have it ready to use on Tuesday rather than a temporarily-assembled rear DI setup in the sewing machine desk). Yay!
Monday, March 23, 2009
Here are a few photos - a new page under "Hardware" will be coming soon. Click to enlarge:
 Apparently the brackets came with cheap screws. I replaced them all. |
 Using good-quality screws, we got the platforms, then the wheels themselves, attached. If anyone has a router (for wood, not packets) they could lend me so I can round those edges nicely, it would be swell. |
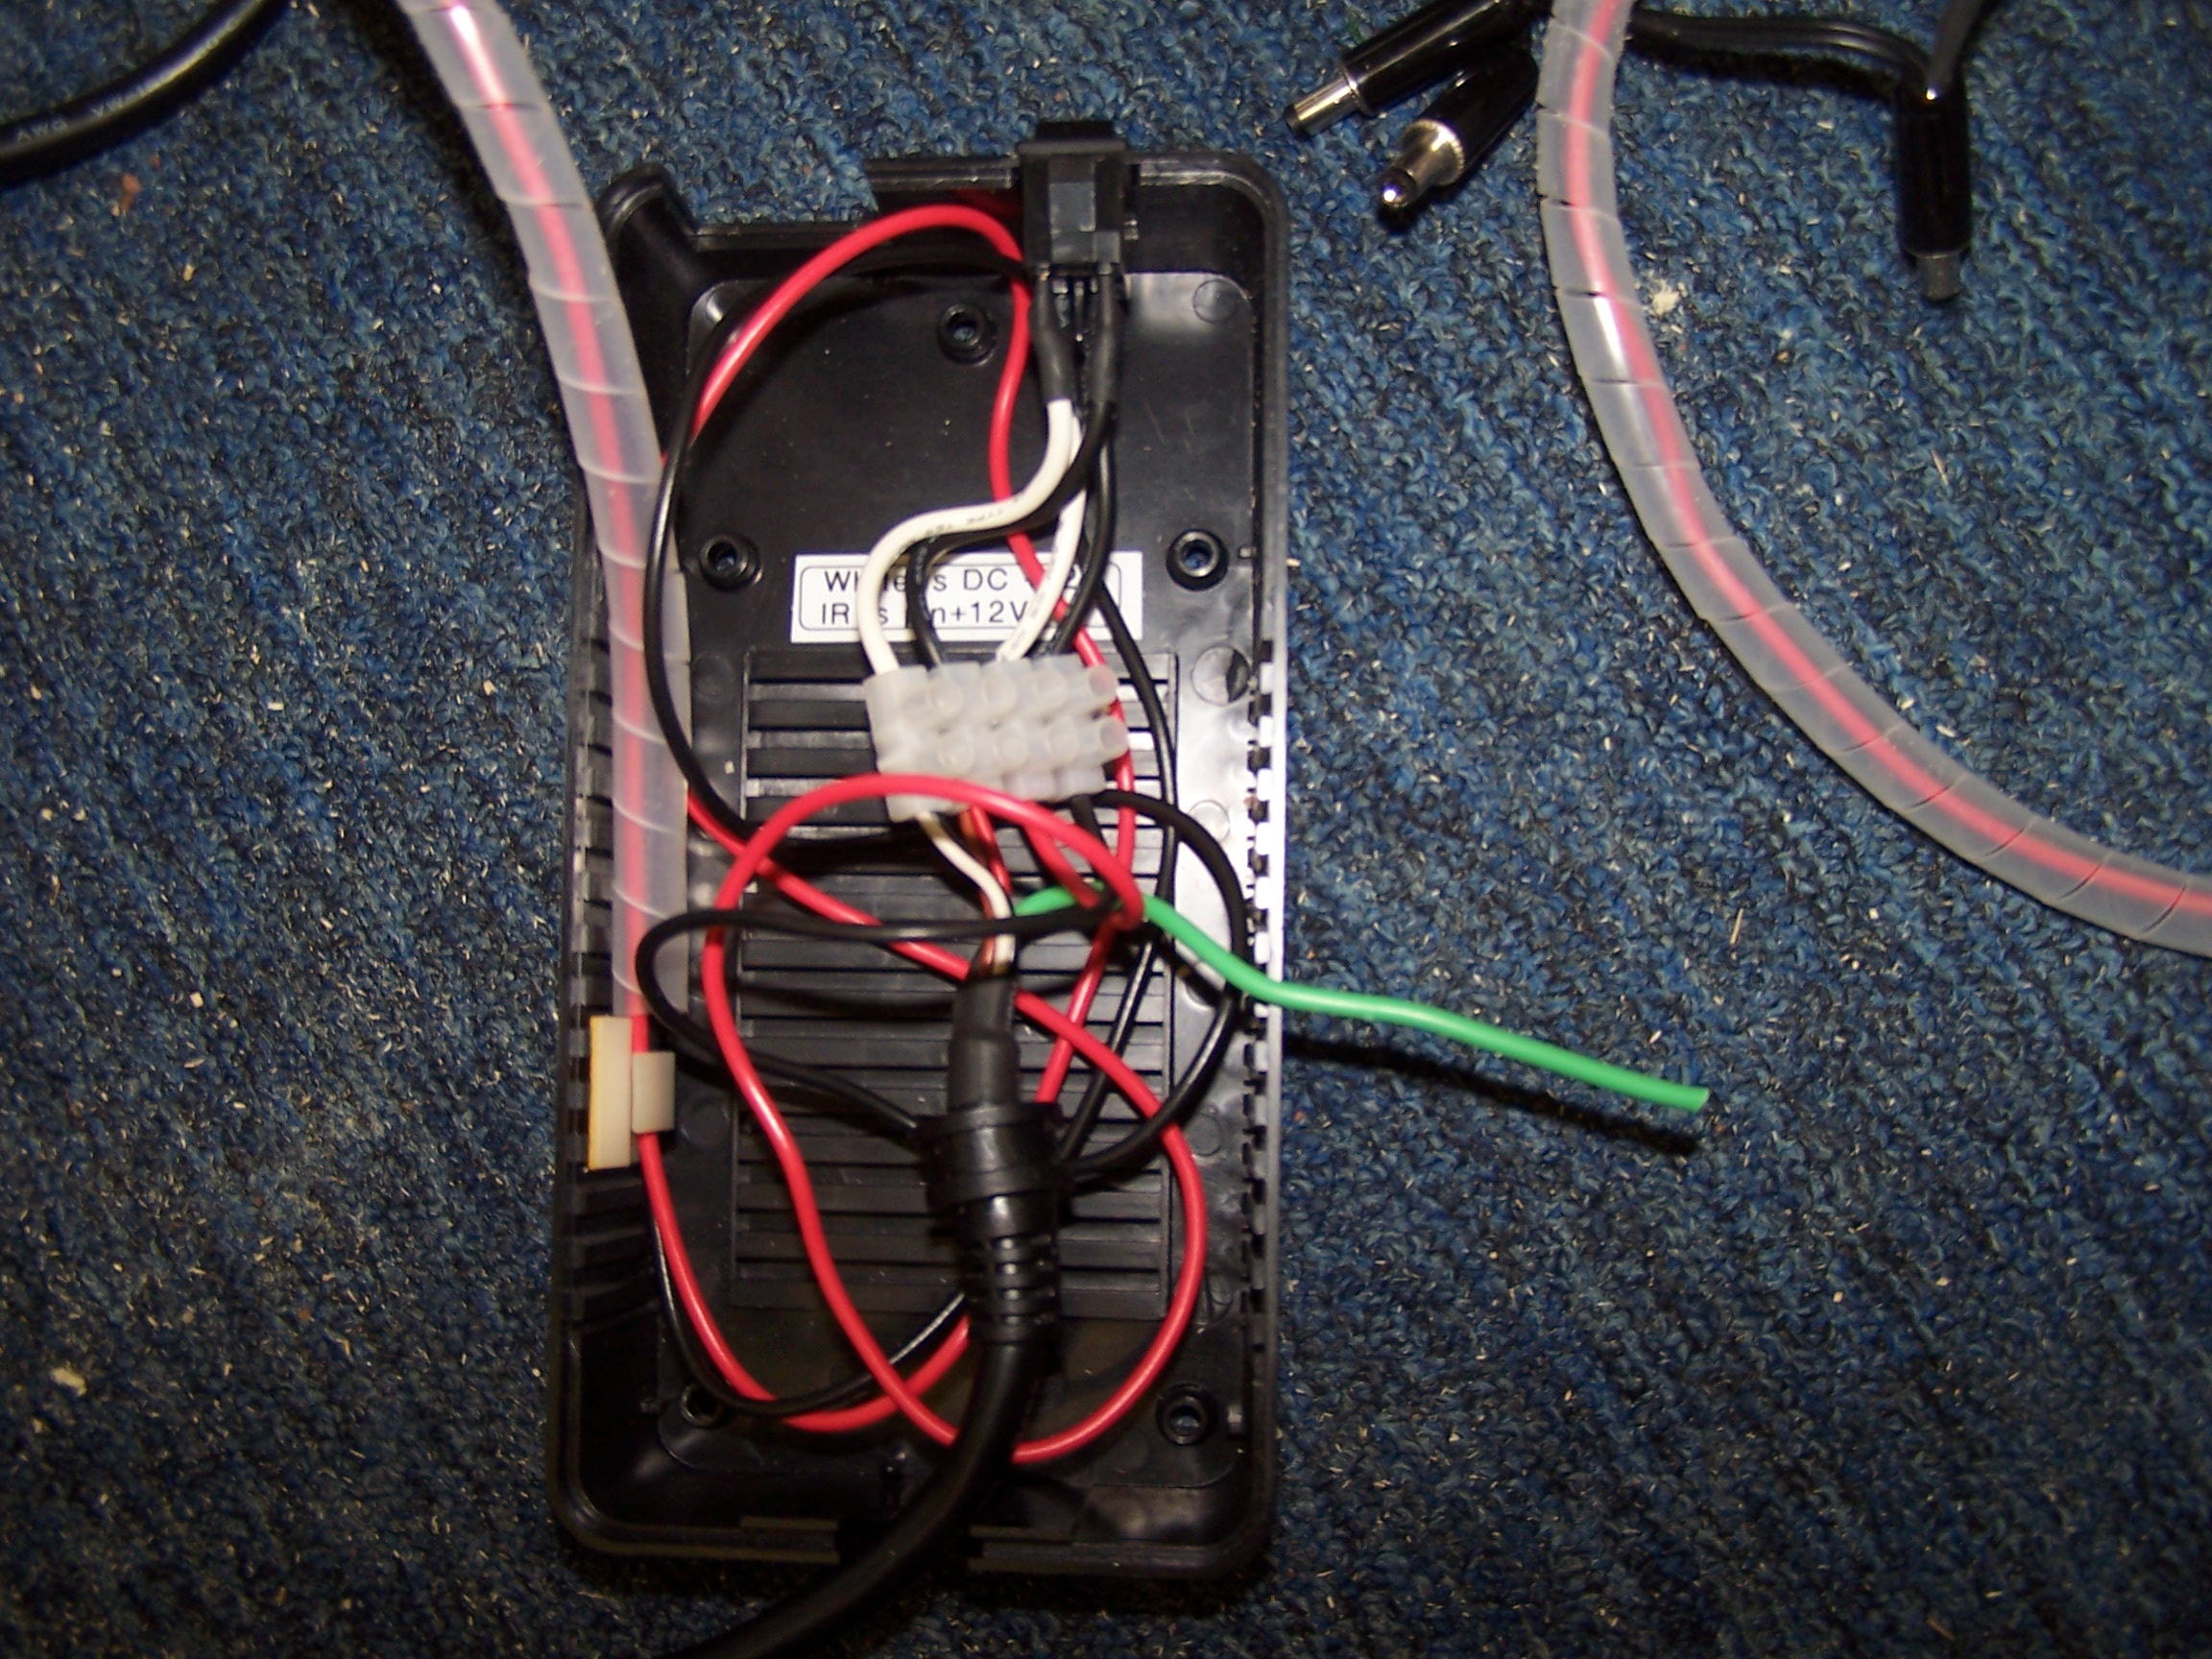 Inside the adapter box, I removed the old circuitry and made neat connections to be able to switch the 12V DC from the computer, and send it out over the existing DC output cables/plugs. It's really quite clean - the "mess" you might see is just extra length on the box<->computer cable. |
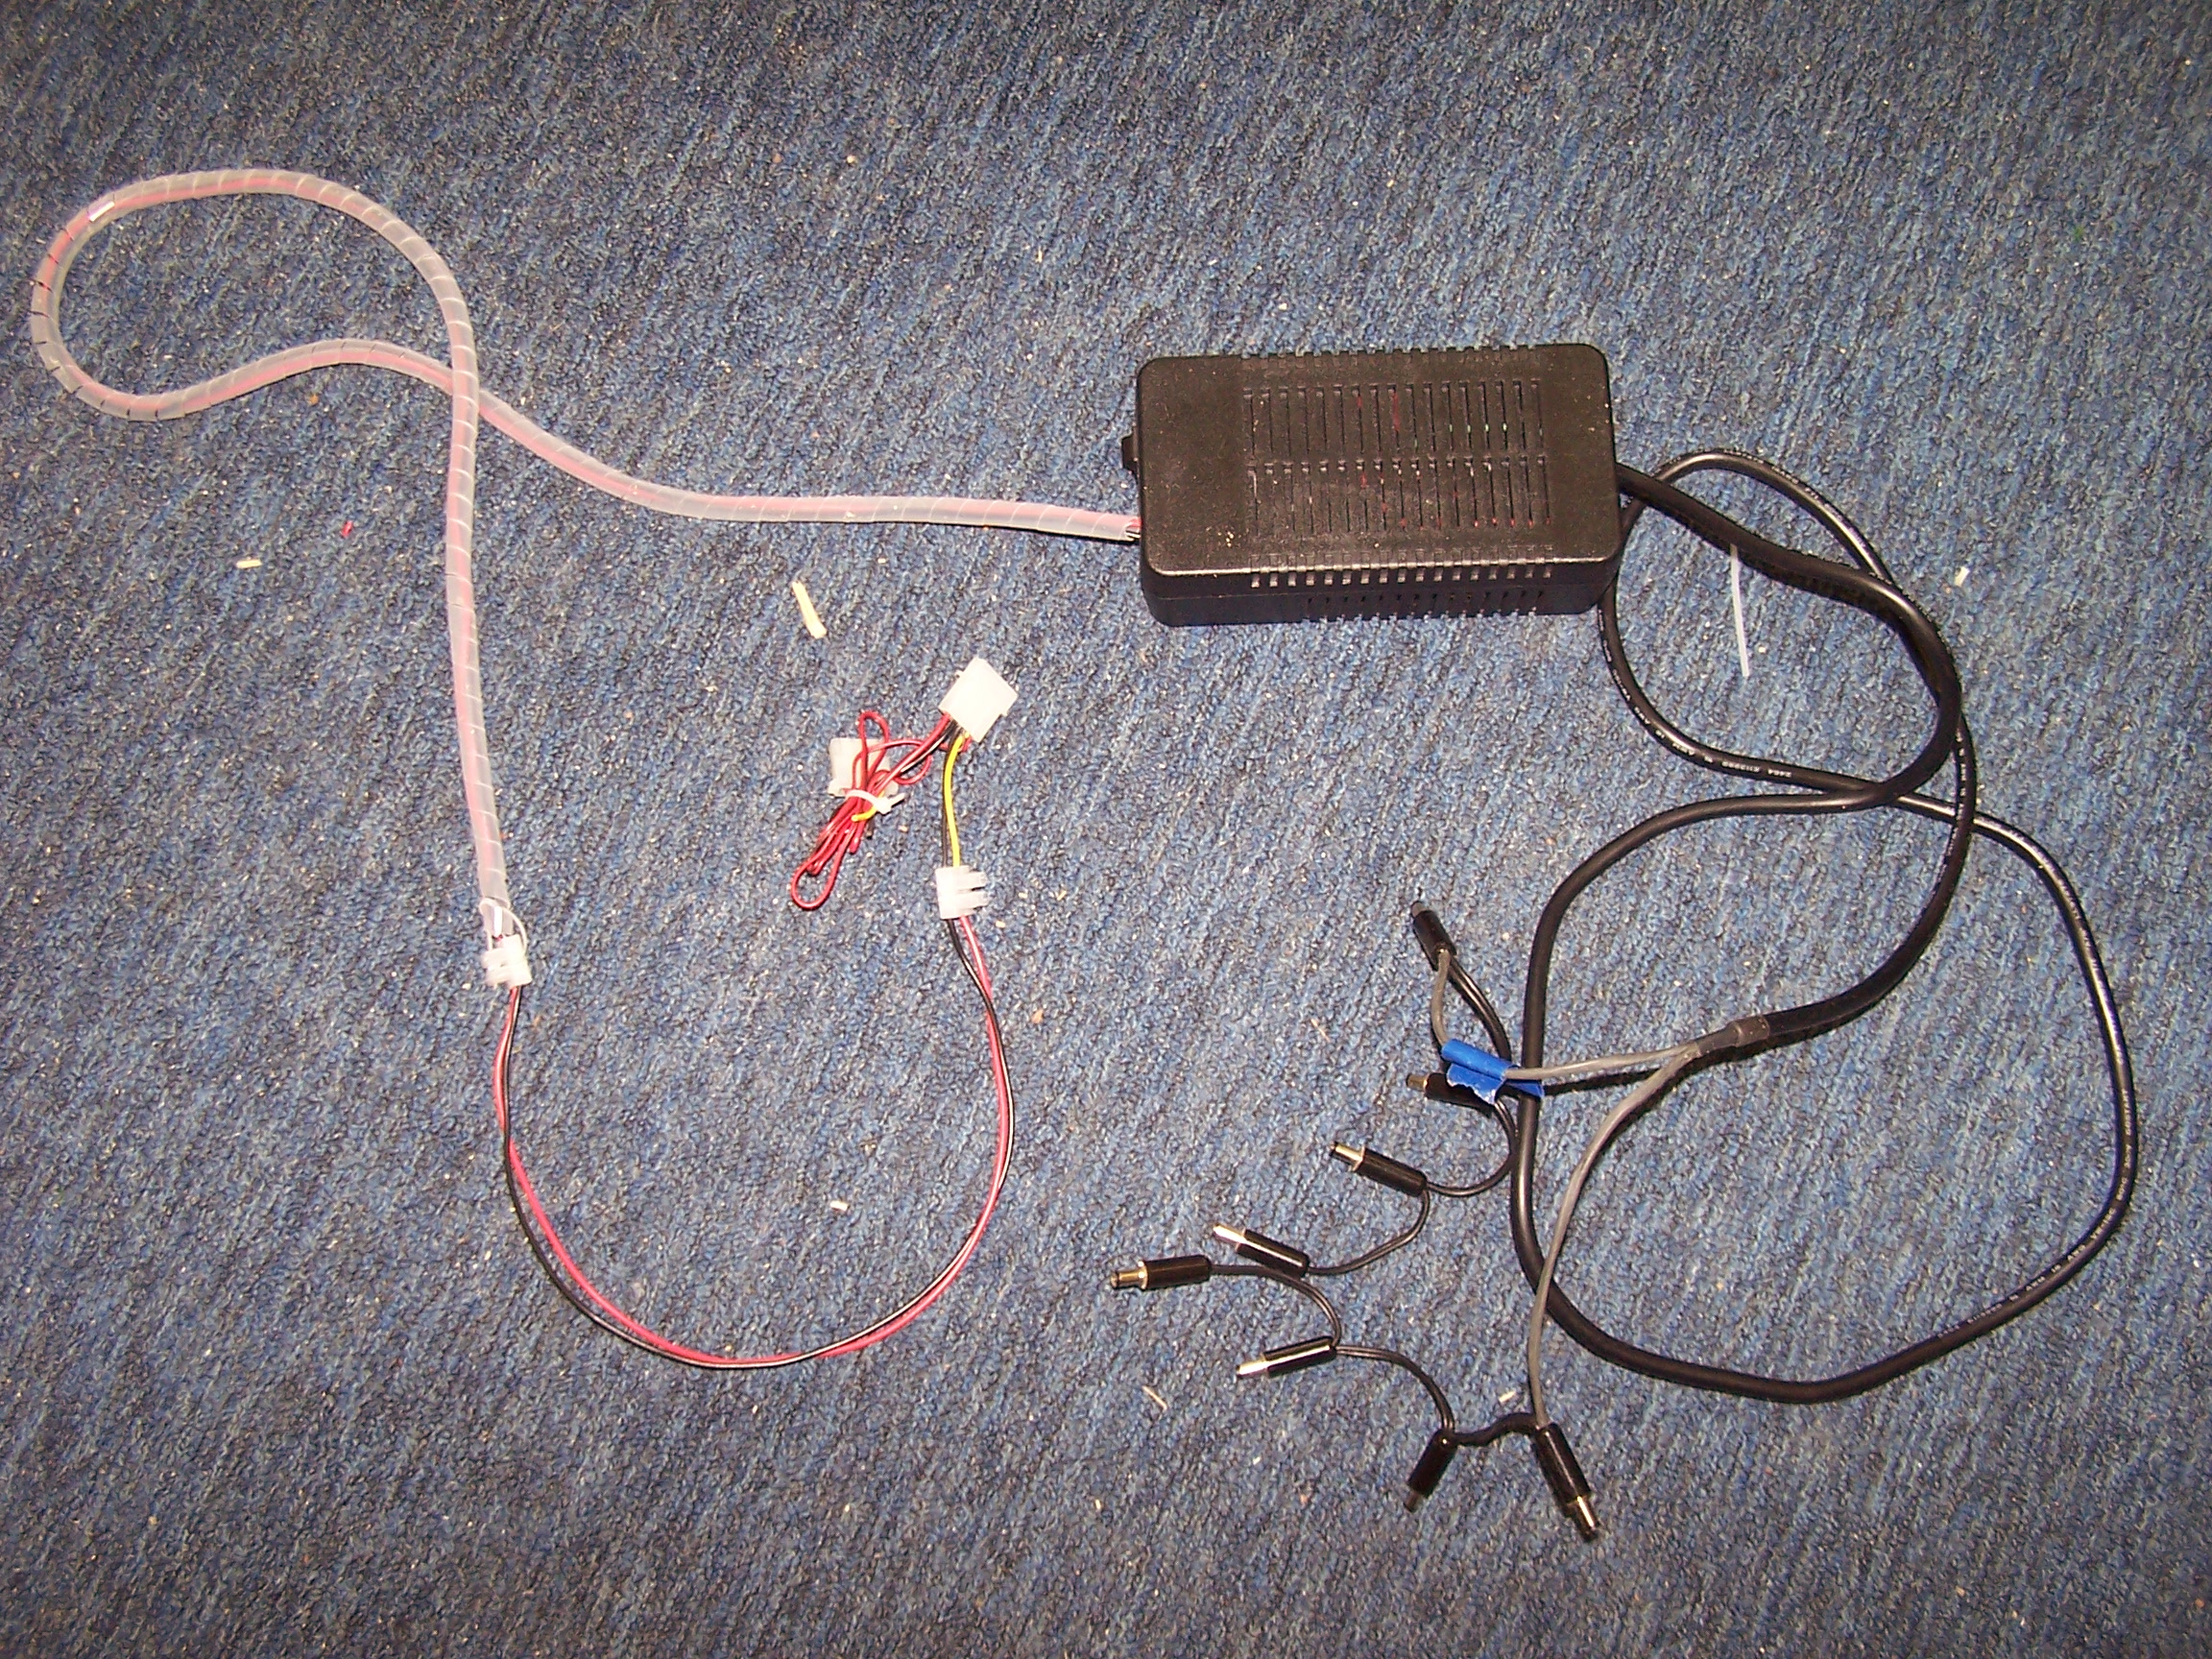 Here you can see the part that plugs in inside the computer and the two wires to lead out of ventilation holes, which then connect to the long white-wrapped cable via screw-terminals and go into the completed switching/distribution box. |
Sunday, March 22, 2009
I'll put up more details, along with pictures, later when it's not so late at night, but I wanted to make a brief update on the remaining progress I made during spring break. With the help of Katie Haines, then my dad, I modified the sewing machine desk to have bases on the bottoms of the legs with rubber wheels that can swivel and lock, so that it is portable without being too painful to move. It seems that it also might be nice to have handles on the side: if I can find some and get a moment, I'll install them, since they would be easy to install to make the desk super simple to carry over particularly rough ground or stairs.
Also, I did some electrical work: using a variety of scavenged pieces, including a strange old DC adapter that I had, with multiple DC out plugs and a nice roomy reusable case, I put together an adapter that will allow me to plug my infrared illuminators into the quality 12 V supply from within a computer, while being switchable, as well as disconnectable from the computer using screw terminals. The finished product here looks really polished, and should be very reliable. I need to hunt around a bit to find DC plugs that fit the illuminators, however, as the ones that were already connected to these wires fit the outside diameter of the socket, but not the inside pin diameter.
I also made more progress on software, connecting my previous work to a multi-touch canvas framework, and have figured out almost completely how the pile-locating algorithm will be implemented: I was able to find information (and code libraries) on already developed hierarchical clustering algorithms, which I simply needed to adapt to separate things into a number of piles, rather than into a full binary tree.
This week: get a demo ready for my walk-through, get a poster over to media services to the printed for next Tuesday, meet with Dr. Olson about the lasers, and meet with my plastics company representative to finalize those arrangements.
Tuesday, March 17, 2009
It has been a productive spring break so far. I met with Dr. Olson, a physics professor at St. Norbert, to discuss my second device and its use of lasers. Right now, it seems that the fact that I would need to purchase laser blocking goggles will make this particular construction in feasible at this time on the budget that I have, since the goggles alone are $115. However, this is not too much of a setback, since I can easily change my plans to build a similar device based on LEDs instead of lasers.
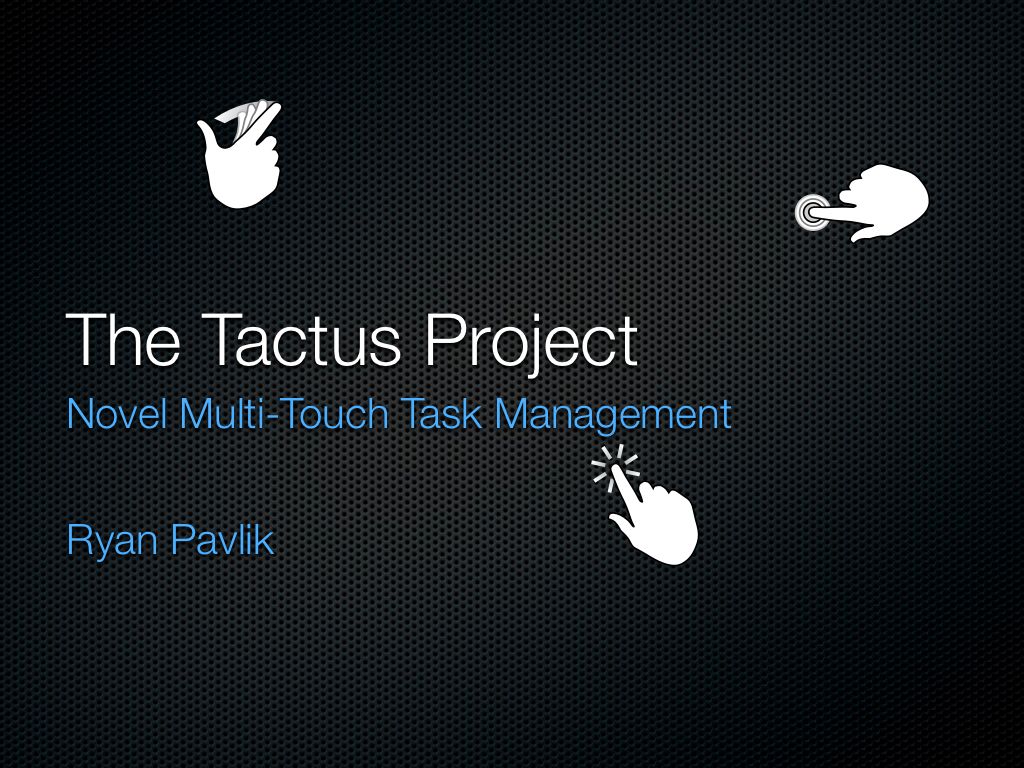
I also have completed making the presentation for my walk-through. I'm using Apple Keynote, so I was able to add some nifty animations to really show the gestures, better than I could just by pointing or with a laser pointer. I think it looks pretty classy, and it will work well. This presentation will also serve as a good base for my final presentation.
Here's the title slide as a teaser. Click to enlarge.
Today, I received my infrared illuminators from deal extreme in the mail. In looking around my basement, I wasn't able to find a standalone 12 V adapter that works immediately with these illuminators. However, I was able to find some nonfunctioning multiple plug power adapters that have the correctly sized plug on them. I will be scavenging those plugs and connecting them to a computer power supply in order to get 12 V. I will put some pictures up later.
I also met with the branch manager of a local plastics company. I brought in the projector, and looked at a number of samples of frosted acrylic to see which would work best. It looks like using Plexiglas P-80 one side frosted or the Plexiglas clear edge one side frosted are the best solutions for use as a projection surface and the diffusion needed for diffuse illumination multi-touch sensing: it really looks sharp, and better than expected! I am waiting to hear back from him on whether he can find pieces of this material affordably, hopefully as scrap or excess from another job.
I also figured out how I will be attaching wheels to the sewing machine desk. Portable. Because in the legs of the desk are smaller than the smallest base wheels available at Menards, I will have to use angle brackets and pieces of scrap wood to make a larger bottom surface. It looks like I should have enough money in my budget to actually get rubber wheels, as opposed to plastic, which will make transporting the unit over bumpy surfaces much, much more pleasant. I might as to cover a few of these costs out of my own pocket, however, that's alright with me, especially if it means I don't have to carry the desk and can roll it instead.
I did the calculations on replacing the backlight of the LCD screen I will be using for the second device. While my original plan was to use white LEDs to illuminate the display, the calculation tools I've used suggested an alternate plan. When I calculated the number of lumens that would be needed, a tool mention that it was approximately the output of a 100 W incandescent bulb. I know from experience that a daylight compact fluorescent bulb as approximately the same color temperature as an LCD backlight does, since I use one as a biased light behind my own display to reduce eyestrain. Since I do not need to fit the display with its replace backlight back into its original in case, size is not really an issue. Thus, it seems logical, and much cheaper, to use a one of these daylight compact fluorescent bulbs as the replacement backlight for my display. I will test this theory tomorrow, and see if it is bright enough to do the job. Bonus: not only is it cheaper, I don't have to wait for shipping!
Because many of the suppliers are the same for my first and second hardware devices, though this hardware is taking longer than expected, I am also taking care of much of the second device in parallel. I have some questions posted to the forums to verify my plans, and the only additional parts that I need are to be ordered domestically, rather from Hong Kong, so shipping should be much faster.
Now, back to work!
Tuesday, March 10, 2009
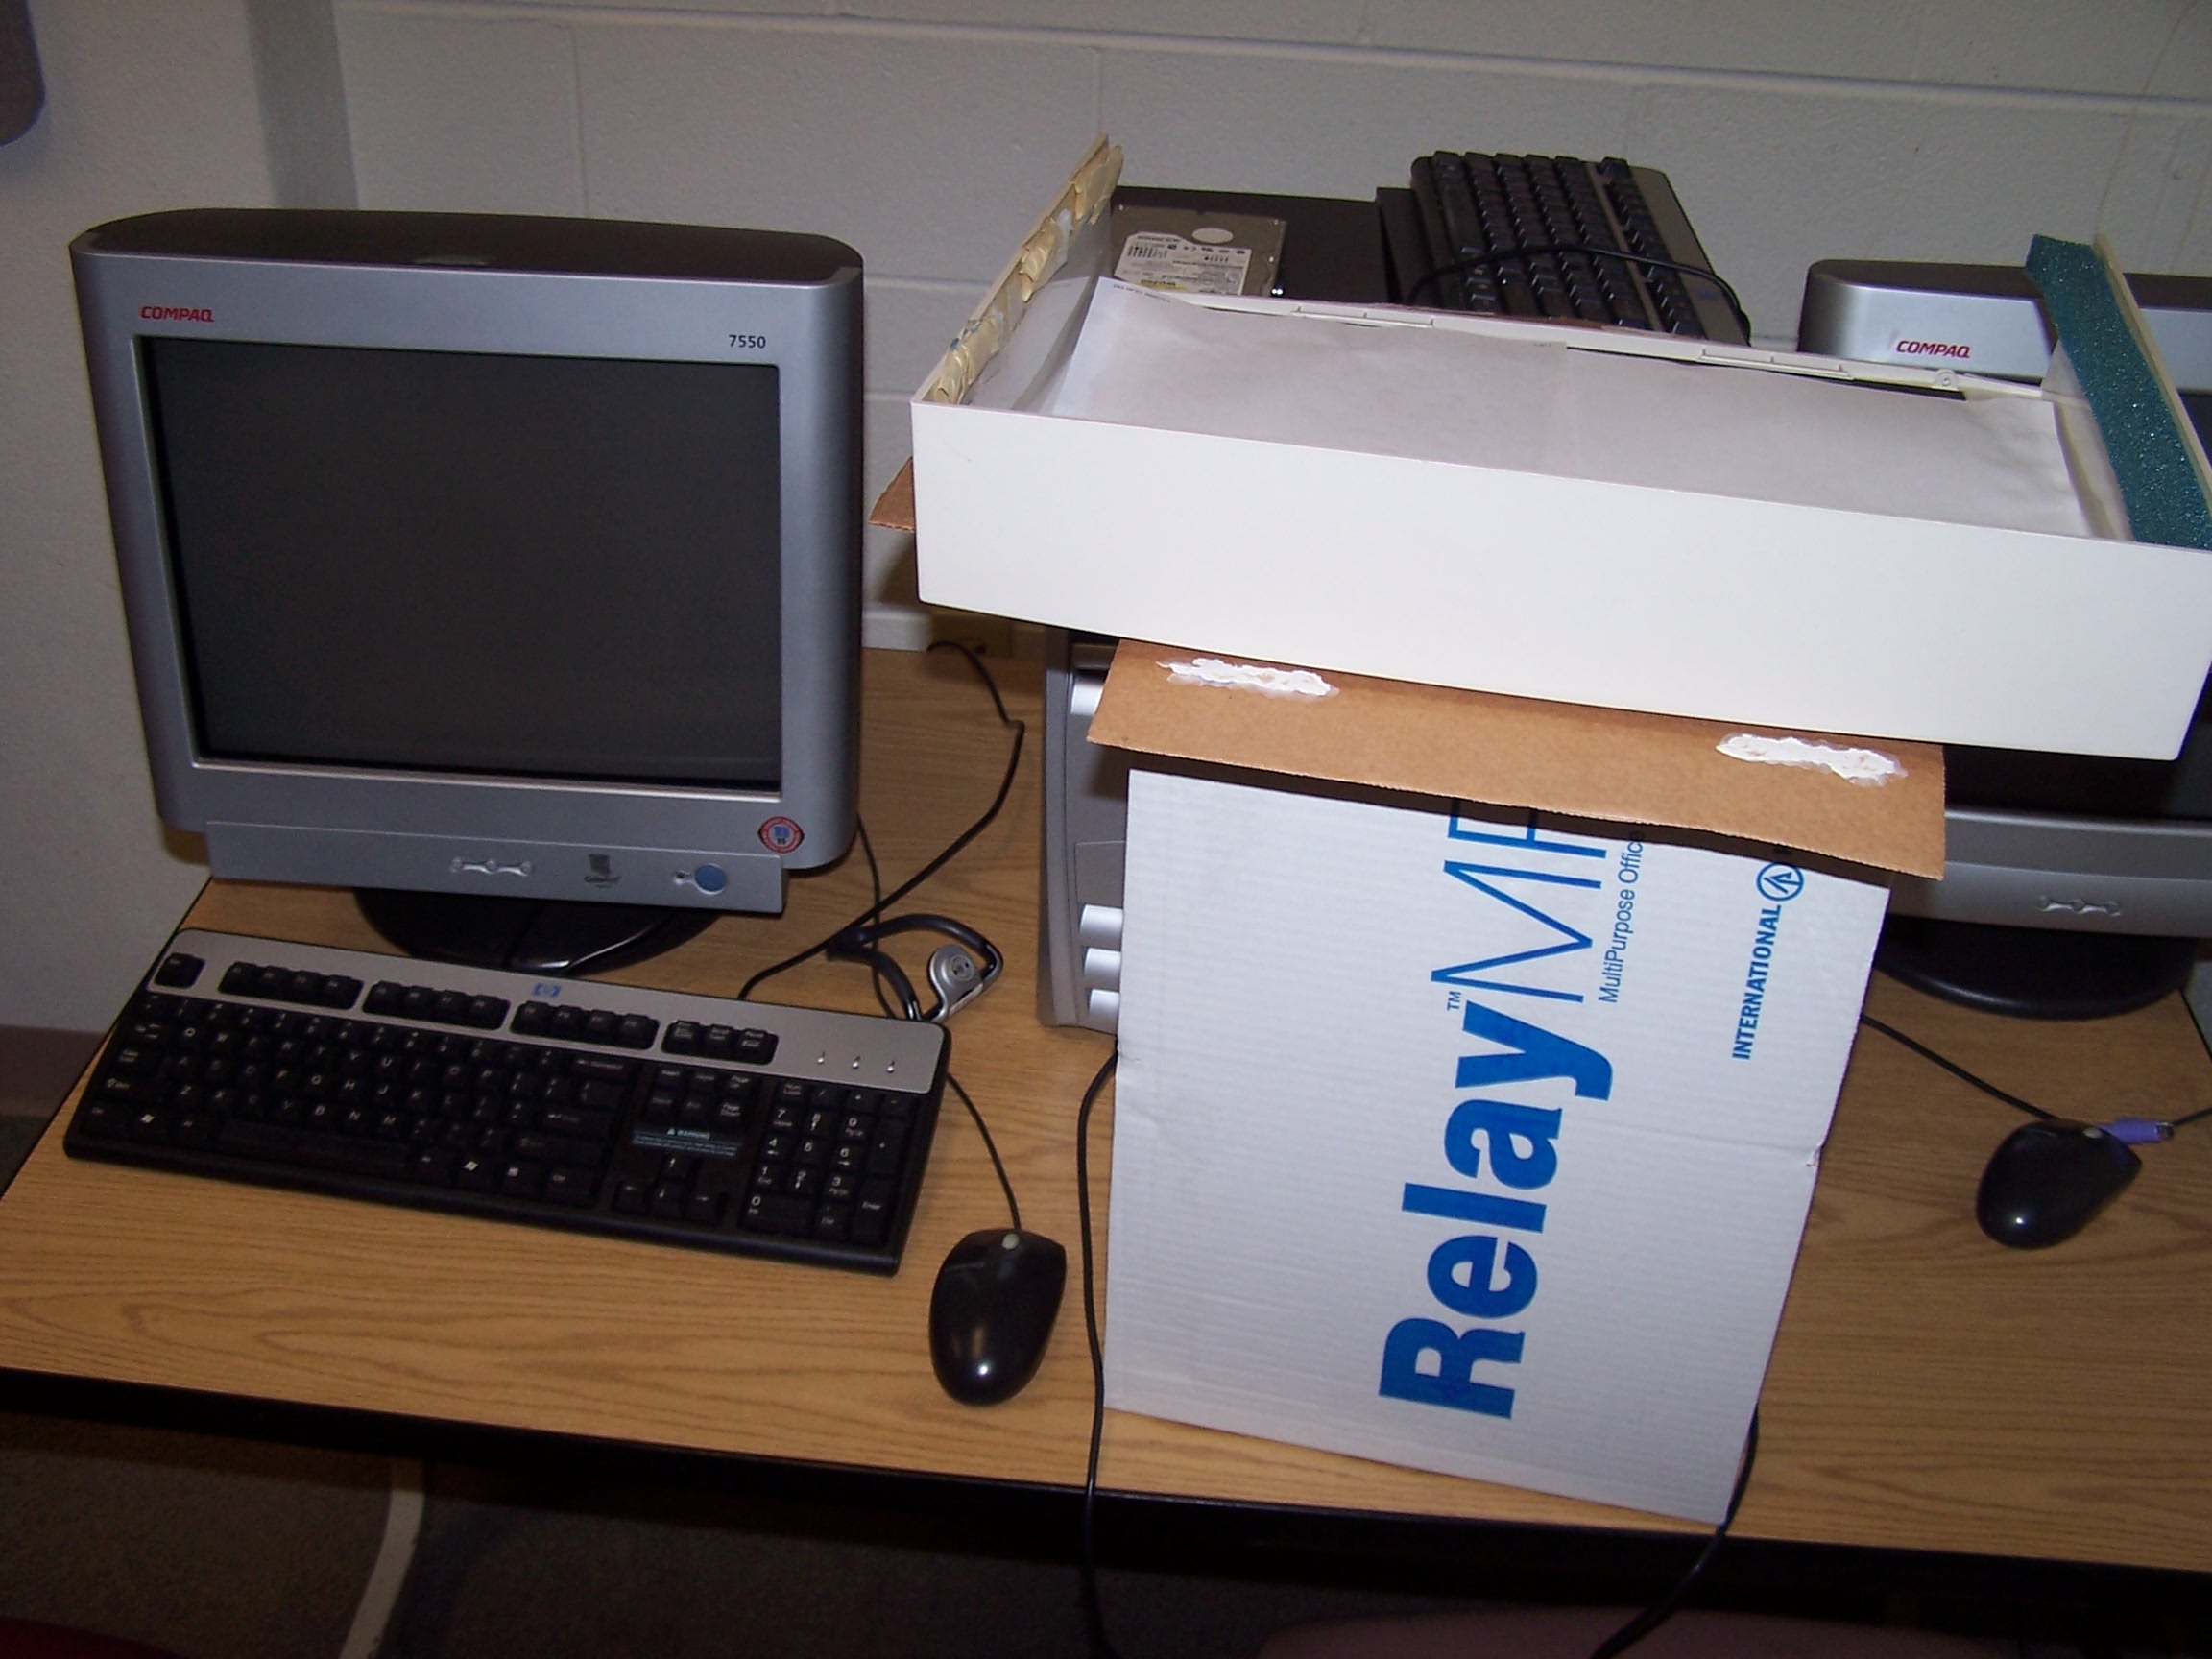
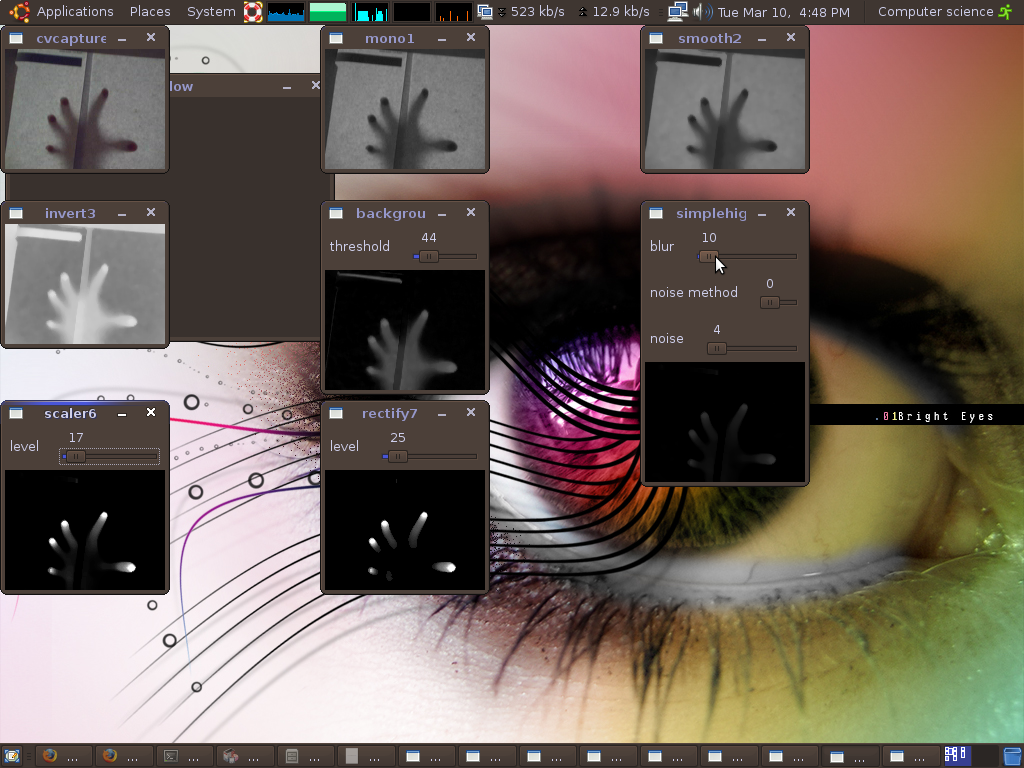
Some nice implementation progress: I was able to get a spare hard drive from the computer science department to put in the machine that will run the table, so that I can install Linux without removing Windows from the already-full hard drive that came in the machine. I got Linux (Ubuntu 8.10 32 bit) up and running well, and with most of the tweaks and additional packages I tend to have on an install to make it work nicer. I also was able to download and install the dependencies for the touch processing software: TouchLib (which is directly supported by SparshUI, the gesture recognizer) and tBeta (newer software, not yet supported but might be easy, and also enables basic demos). Out of some parts lying around, I built an "MT-Mini" - a small touch tablet (not touch screen) that lets me test the functionality and performance of the supporting software. I was able to successfully get both libraries to recognize the image, process it, and extract "blobs" - the shapes of the touched areas. Here are some images (screenshots and photos), click to enlarge:
 |
 |
 |
 |
I also updated the Hardware page with an image of the second desk. Now, back to work!
Sunday, March 8, 2009
I was able to disassemble the "Beast" projector (the InFocus LitePro 570 - given that name by Computer Services) and remove the focusing lens stop, allowing it to focus closer than the listed 5.7 feet (68 inches for a 5 foot image) - it now can focus at a distance of about 33 inches, giving an image of 29 inches diagonal size (according to ratios, not tested), which will be close enough to neatly use it in the table! I've posted more information and photos of the projector modification process.
In other hardware topics, my illuminators have been shipped from Hong Kong, so they should be here soon, for some definition of soon. I have had both the desks delivered to the workspace, and I have figured out how each will be adapted and modified to support the multi-touch surface.
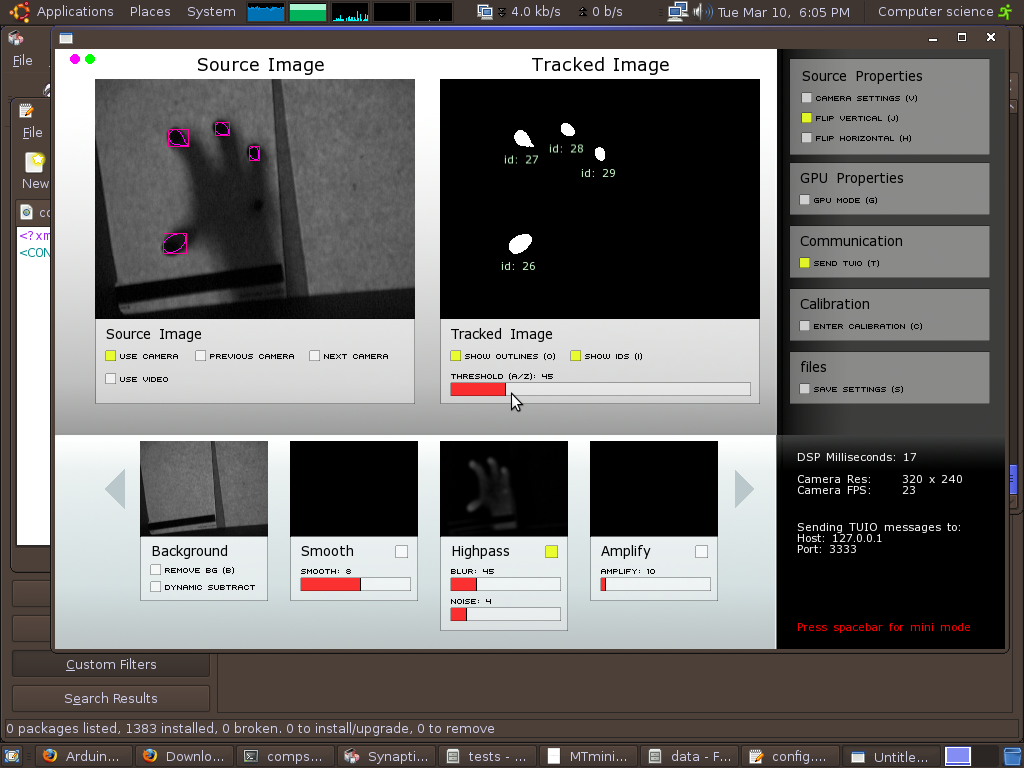
I also made a lot of progress on the software front. I built and tested quite a bit of Python software to handle window management and organization of windows into "window piles," and the classes to handle this are nearly complete, and already functional. I also built my very first GUI application with Python from scratch, which was also my very first GTK+ (the Linux GUI toolkit I am using) application from scratch. The code seems neat and clean, which makes me happy, though it also means I get a lot of functionality out of a few lines of code, which makes for less impressive statistics. Maybe it will be impressive that pylint, a Python code convention and error checker, gives my code a high score and only takes off points and warns about the functions I haven't finished implementing! :) I am using Git and GitHub hosting for version control. While the version that I have pushed to public version control might be outdated at times, you are welcome to look at it: I simply make no promises about its functionality or that it won't eat your computer, your hard drive, or your filled donut. Since everybody likes screen shots, especially when they are the alternative potentially hard drive eating software, here you go. Yes, I know the interface is atrocious, but this is not ever going to be user-facing: it will be replaced by the multi-touch interface. It's just a testing app, and a little screenshot proof that I have code that works.
Click to show full size image.

Schedule overview: Overall, according to my schedule, I'm a little bit behind. However, when planning, I failed to factor in shipment time, and while it's a drag to wait for things to ship, it is also giving me time to contact local businesses to attempt to locate parts more affordably. I don't personally feel like I am behind, especially with my software breakthroughs recently. The upcoming spring break will also be helpful in helping me catch up, now all I have to do is get through this week before spring break, which includes a six page paper and a comprehensive math test for math majors. :-)
Website update: The new projector modification page has been posted. I've linked to the GitHub version control, and thus, my work-in-progress code, in a minor update to the Software page. Also, if you didn't check my website during this past week, please see my mini journal entries below for pages updated during the week, as there were a few.
Wednesday, March 4, 2009
I wanted to make note of a few resources that I'll be using in my poster and my presentation. First of all, from the person who has been helping me the most on the NUIGroup forums, I have access to 3-D images of a variety of multi-touch devices. Secondly, from the author of a book that I don't have, Dan Saffer's Designing Gestural Interfaces, I have some freely-released symbolic images to describe multi-touch gestures. (Coincidentally, I read through the first chapter of that book, available online as a "free sample," and it seemed both useful and supportive of my design principles for this project!) Both of these resources should come in handy.
Tuesday, March 3, 2009
Only a few small website updates today. On the hardware page, I added links to LEDs light strips, details about the acrylic sheets, and some photos of the smaller (sewing machine) desk. Also of note, I have checked out a key to the workspace while a dedicated key for the computer science department is being cut. I now also have some ideas on how conversion of the second, larger, Craigslist desk will take place.
Sunday, March 1, 2009
Again, a very productive, and informative, week. I put the web page updates list, as well as a schedule check, at the bottom of this post, so as to not spoil the story. Last weekend, I had a discussion with an experienced builder of multi-touch systems on the NUIGroup forums. I had asked for feedback on the hardware comparison charts that I posted last week on this website. I wanted to be sure that what seemed to be the appropriate course of action was supported not only by my research, but the experience of others. After several messages, we arrived at a solid course of action for hardware construction. camp for my first version of the hardware, I will build a projected Rear DI device, and for the second version, I will either build a laser light plane (LLP) device using an LCD, or a projected FTIR screen.
I met with Dr. Pankratz on Monday, and his reaction to the charts he had seen over the weekend was to ask me for a commitment on the design. Fortunately, I had arrived with just such a commitment, based on information I had learned during the weekend. I got the go-ahead to purchase the necessary hardware to build the device. We also discussed working on software, while hardware is being shipped, and the updating and finalization of the application to the Celebrating Student and Faculty/Staff Collaboration event on March 31. I also mentioned the PS3 Eye, which seems to be promising as a cheap, powerful camera for computer vision applications. It costs $40 (just as cheap in any old store as online) and offers very high frame rates, much higher than the Logitech cameras that we use right now (up to 60 or 120, depending on resolution). Reverse-engineered drivers for Windows are working and available right now, and Linux drivers are in progress and somewhat working - development is proceeding quickly on both fronts thanks to several coders working in the community. On Dr. Pankratz's suggestion, I mentioned these cameras to Mr. Blahnik. He seems very interested in them for their framerate advances. They also have four microphones, for audio capture and audio location (within a PlayStation 3 game). I know a senior project was conducted on this last year, and these cameras might be useful for further investigation into this topic.
Since my new, final plan for hardware will allow me to produce two, complete devices, I looked for and found an additional desk to use on Craigslist. That was delivered on Friday afternoon, and is currently in the workspace drying out from a huge snowstorm.
I ordered the IR illuminators, and also got a few not-quite-working projectors. Tomorrow, when I have a moment during business hours, I will be calling local sign shops to try to get left over acrylic sheets, quicker and hopefully cheaper than buying online.
This week, my tasks according to my schedule included developing a commandline-based task manager software. While I had a large number of other commitments this week, I did luck out with this bit of software. It turns out that there is a program called wmctrl that does this -- now I just need to learn how to use it. There is also a library called libwnck (the window navigator construction kit) that has similar functions. It looks like I'll be able to directly use libwnck from Python, where I intend to code the high-level bits of the application, and interoperate with a thin interface layer for the multitouch in C++. Thank goodness for modular open source software that will let me get to the exciting bits without worrying about the messy bits as much! :-) I've worked with building a basic app in Python that models the windows and manipulates their state (minimized/restored) - not quite done, but seems to be straightforward. Fortunately, the UI toolkit I'm using on Linux (GTK+) has great Python support that easily interacts with the libwnck python bindings. This summer I worked with GTK+ (except from C/C++) on my Google Summer of Code project, so I have experience there, and there's some sample code for the libwnck Python bindings, too. I have read through all the docs on connecting Python and C/C++ (that is, connecting them closer than before: calling functions, sharing data - before this semester I only had them interoperate at arms-length: calling a separate executable) and while it seems like it will require some boilerplate code and a few magic words, it doesn't look too hard.
Schedule check: According to my gantt chart/plan, I am (basically) on schedule - working on all the things I should be working on. "Basically" on schedule, because physical space access is taking a while, but apparently Facilities is in the process of making keys. The ball is rolling for getting all parts, though, and space access isn't really blocking anything at this point - I see no purpose in cutting up a desk before I have the things to put in the hole - it seems like a good way to make an incorrect cut. (so, this means I set up the dependencies in my chart incorrectly - I'll fix them and upload an update sometime, probably before I have one scheduled on the chart :D.) This week, I'll be working on catching my presentation slides up to my progress, and making headway on the Celebration poster. Software-wise, I'll be getting the Python taskman software not only handling minimization/restoration (easy code) but the "pile" model of window grouping and the associated algorithm (slightly more interesting code - to determine which windows belong to a pile) and ready to connect to the C/C++ multitouch software, and getting the basics of the C/C++ software written (the parts I don't need hardware for). I'll also, as mentioned, get acrylic sheets one way or another, and try my hand at a little projector disassembly. Should be good!
On this website, I updated the hardware page with the new plan, as well as an image of the projection on the projection surface (see the Rear DI parts checklist), and put the information from the old page in another file, linked on the bottom of the current hardware page. While the old information no longer reflects my current plans, it still has useful information, so I'm keeping it available, if a bit hidden. I updated the software page as well, with the old one preserved similarly, to reflect my new discoveries about the software I can build upon. And, of course, I updated this journal!
Wednesday, February 18, 2009
Wow, a lot of progress since last week that I have wanted to post about but haven't had a chance! First up, I have updated Plan (after learning about Gantt charts), Hardware (uploaded printable tech comparisons, and added page on infrared imaging), and this journal. I also updated a bit of styling, and all the headers and footers: visitors can reach me now if they aren't a spam bot!
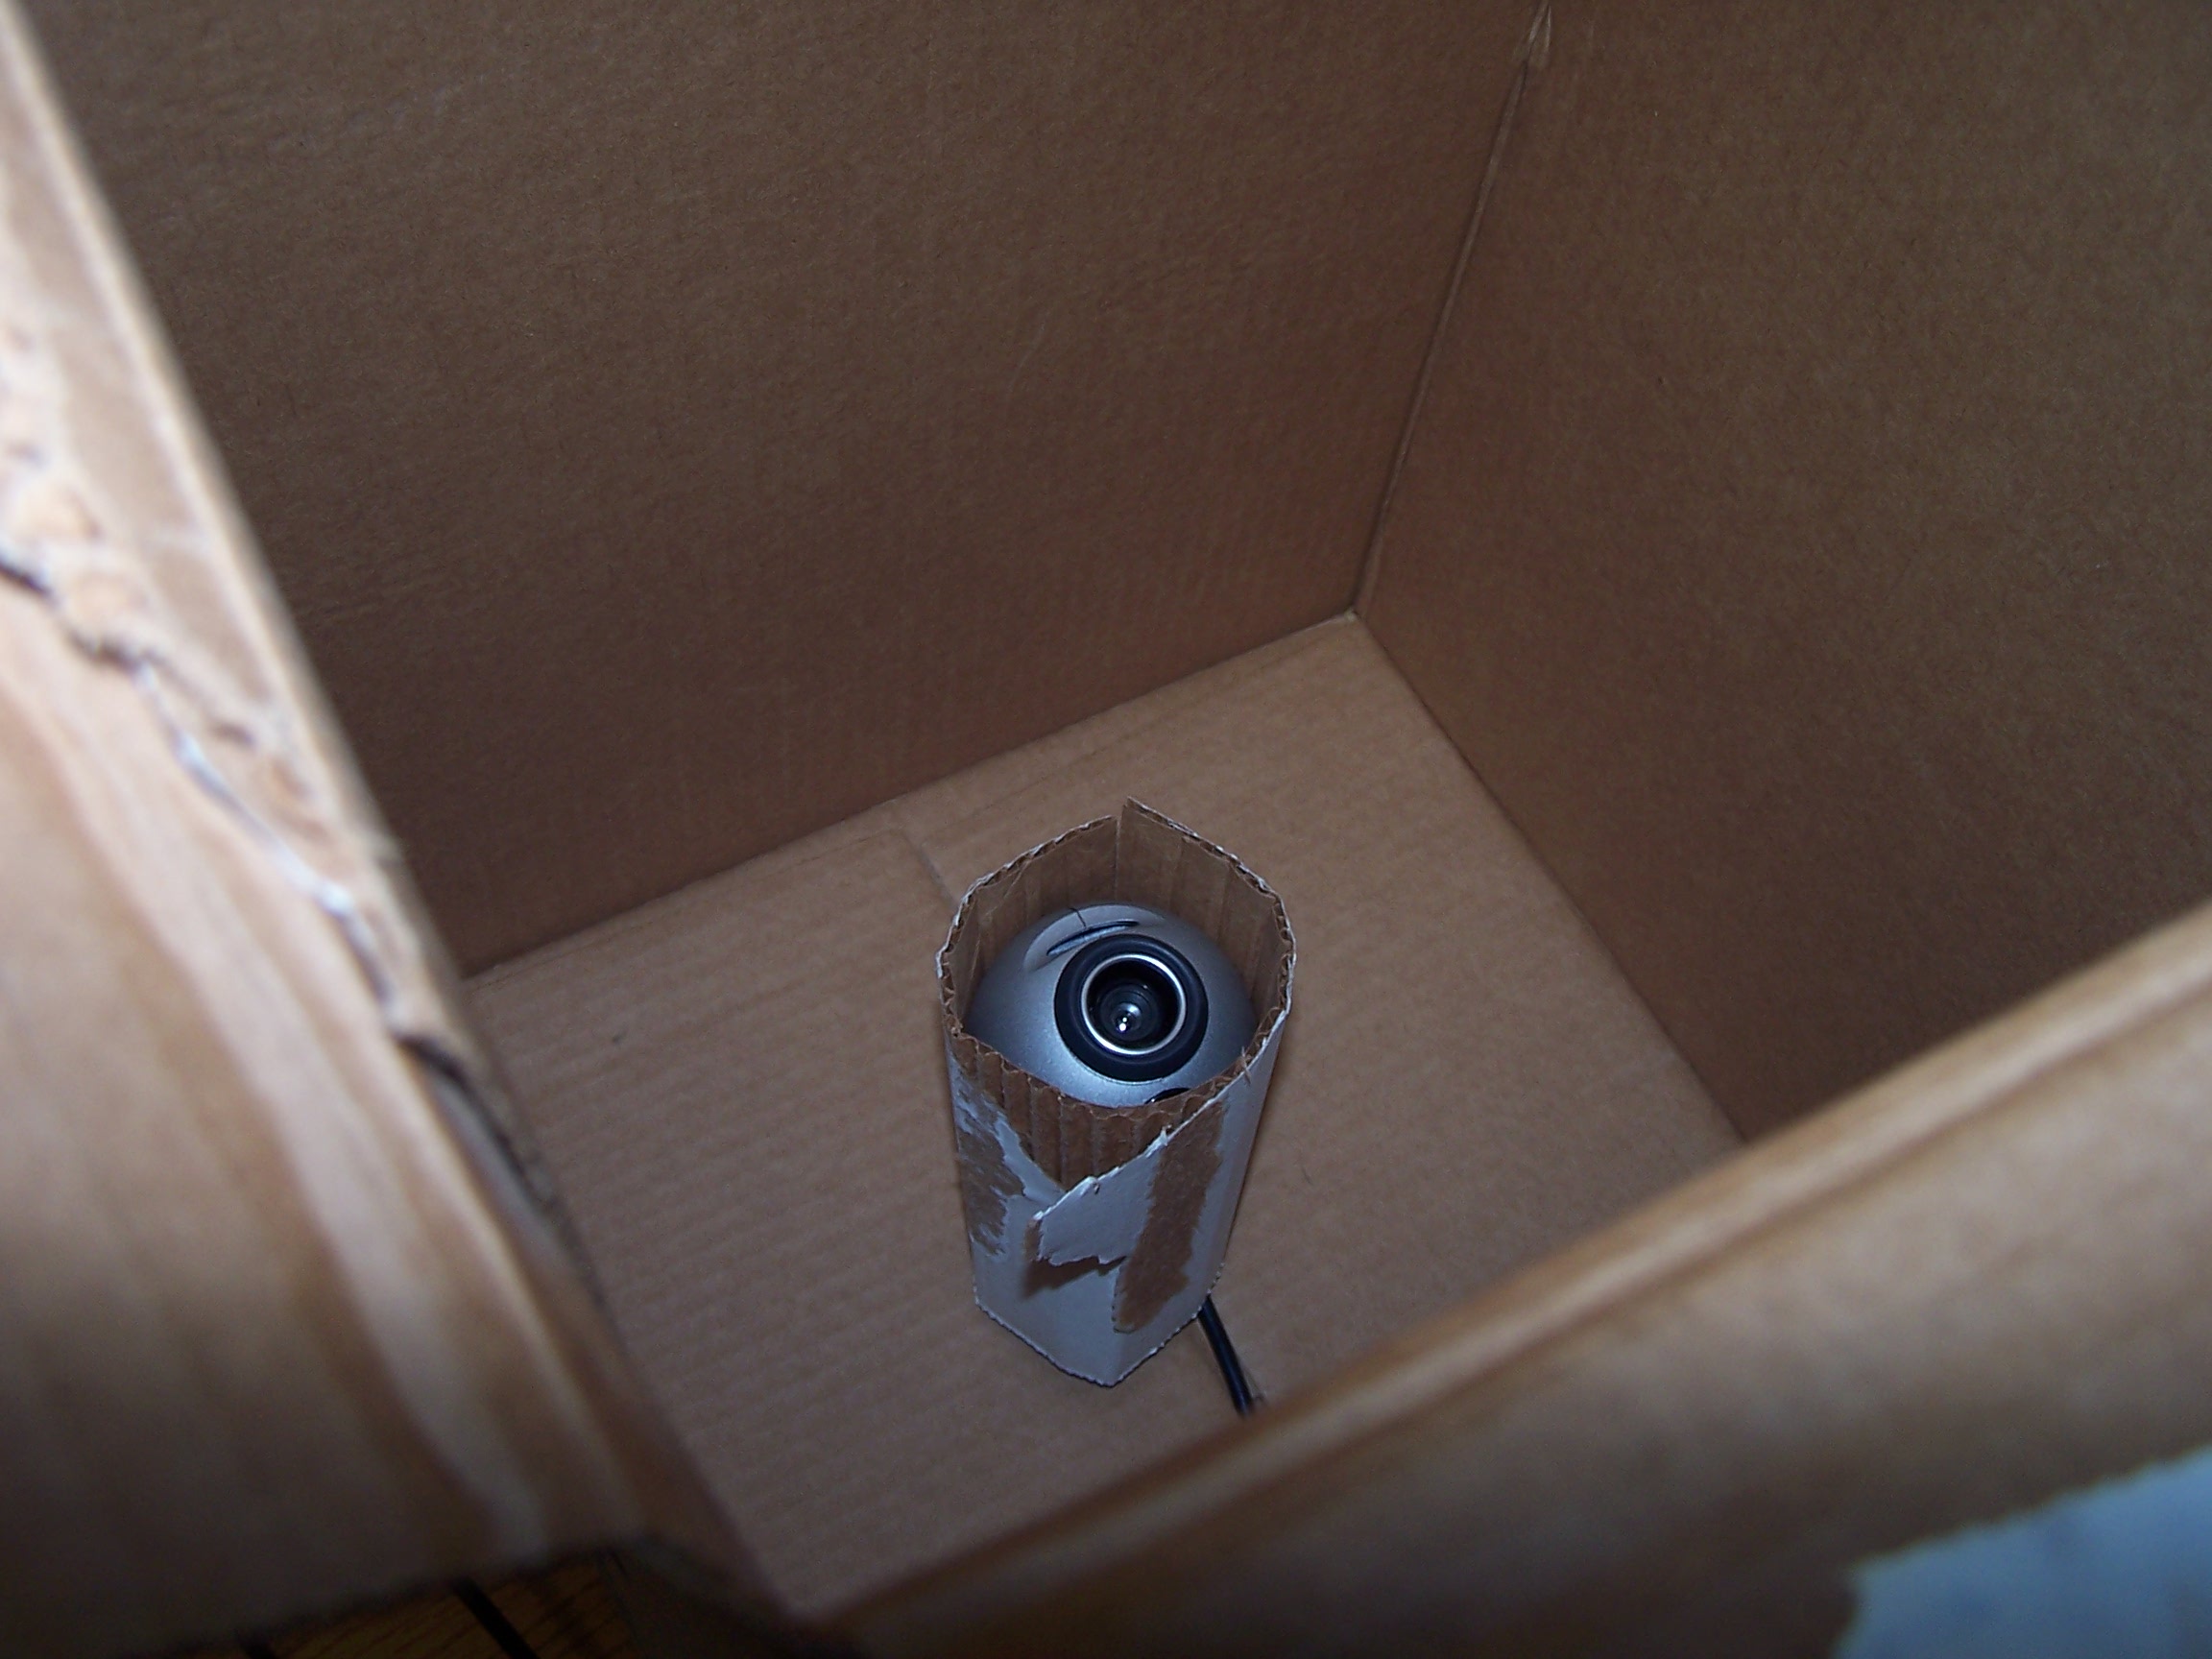
Second, I got the webcam working (seems VMWare Fusion and Ubuntu Linux 8.04 don't want to see the camera, but Ubuntu 8.10 running on the bare machine sees it with no problem), then popped it open and removed the infrared filter. I've documented all that on my new page about infrared light and infrared imaging, with lots of photos!
Also, as promised, I went shopping, then talked with Dr. Pankratz, and did a lot of research and thinking. It would be so much easier if there were only one way to build the hardware, however, that's not the case: there are countless multi-touch technologies and countless variations of each. I've compared the four methods I have narrowed it down to, and some guidance from Dr. Pankratz regarding the budget has helped.
In our seminar we discussed, among other chapters, "Plan to Throw One Away (You Will Anyway)" from Mythical Man Month which was an interesting thing to think about with regard to my physical building of this hardware. I'm thinking now that I will probably build two devices: one as a rough "good enough for now" and then, once parts and resources arrive and I have more experience with the ins-and-outs of the hardware and software interaction, I'll build a second, likely using a different technique.
Right now I'm leaning Projected DI then LCD LED-LP, and here's why... I already have access to a large sheet of thick acrylic: my custom computer desk Katie and I designed and built this summer has a plexiglass surface that I use as a whiteboard (Think of the similar one in the TV show "Numb3rs" to get an idea of how high tech it makes me feel...). As long as I don't modify the surface (that is, so that I can still use it after) I can set it up as a quick-and-dirty input device, and the best part is I have almost all the parts already: I have the projector (need to modify it) and the mirror, I have the projection surface (from my shopping trip: works well and is super-cheap), and I have the IR cam, so I just need some illumination! Of course, the other option is building two to leave here: the plan would probably be then to build a projector based one, likely in a larger table so I don't have to cut down the acrylic, and then build the LCD-based one into the sewing machine desk I already have ready to modify.
I would encourage you to check out the printable PDF comparisons on the Hardware page and offer your input: they're a pretty thorough but hopefully concise summary of my hardware research. Thanks!
Wednesday, February 11, 2009 @ 10:00pm (Post 2 today)
Scratch one thing from the list of items to find! I now have a desk that I can cut and modify as needed: fortunately my family hadn't gotten around to putting it on the curb yet. For using the projector, I'll still need to use the "Beam Folding" mirror technique and probably have the projector outside of the footprint of the original desk in order to be able to get an appropriate size display and the ability to focus the display - important!
This weekend I'll be going out to Menards, Fleet Farm, or similar stores to get metal tape (for the edges of the surface to maximize internal reflection), as well as to find the prices of the projection surface material, a component called a "compliant surface" (improves recognition of touches - optional but if it's cheap enough it might be worth it), and smaller pieces of Plexiglass than I used to build my personal computer desk this summer. I should really only need a small piece, of a thinner material, which should save a lot compared to the largest-size, thickest piece I got to use as my desk surface.
I realized that once I have the desk, the "preferred" hardware device will no longer fit in my small dorm room without making it feel like I'm living in a closet, so I will have to find a construction space, probably in PAC, before I have the desk brought to school.
Wednesday, February 11, 2009
Today was apparently hardware day - thanks to the IT and Tech Support people, I now have an old, really heavy InFocus LitePro 570 projector to build into the project. The size, heat, and shortest screen distance will pose a few challenges in construction, but it's something, and I can probably use the mounting and mirror techniques I saw in the ISU multi-touch table to set it up. I determined it wouldn't be a good use of time to try to add a lens and change how close I could focus it, because I have very little (read: a unit in high school physics) optics experience.
I also stopped by Dr. Pankratz's office to pick up a camera: the Logitech QuickCam Pro 4000 that I now have here will hopefully work well. It's a high-quality camera, with available Linux drivers (essential) and an infrared filter that's easy to remove (the filter needs to go, the easy to remove part is a bonus). Once I get it working before taking it apart, I'll get out the screwdrivers and disassemble it so that it can pick up the IR light that the hardware will run on.
So, aside from the actual desk structure (know anyone getting rid of a computer desk that I could cut a hole in?) which might be a salvage-and-modify or a build-from-scratch, depending on my patience and timing details, and the surface/surface illumination, the hardware pieces are all available to me now. If I run across someone ditching an LCD (even with a broken backlight - I can replace it with an LED one while I'm at it), I'll still grab it since I found instructions on the NUI Group Forums (a community of people building their own multi-touch technology - I'll be using some of their software) on how to deconstruct an LCD to create a multi-touch surface. This web site will be of great use to me, since there's a lot of experience to draw on. For instance, I never would have thought to call electronics and hi-fi stores to ask if they have any broken remotes, since those would be sources of IR LEDs. I'm not sure the number of LEDs I'll need to properly illuminate the interior of the surface, so if I can try using a couple freebies and see how it works, I can get a better idea of if I need to order any.
The important thing is, even if I find no other good "freebies" I've got all the expensive parts of the hardware, which is what I was worried about. Alright!
I've put up fairly complete information on the hardware and software pages. When I modify any of these pages, I will update this journal and make note of it, so that those of you who are only following my project by my web site will be able to see what's happening without having to look at every page to see what changed. I'll also be putting up a discussion of the strengths and weaknesses of various input devices and technologies, both as exposition and as a reminder to myself to consider them carefully when developing.
Extra links for today's post: General information on infrared sensing with webcams, Post on NUI Group about removal of QC Pro 4000 IR filter, Page with info and instructions on filter removal, as well as sample images.
Friday, February 6, 2009
Today was the open house for the Iowa State HCI graduate program, and it was very impressive. They have a lot of really neat technology, and their grad students are doing some pretty cool things. It's an interesting comparison to what I'm used to in my undergraduate study: St. Norbert, an undergrad educational institution, spends $20 million on a library, ISU, a graduate and undergrad research university, spends $6 million to build the best-in-the-world 6-sided, 160hz, stereoscopic virtual reality cave. Grad school will be very exciting if this is the kind of great tech I get to work with!
I got to talk with a lot of folks today about my academic history, desires, and goals, as well as my senior project. The general impression was that my project seemed pretty neat, and after thinking about it on the drive and in discussions, I've cut back the scope a bit to just manage windows with the device. If that goes too easily and I have lots of extra time, I'll maybe tack on some additional things, but for a single semester, undergraduate project, I've got plenty to work on.
I was able to chat with the folks in their multi-touch group here at ISU, and I was encouraged to make use of their open-source multi-touch gesture UI library, Sparsh UI. I will certainly be investigating this, since the more work I can build on, the more new things I can get to.
Finally, I ran across an article that summarizes the various multi-touch technologies [PDF] (mirrored locally) fairly concisely. It seems I might have trouble building my planned device on top of a CRT or LCD, or at least it hasn't been done or well-publicized. I'll start looking for a way to get a projector, since it would make life a lot easier. Once I get the camera and illumination set up I'll have a better idea of whether I can do the side-camera implementation or if I need to modify the design.
Things I need to read about and probably use: scene graphs (and OpenSceneGraph), and X window managers. I'll probably build my system to connect to an existing "X window manager" (which is actually the part that draws the titlebars, etc, and has little to do with the taskbar) and just replace the taskbar - a separate component in your average Linux + Xorg graphical environment (Gnome, Xfce, KDE).
Wednesday, February 4, 2009
Web site up, that should be good for something, right? :) Off to Iowa State from Thursday to Saturday, then I'll try the "running other people's code" part of the project.