Links to Project Documents

For more information on my project, to see my PowerPoint(s), or to try the program, follow the appropriate link(s) below:
Note: Please see binder for acknowledgements and notes to the next student on this project.
Final PowerPoint Presentation (PDF)
Walk Through PowerPoint Presentation (PPTX)
How to Use Simulator (PDF)
Important Algorithms Explained (PDF)
Simulator Program--executable
Simulator Program--zipped file
First Curve Drawing Program--executable
First Curve Drawing Program--zipped file
Source Code: addTrain.txt
editForm.txt
simulatorStatus.txt
trackDesigner.txt
trackDocument.txt
trackObjects.txt
How I Went About the Project--Designing Tiny Bits:

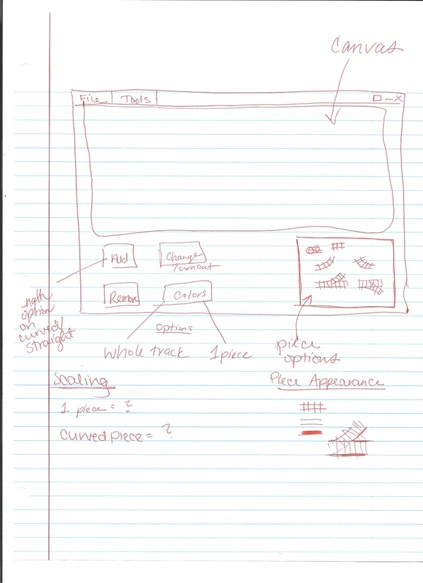
Main data structure--defines a segment of track
I began this semester knowing almost nothing about the train and very confused as far as what the requirements for the project actually meant.
Piece of Advice #1: Ask questions! Then ask more questions! Then create some type of example and ASK MORE QUESTIONS. Get a clear idea of the END GOAL before you try to make real progress.
After I finally started to get an idea of what I was supposed to do, I started to meet with Dr. Pankratz. We discussed design issues AT LEAST twice a week throughout the semester. Some of these meetings were as short as 5-10 minutes whereas others were 30-60 minutes. It was great to have constant feedback and know someone else had a high level understanding of my project.
The "curve" issue:
The first aspect of the track designer that I truly spent a lot of time designing was the curves. Initially, I was using bezier curves, which are curves defined by a multiple of three plus one points (4, 7, 10, 13...). Bezier curves are very smooth graphically. The curvature depends on the location of the control points, which are all points between the two endpoints. My program was allowing a user to click two endpoints and then generating those control points between them. The user was then allowed to drag the control points to create curvature.
Eventually, I came up with the idea of having those control points turn into sensors on the track. Then it didn't make sense to have them off the track. This is when I decided to use the regular DrawCurve function in C#. It simply connects any number of points with a curve. These curves are not quite as smooth as the beziers, but at least all the control points were now on the track.
After I decided to go to the regular curves, I was still using two control points between the endpoints. This was no longer necessary since the DrawCurve function did not need that multiple of three plus one number of points. I decided that I did not need an extra sensor, so I cut it down to one control point between the endpoints. This is what I ended up using in the final track designer.
This is an example of the tiny steps I took. I went about the entire project in small steps like this. I refined an idea until I felt it was the best way of accomplishing a task.
How to Make Progress

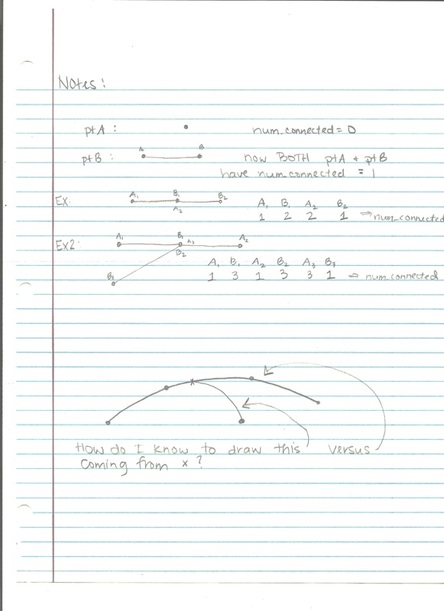
Process of drawing track--determining when a point is a turnout
I also had a very hard time beginning to make "real" progress on this project.
Piece of Advice #2: Listen to your classmates. I went into my walk through with almost nothing to show. My classmates advised me to:
1. Set aside time to work on the project (even if it is only a short amount)
2. Know the underlying data structures.
When I began to utilize their advice, I "magically" started to make progress (which in turn motivated me to work harder on it!). I have no idea where this project would have ended up had I not received their advice.
After I got going, there was not much to slow me down. I had the "call a meeting as soon as you get stuck" mentality, and I was able to resolve many issues without wasting time. Some of the biggest things I needed to design and implement were: graphically representing the track (trackStructure), moving the train ("blind" trains that simply follow track color), adding turnouts (automatically when number of segments connected to a point becomes three), and deleting segments (shifting all existing segments up). All of these issues required some discussion, but none stood still for more than a day or two.
Most Importantly...

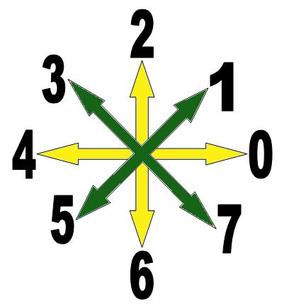
Compass--used to determine the direction of the train
When I really got into the project, working on it did not feel like typical schoolwork. I was excited to sit down and mess with the code, and that's when I made the most progress.
Piece of Advice #3: Remember to always keep the end goal in mind. Do not make any design modifications without first asking yourself "will this cripple my ability to successfully complete a different part of the project". If the answer is yes, spend some time coming up with a better solution!
Without further ado.....
Piece of Advice #4: HAVE FUN. This is your last semester of college, and IT'S GOING TO FLY. Enjoy the project, but do not work yourself to death. It's meant to be hard work and a lot of learning, but most of all it should be fun.